
Haze, vapor, smoke, and other particulate matter in the air will show up in your photos. Foggy, thick atmospheric conditions can make for beautiful photographs, but it doesn’t always add to the shot. We wrote this article to show you how to minimize the effects of haze and fog in photos using Exposure’s layers, masking, and Haze Level controls.
Keep in mind that the opposite effect, increasing foggy conditions, can be achieved by applying layers in the same order.
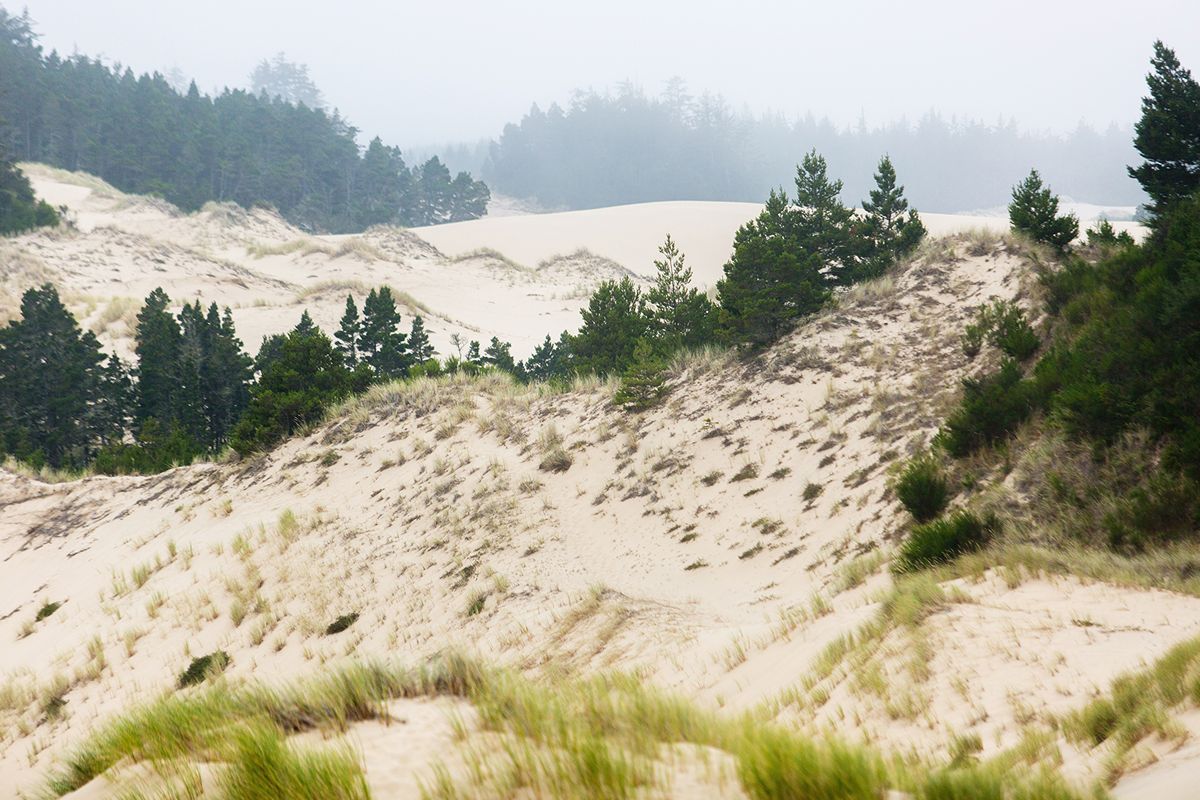
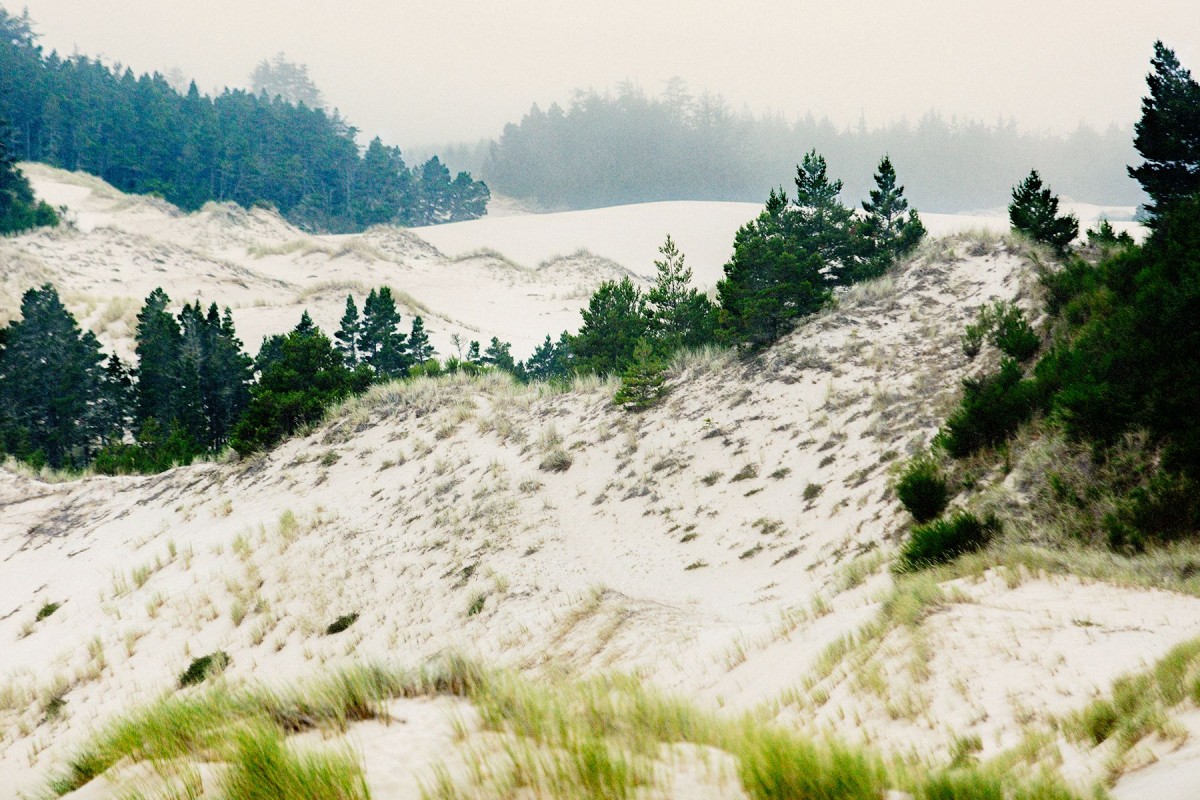
Original photo. All images © Kariann Photography
Removing Atmospheric Fog
Exposure’s Haze Level control does a great job eliminating the effects of fog. When it is applied in a layered approach, it’s even more effective. The greater the distance between the lens and a scene object gives more room for atmospheric effects to accumulate. So the phenomenon is more common in landscapes than studio portraits. Exposure’s layering enables you to mimic the build up of atmosphere at greater distances in the image to control atmospheric haze.
Step 1: Global Adjustment
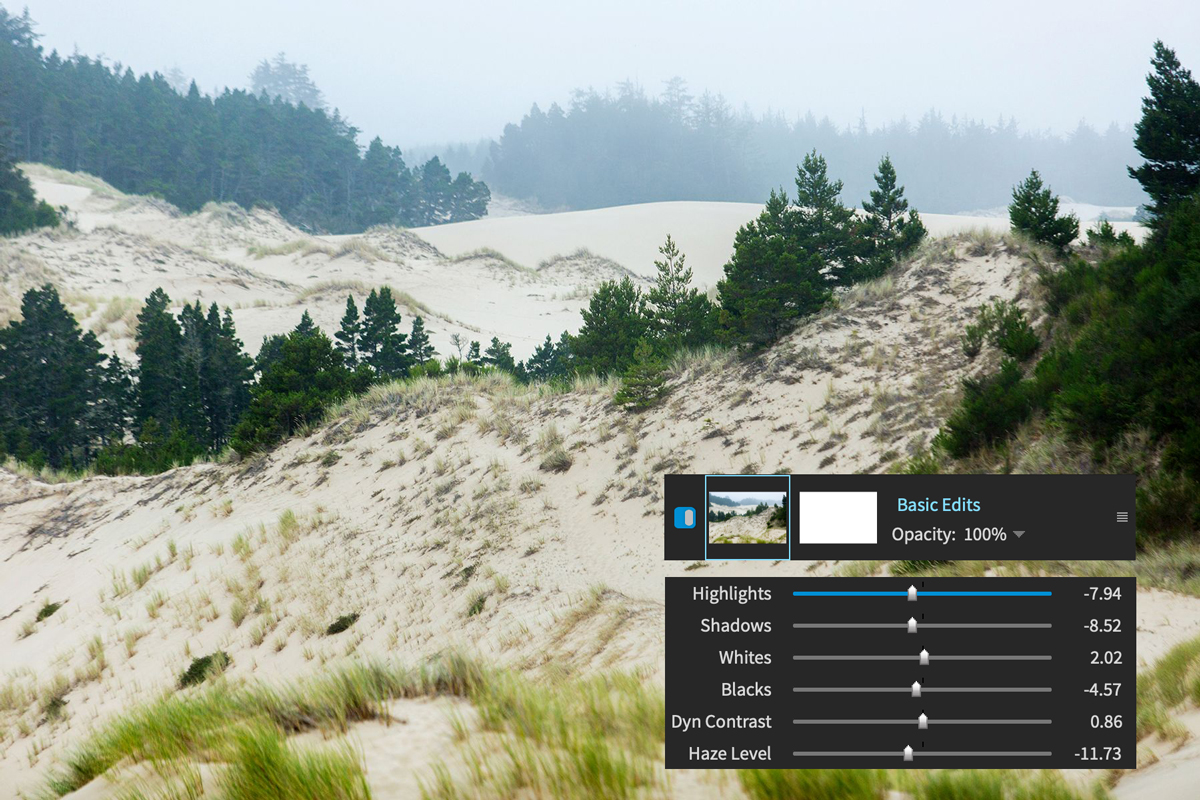
The first step in the process is to remove haze effects from the entire image. This is what’s called a ‘global adjustment.’ The Auto button will include intelligent adjustments to Haze Level when it’s selected, so you can apply this in one click.
In addition to tweaks to haze level, apply a color adjustment to ensure proper white balance. Select a neutral tone from the foreground, at the bottom of the frame, where there isn’t much haze. This adjustment is important because it will set up the tones for the rest of the process. Currently, the snow drifts have a sandy appearance.
Step 2: Haze in Front
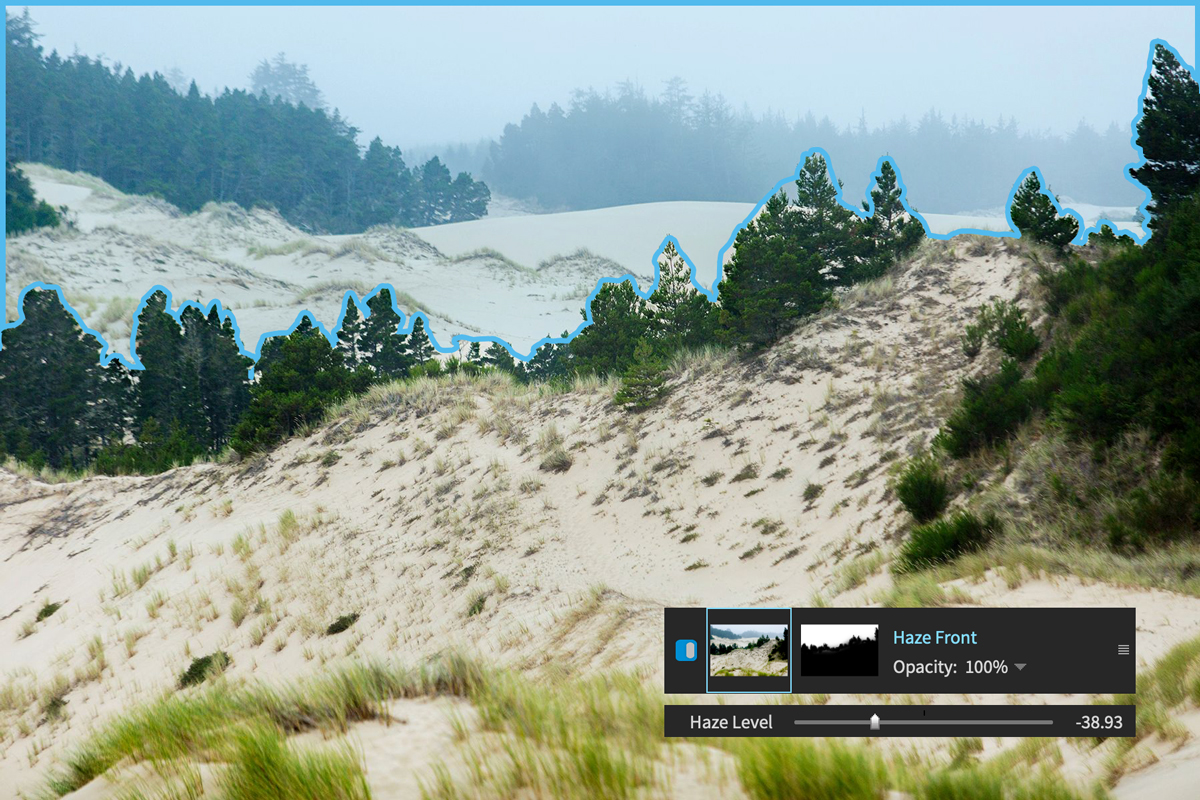
Next, create a new layer. This layer will be used to apply a stronger haze level adjustment to foggy areas in the image. A new layer enables us to control a second set of adjustments separately from the basic edits we already made. The brush or the color constraints can be used to mask off all the areas with fog. In the example, the layer was renamed Haze Front because it is the first layer of our localized haze removal. The other layers we use will target areas further back in the distance, where the fog is more dense.
An important point to make is that the layers in Exposure are nondestructive, so they never make permanent changes to your original image. This means you can revisit adjustments on each layer and make adjustments to the effect. You can also revisit the layer mask and clean up edges. If you need additional information about Exposure’s layers and layer masks, watch our Working with Layers video.
Step 3: Haze in Middle
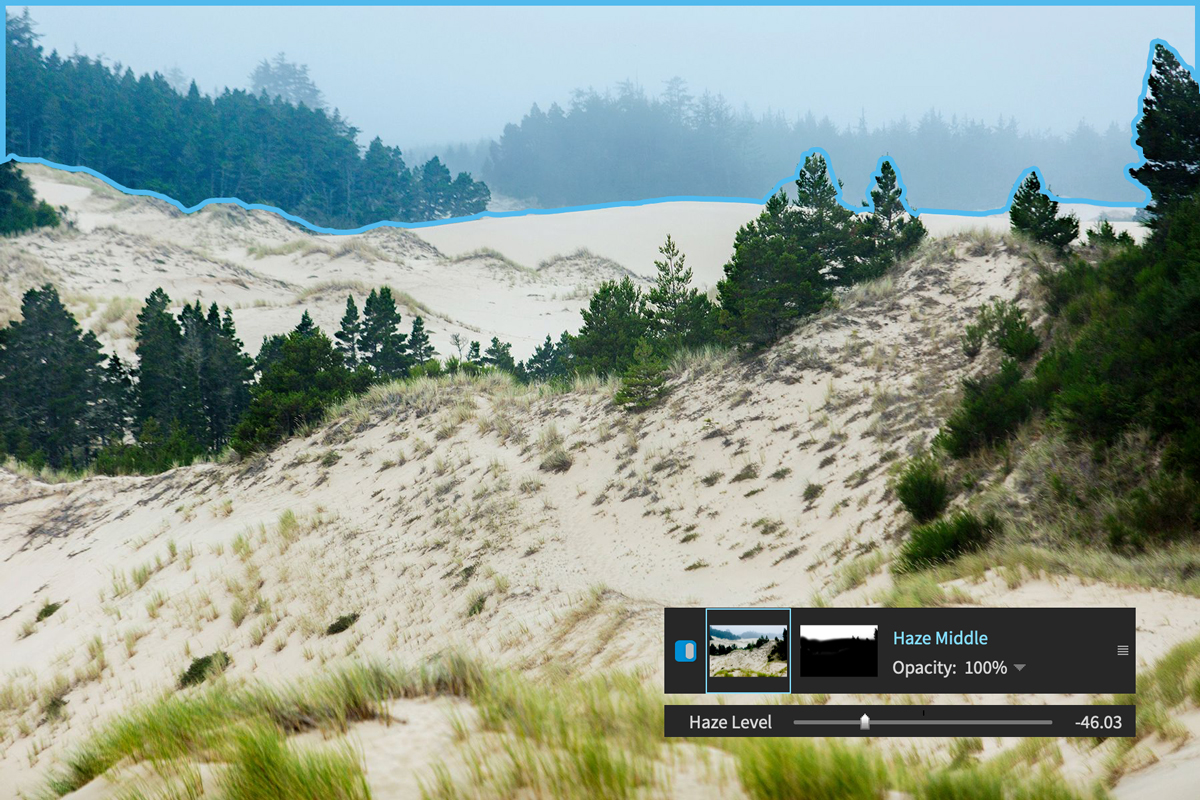
Another new layer is needed to build up haze removal where the fog is more noticeable in the distance. This layer will double the haze removal effect in the background. The adjustments on this layer are very strong, so the mask needs to be carefully handled near the foreground trees on the right. If not, you might see haloing around edges. A simple way to add this layer is to duplicate the first haze removal layer from the right-click menu. Then, simply update the layer name and mask.
If you’re struggling with making clear, precise selections in Exposure, check out our 3D Color Masking Deep Dive video. It demonstrates how to use Exposure’s color constraints to automatically generate detailed layer masks.
Step 4: Haze in Back
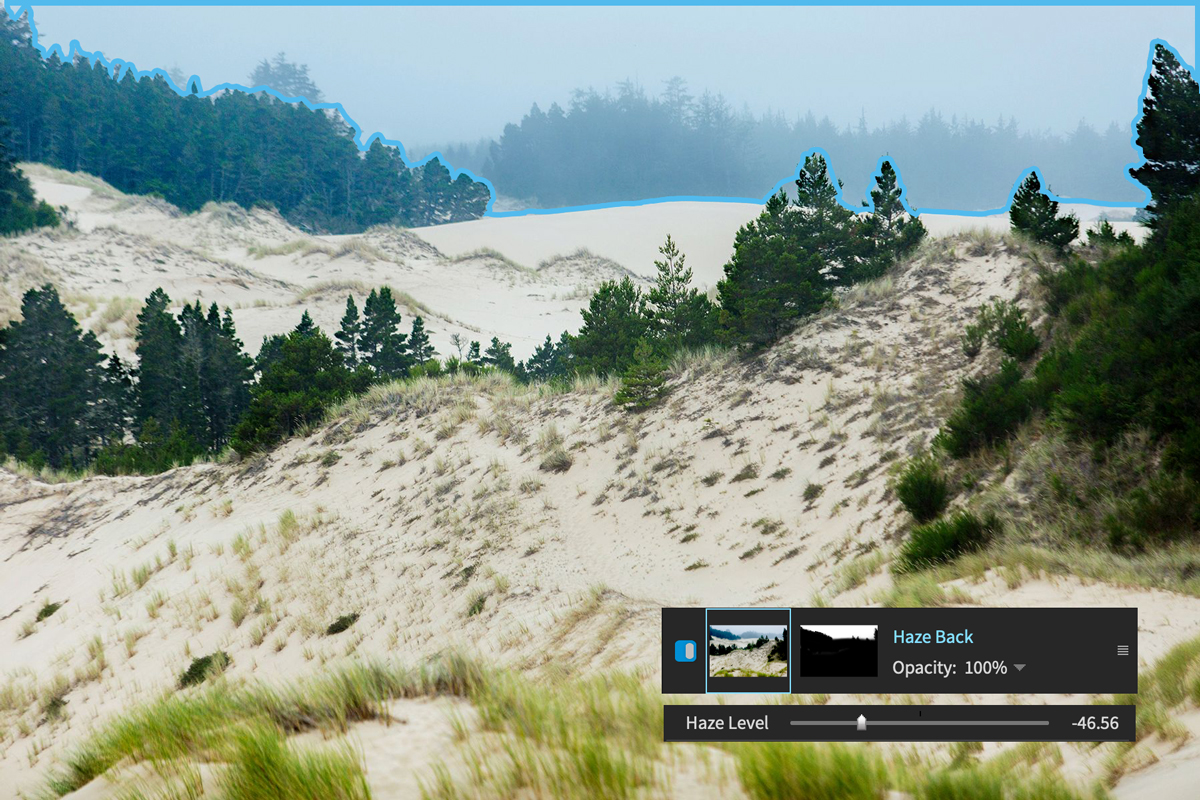
One more haze removal layer is needed to build up fog removal effects from areas in the photo that are furthest from the lens. The effect on this layer will be very strong, so mask carefully around objects in the foreground. Clean masking helps the adjustments you apply, especially stronger effects, believably blend with the image.
Step 5: Color Adjustments
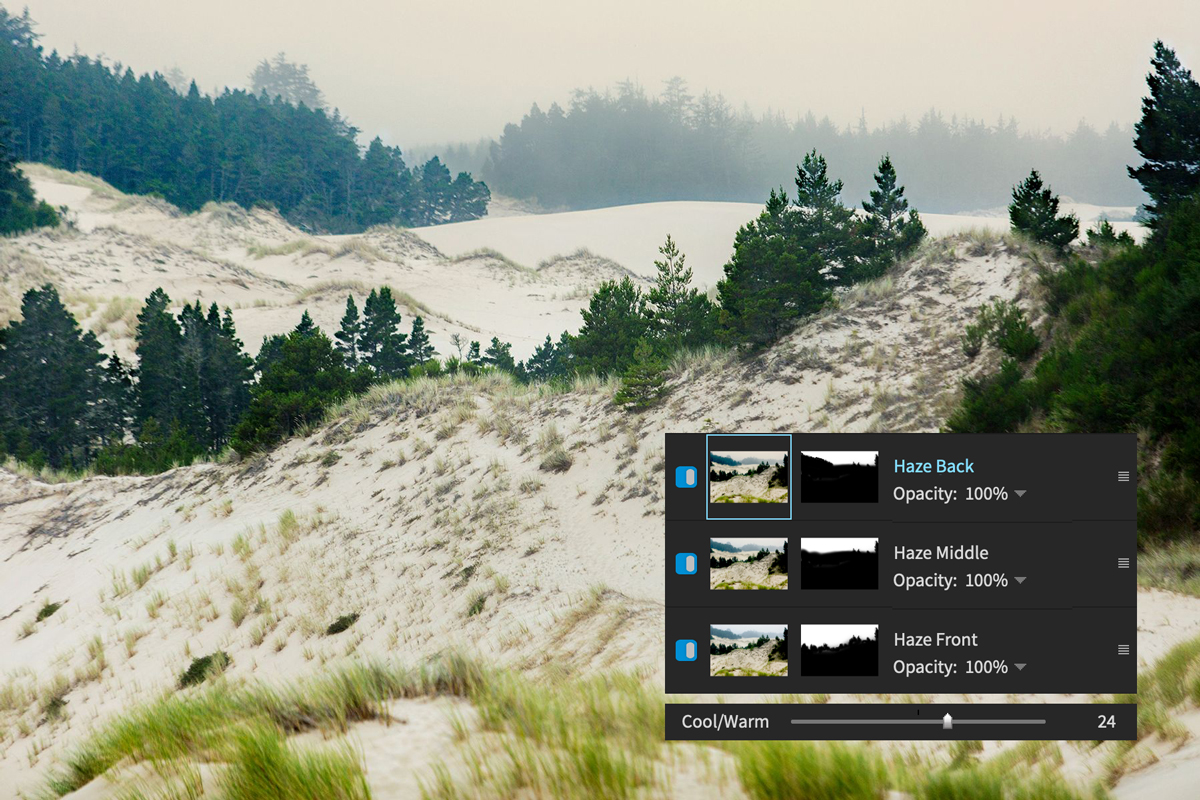
Fog, dust, and particulate matter in the air can have an effect on the color of the image as well. In the example image we are working with, each layer of fog we removed also has blue toning. In Exposure, each layer of haze removal can be revisited to introduce coloring balancing effects.
Warm toning will neutralize the cold blue of the fog, which will help the background blend more naturally with the foreground. On the Color panel for each layer, use the Cool/Warm slider to apply this adjustment until the snow areas match tones. Revisit each of the layers to add these tweaks minus the basic adjustment layer, because it is home to the original white balance adjustment.
Step 6: Creative Presets
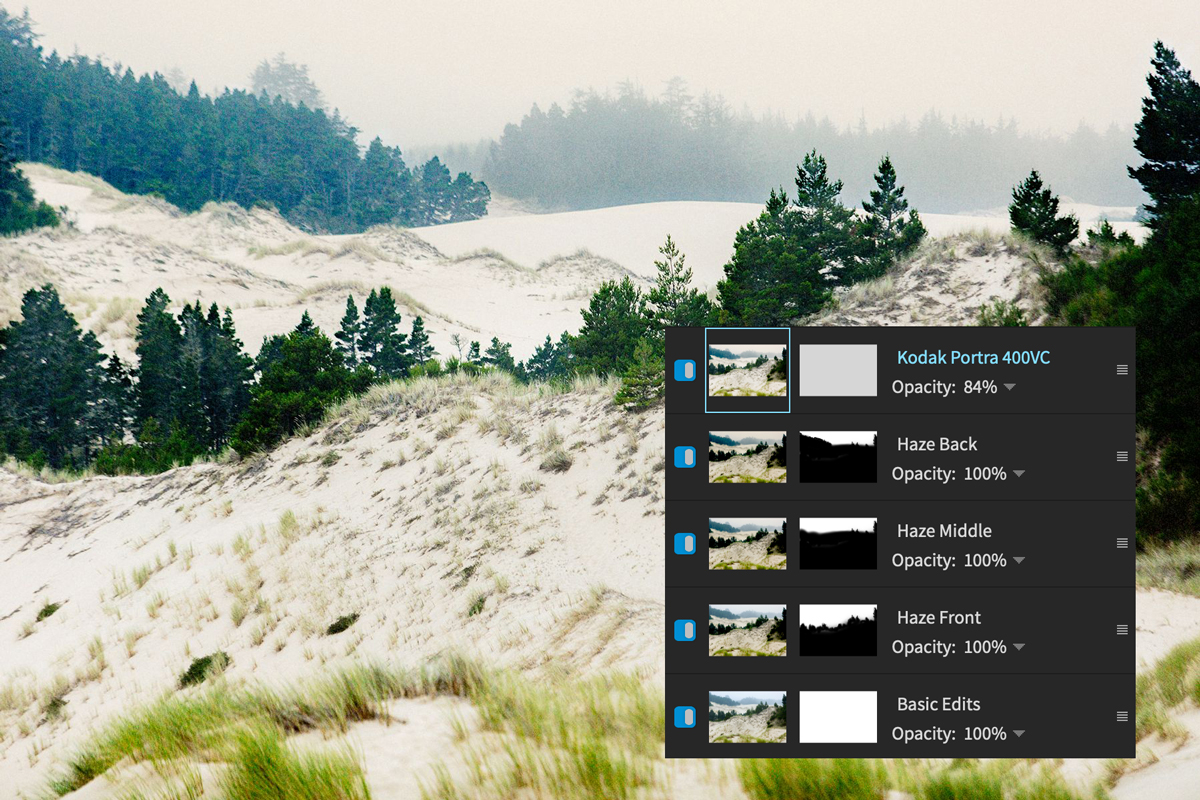
With all these editing layers applied, now is a great time to enhance the shot with one of Exposure’s creative presets. In particular, this image has a warm color tone in the snow and sky. One preset that’s great for gently smoothing warm tones is one of the film emulation presets specific for portraits, Kodak Portra. The VC variety of Kodak Portra stands for vivid color. It works great with this shot because it gives the greens in the shot a little pop while smoothing the white snow, making it appear thicker and more fluffy. You can simply drag the preset to the ‘add layer’ button on the layer panel as a streamlined method as adding a preset in a new layer.
At this point, the transformation is complete. One important point to make is that you can revisit any of the steps made during the editing process and make adjustments. Exposure makes it easy to revisit each step you took in the editing process in the History panel.

As you can see, by combining Exposure’s layer tools with the Haze Level slider, you have lots of creative control over atmospheric fog in your images. Using multiple layers to build up the effects you apply is a great way to blend your edits and gives you detailed control over the process.
Try Exposure Today


