Below is a new tutorial video that demonstrates the combination of using Bokeh and Exposure on an image in Photoshop. In the video, I closely follow the workflow of editorial fashion and beauty photographer, Chris Yates.
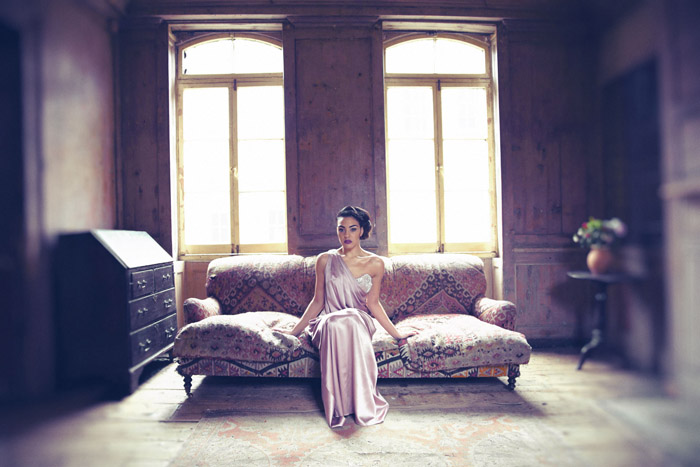
The image I used in the tutorial came from a shoot Chris did back in 2013. The concept was to combine fashionable evening attire with a historic scene. The original capture has beautiful tones and color textures even prior to editing.
Chris used Bokeh to add lens-specific blurring that helps draw your eye into the shot. He loves the effect that his Canon 50mm 1.2L produces, but he didn’t use that lens on on location. Bokeh as an invaluable asset for his post-processing workflow because it allows him to produce the same creamy blur even after he snaps the shutter. The effect, like what he did here, helps him bring his photos up to a new level.
Exposure was used to add custom coloring to the image. Chris is a whiz with curves, so I followed suit in the video. The effects from Exposure allowed him to creatively manipulate the image per his preconceived vision of the scene.
As always, I’ll take you step-by-step through the whole process, and give you a bunch of helpful tips and tricks along the way. Enjoy!
Try Exposure Today


