I’ve written previously about the irony of trying to recreate the defects of analog photography through digital trickery, and today’s article is no exception. Modern lenses use a variety of expensive coatings and exotic lens elements to reduce lens flare effects. Lens flare is a byproduct of stray light photons bouncing around the glass elements in a lens when the sun is in or near the frame. Many older lenses tend to be very “flare-prone”, and in some cases images can be completely ruined by a complete loss of contrast, an effect called veiling, and little green or orange artifacts that are a part of a lens’ flair pattern. A big green or orange blob across your model’s stomach as the result of trying to backlight them with the sun really isn’t very cool.

I know from experience that trying to eliminate some of those “ghosts” in post processing can be very, very hard. This is the reason why modern lenses are engineered to diminish this effect. As disastrous as these results can be, lens flare effects in some cases produce some very cool, very unique images. But this is programmed out of most modern lenses, so what to do?
Fortunately adding some of those same lens flare effects through Alien Skin Software’s Exposure is a much simpler process. Exposure allows you to get all the cool out of the flare without the headaches. Today’s article will focus on how to use lens flare effects in Exposure with flair.
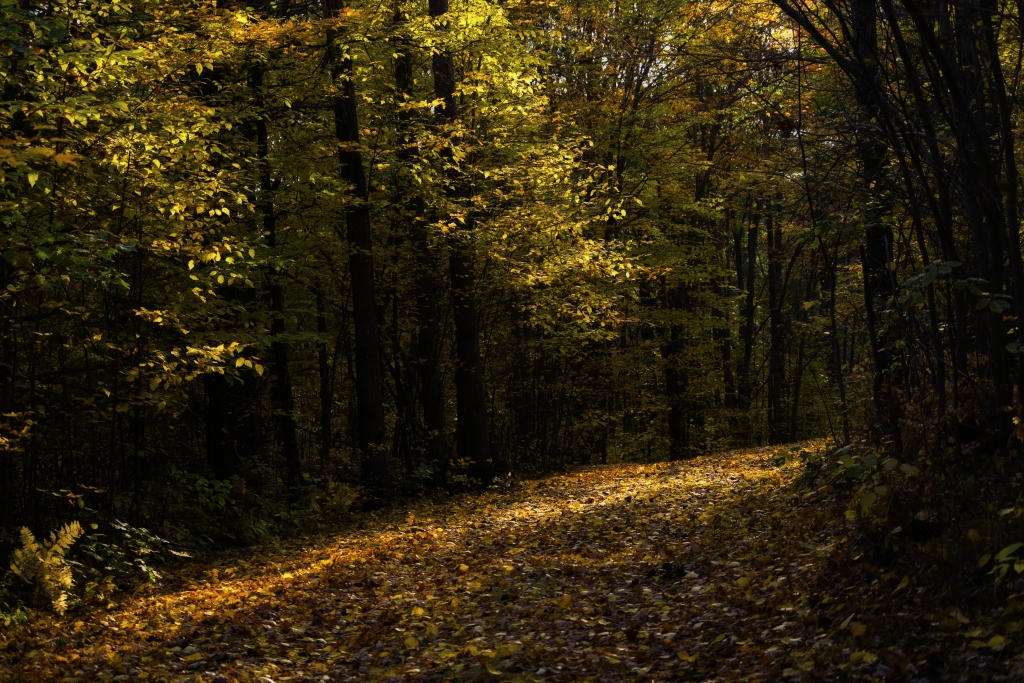
Let’s start with this image I took recently of beautiful light hitting some fall foliage. It’s a nice enough image, but the big challenge with images like this is that they tend to get a little…busy. Too many crisp edges, too many details. The beauty is there, but it’s buried in the busyness. Even after some processing to enhance shadows and light, along with color, I felt the image was missing something.
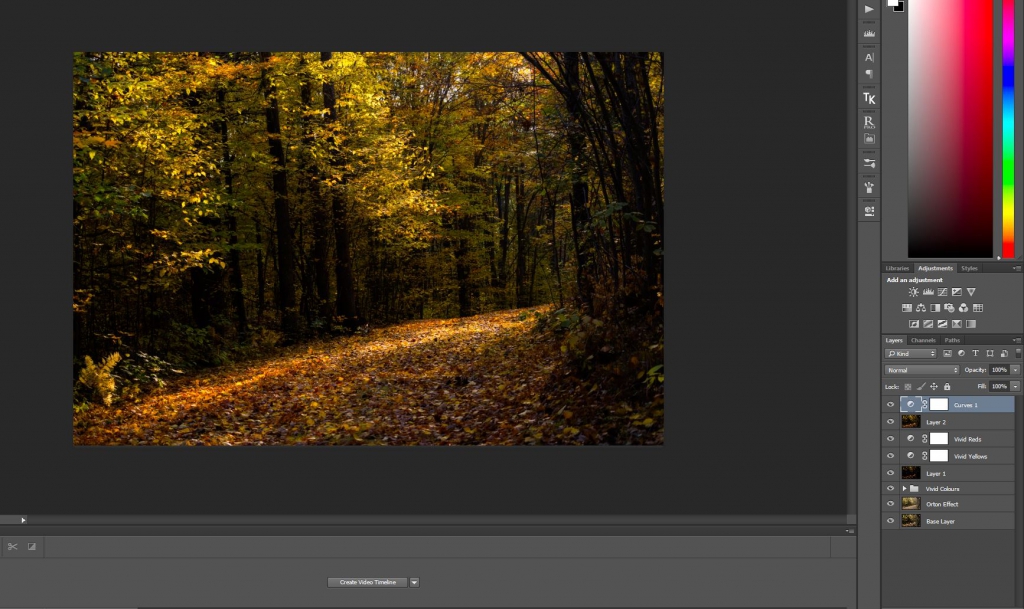
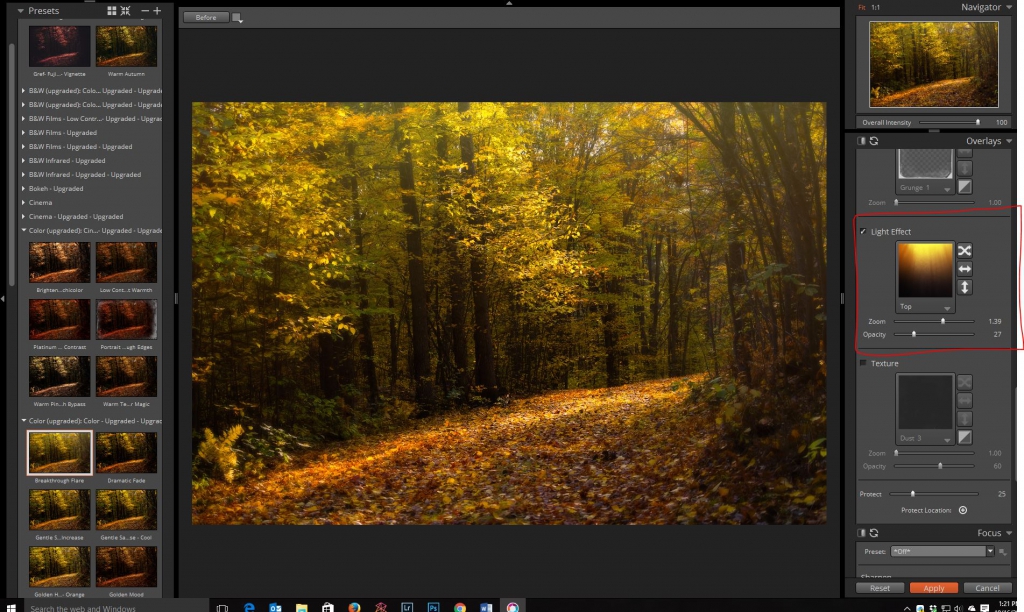
I took it into Exposure X and began to play with the “Light Effect” panel on the right. I settled on the “Top” preset that just adds a flare “veiling” effect that I find works well on a lot of images. The great thing about all of the presets in Exposure is that you can play with the details. You can change the position of the lens flare effect, the size, and even the opacity. The fact that you can visually watch these changes play out on your images makes it easy to choose what works…and what doesn’t.
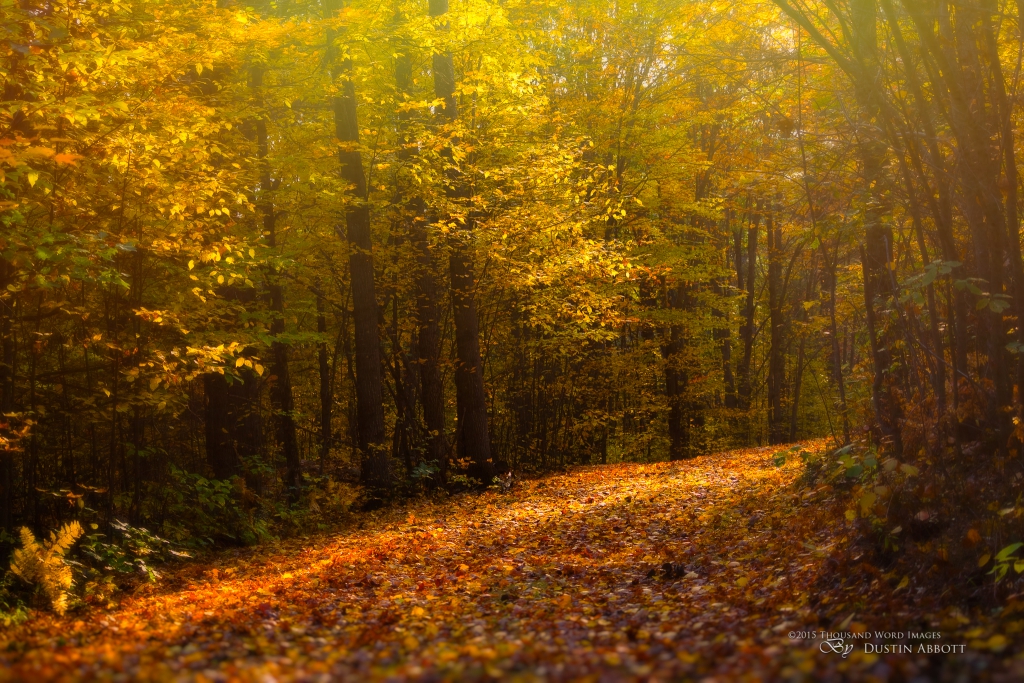
Some minor tweaking and I quickly arrived at a finished look I’m much happier with.
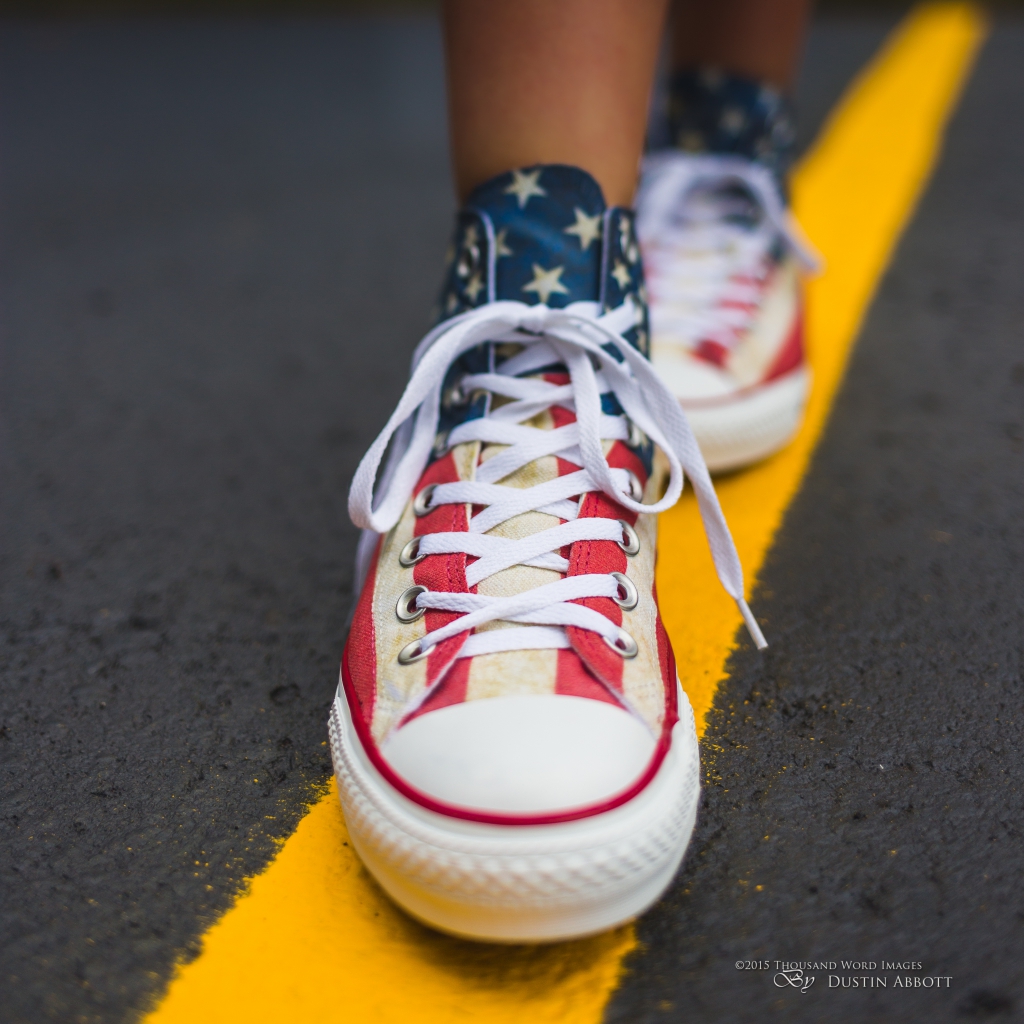
In our second example I was highlighting my daughter’s new Converse All-Stars that she had been wanting for months and finally had for the beginning of school. I got low and shot a fairly shallow DOF shot of her shoes. She was on fresh asphalt, and in my mind I wanted to go a little grittier with look of the image to match the asphalt look.
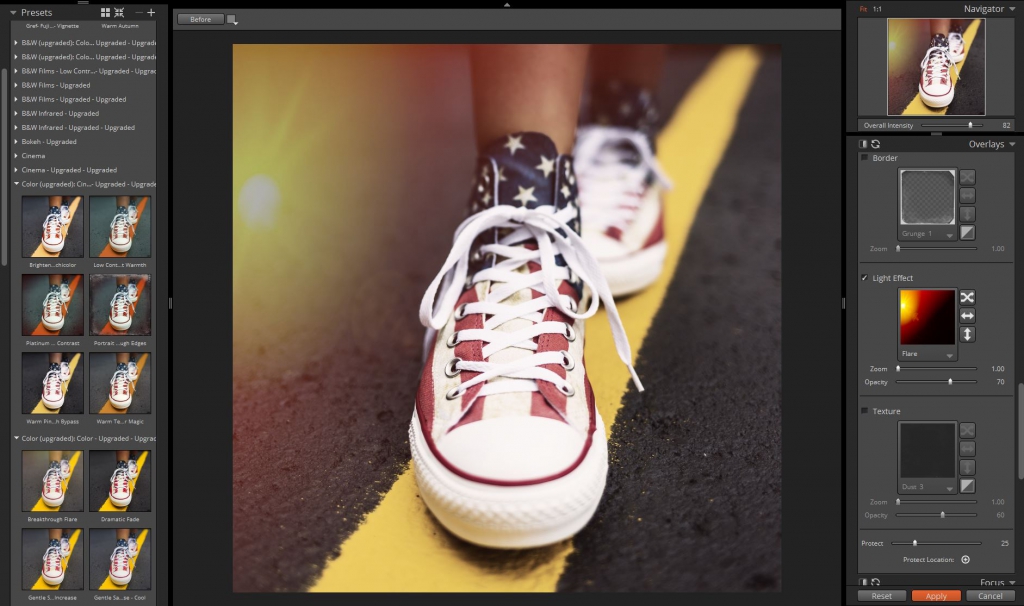
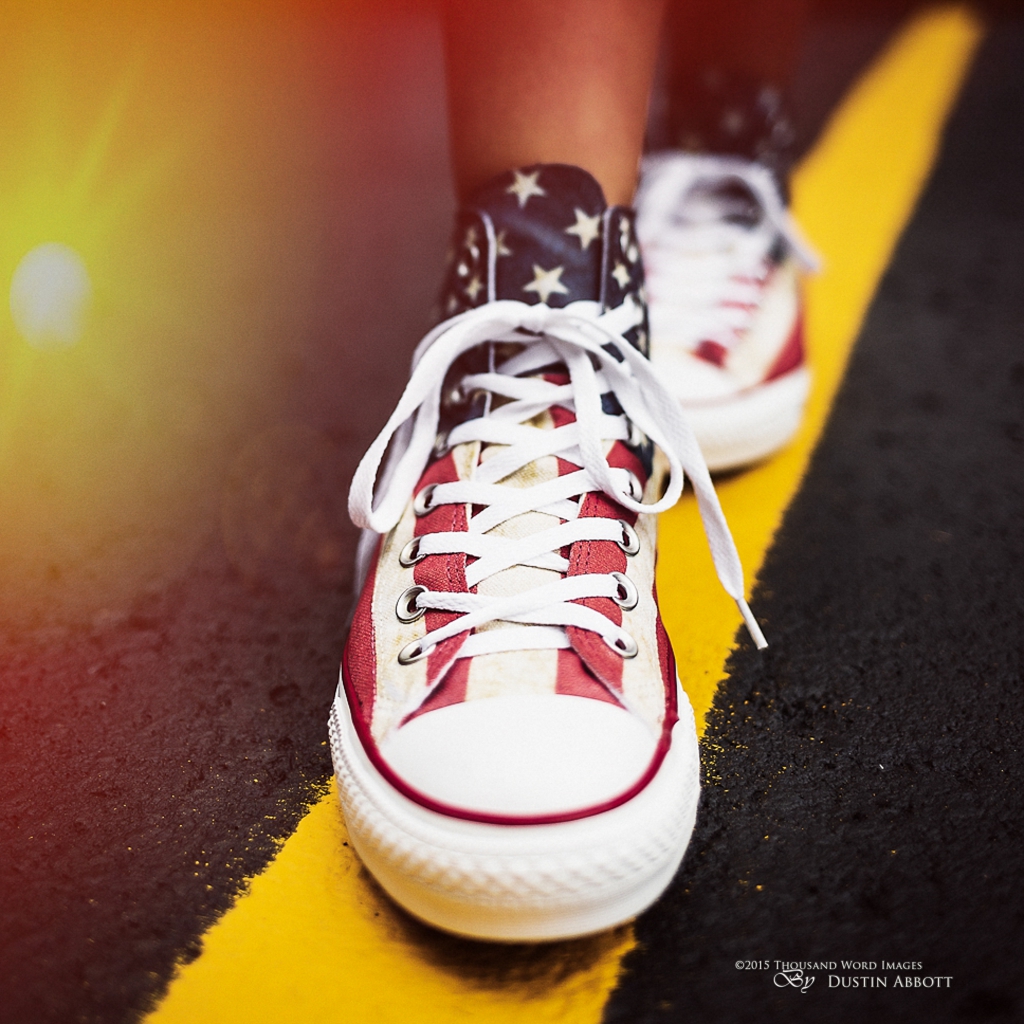
I decided on a “Bleach Bypass” preset in Exposure. The look was cool, with muted colors and high contrast, but the image was still missing…something. I chose the “Flare” preset in the Light Effects panel. It instantly worked, giving a sense of color back to the image and helping there to be a gradation of a softer effect towards the grittier right half of the image.
My daughter was delighted. The flare is what gave the image its flair.
I find that this is frequently the case. That little bit of color alteration or a bright point in the image helps to break up the monotony and gives a stylish focal point. In some cases I will even layer the effect.
Take this wedding photo, for example. I wanted a particular look, and when I added the first light leak (to the top left corner) the photo felt a little unbalanced. I decided to take the image back into Exposure and did nothing save add a second light leak to the lower right corner. This helped balance the image, and I was very happy with the result. It had some vintage imperfection while retaining the sensibility of modern contrast.
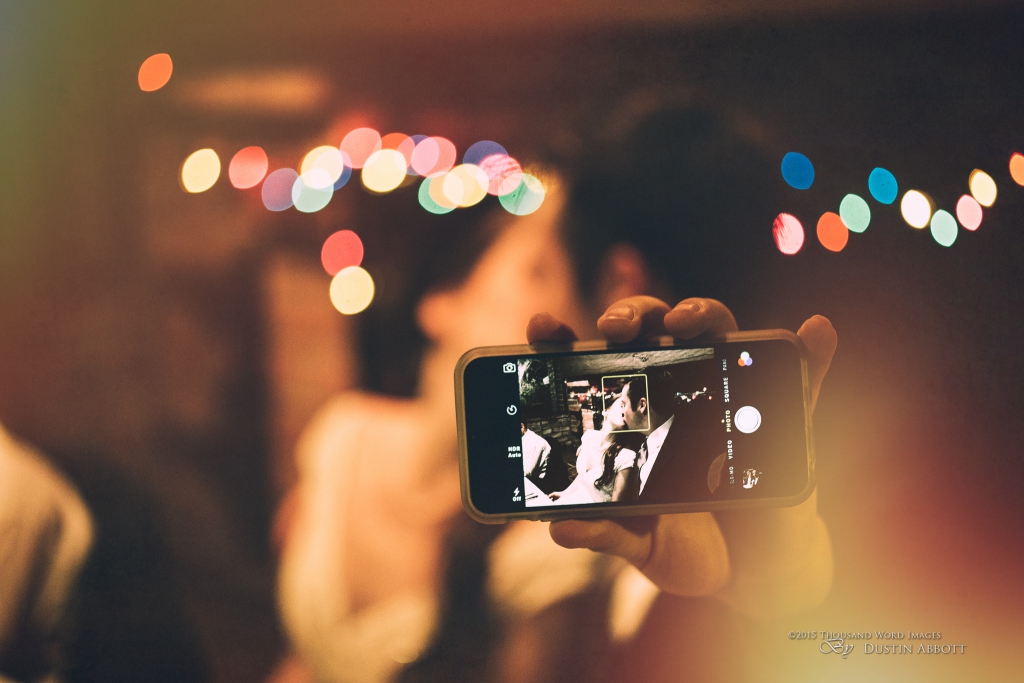
A second way to accomplish this (if you want to stay in Exposure or use it as a standalone product) is to simply add some of your own lens flare effects or light leaks by importing them as a Texture in the Overlays panel. I’ve done this several times to give myself a few extra options to play with. Here, for example, is an image that I added a custom flare to.
The best thing about adding a lens flare effect or light leak in Exposure is the ease in which it’s done and then being able to switch things around in real time. You have visual feedback on exactly how it is going to affect your image. The end result isn’t going to be random; it will be the way you want it to be. You control how extreme the effect is and where it is placed. It’s easy to experiment with this for a minute or two and decide if it adds the image or not. If not, just uncheck the box next to “Light Effect” and the effect will be turned off.

So go ahead and experiment. You will probably find that the subtle addition of a light leak or lens flare effect here and there will give an extra dimension of style to your images. And no green blobs in the middle of your model…I promise!