Kevin Mullins is a documentary wedding and social photographer. Kevin was Fujifilm’s very first Wedding Photography Ambassador, and has been shooting with Fujifilm’s X-Series of cameras since their original launch. In the article below, Kevin talks about his experiences with Exposure and shares how he benefits from using a fast photo editor at the center of his workflow.

I’ve been a long-time user and fan of Alien Skin’s Exposure. I’ve been eagerly awaiting each new release as it has matured into a standalone viable raw editor and photo finishing toolkit.
I’m a Fujifilm photographer and everything I shoot with these days is shot on the Fujifilm mirrorless range of cameras. For my wedding and large-volume work, I often shoot JPEG, and this means I need to do little photo finishing beyond basic exposure corrections. However, when I’m shooting my personal photography, street photography or lower-volume work I may shoot in RAW, and it’s in these cases that I require a solid RAW editor with a good workflow.
One of my pet peeves with Lightroom is that when I need to use an external editor, such as Photoshop or even Exposure as an external editor, Lightroom creates all these additional files (TIFF in my case). So I often find myself with a plethora of extra files clogging up my Lightroom catalogue just for editing one image. I love the fact that Exposure is a standalone editor so I don’t even use Lightroom as a catapult application. When Lightroom drags its feet and creates a mess, Exposure X2 is my friend.
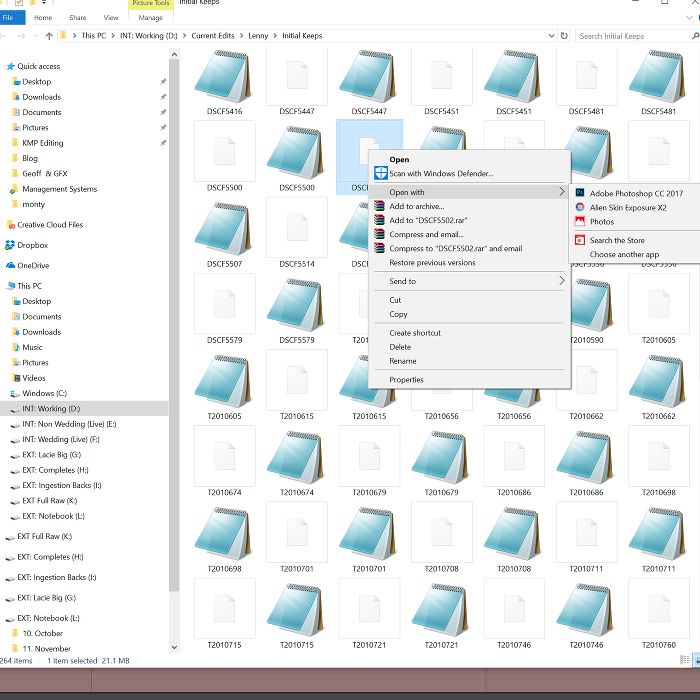
Being able to simply launch Exposure directly from the file is a real benefit. I don’t need to create catalogues.
The benefits of this are immediate as soon as the Exposure interface launches.
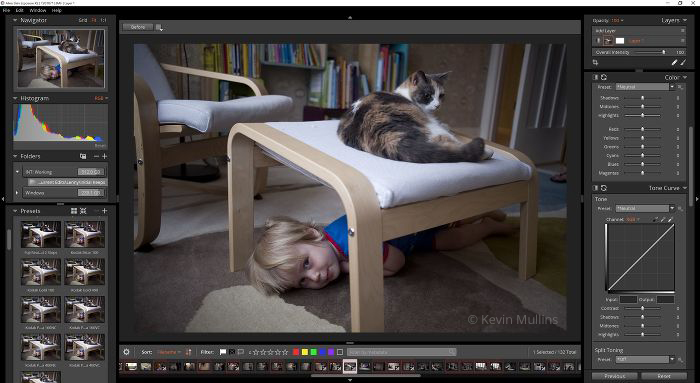
A fast, responsive interface is important to me. The Exposure interface loads quickly. The filmstrip at the bottom loads immediately with all the other RAW images from the folder location.
– Click the image to view larger.
One of my core concerns with Lightroom has been the incessant slowing down of the application. I’m forever trying to make it more responsive. Whether that’s with smart previews, thumbnail rendering, using or not using the GPU, etc. It just seems to be getting slower and slower. Whereas Exposure is getting quicker and quicker and that is even true when simply moving between files in the filmstrip. Exposure is genuinely a pleasure to use.
As I mentioned earlier, I often shoot JPEG, and I can configure my cameras to give me a defined “look” right out of the camera.
I like to shoot a lot in monochrome, I like to crunch the blacks a little, and I close the highlights slightly. I also like to get a bit of punch out of my images, and I’ll push the sharpening up in the camera. Additionally, I love the aesthetic of film images, so I often set my camera to do little or even no noise reduction – meaning the higher ISO images retain a more natural grain.
When I’m editing in Exposure, I try and work very quickly but try and retain that filmic look, especially in my monochrome images. To that end, I’ll use a traditional “S” curve to bring in that tonal adjustment as a starting point once the basic white balance and exposure correction is done.
Another great feature in Exposure is the incredible amount of customisation that can be brought to the application.
For example, I usually start in the Tone Curve panel with the “Crush Blacks” preset. However, with images shot with some of my older cameras with a different sensor, I like to use a slightly different tonal curve. In Exposure, I can simply save the curve as preset in the Tone Curve panel.
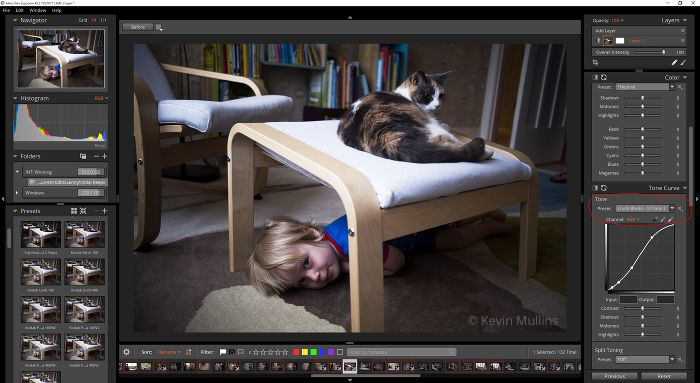
Customising presets and almost any aspect of the application leads to a very quick workflow.
– Click the image to view larger.
Of course, Alien Skin Software is renown for its film emulations and by far my favourite at the moment is the B&W Films – Kodalith preset. This is a deep black and white, and if my research is correct, has its roots in film used for medical photography. I will often use that preset and mix it with my own tone curve and individual adjustments. I like to have punchy images and a decent level of contrast too. In addition to that, I often warm up my images very slightly, and this is easily achieved using a split tone adjustment in Exposure.
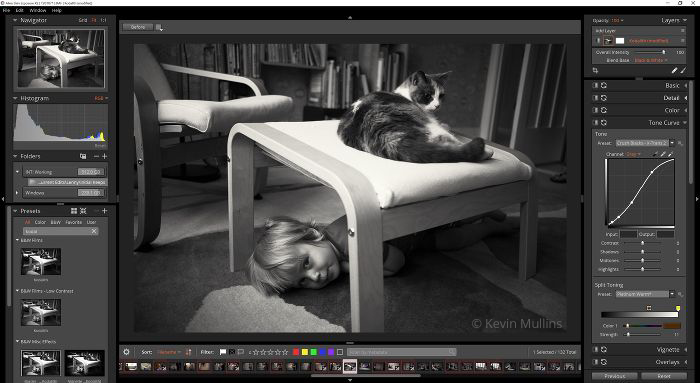
Exposure’s B&W Films – Kodalith preset adds punchy contrast. The effect shown here was customised with tonal adjustments and a variant of the Platinum Warm Split Toning preset.
– Click the image to view larger.
Another great feature of Exposure is the ability to use local adjustments within layers. In the image I’m editing, I’ve decided to brighten the face up slightly. I’ve achieved that by using the brush tool and adding dodging to a separate layer. This means I can build the image non-destructively, and unlike Lightroom, it’s very easy to keep track of all of the levels of adjustment in the image.
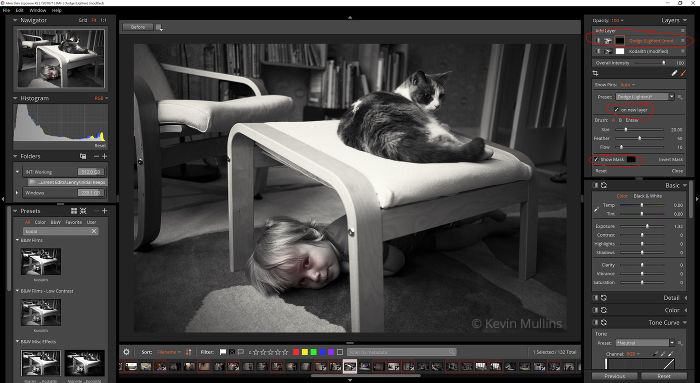
Using adjustment brushes and layers to keep track of them is a welcome feature of Exposure X2.
– Click the image to view larger.
In summary, I’m a big fan of using Exposure, especially for my low-volume work where I’m not shooting JPEGs. It’s a pleasure to use the interface and it’s great that it doesn’t leave messy TIFF files all over the place.
I can completely edit an image in minutes if I wish, or take my time and fine tune accordingly. I have presets setup for grain and vignette and whilst I typically don’t use the border options, there are occasions when I’ll want to quickly export for Instagram or Facebook where they come in handy.
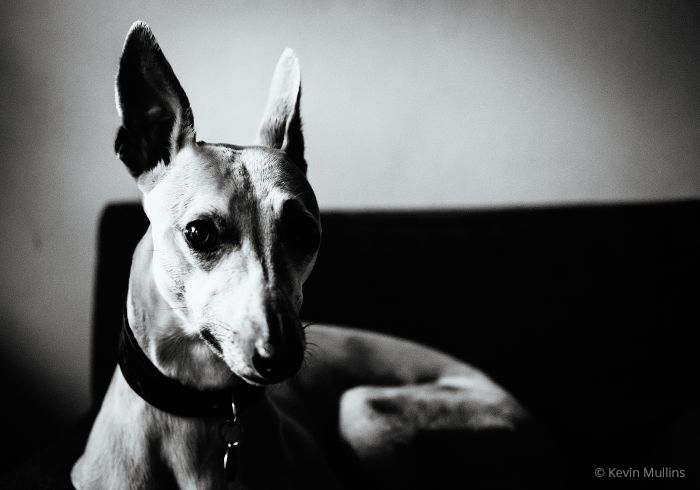

Learn more about Kevin Mullins by visiting his website and blog, or on Facebook, Instagram, and Twitter.
Try Exposure Today



Interesting to see that Kevin is using Exposure. Thanks for sharing the insight into your workflow Kevin. I’ve enjoyed Exposure for personal projects a lot.
Glad to hear that, Jon!
Where does one obtain Exposure and how much does it cost?
Exposure X2 is available for $149 in our store. Here’s a link: https://www.alienskin.com/store/