
Hello! We are Victoria and Terrence from Follow Me Away. We love travel, beautiful landscapes, and of course, photography. We are long-time Alien Skin Exposure users and recently added aerial photography to our bag of tricks over the past year and a half. Iceland is one of our favorite destinations on this planet and holds a special place in our heart, so we were excited to return to this beautiful country for a third time last September. We planned to photograph with the DJI Mavic 2 Pro and edit the landscape images in the new Exposure X4 software. Here is our experience shooting and editing our content from Iceland!
Shooting with The Mavic 2 Pro
In case you didn’t know, DJI recently released two brand new drones, the DJI Mavic 2 Pro and the Mavic Zoom. We had owned the Mavic Pro for almost exactly a year and when we saw the impressive updates that the Mavic 2 Pro would come with, the decision to upgrade before our big trip to Iceland was easy. Now we have to be honest, we are not strictly aerial photographers, but instead are DSLR/Mirrorless shooters who love the unique nature, ease, and new artistic heights owning a drone allows us to achieve.
Aerial photography is a wonderful asset to our current work. It provides us with a new perspective on travel and landscape photography that we would never have been able to achieve for such an affordable price prior to owning a drone. The Mavic 2 Pro features are game-changing for portable aerial photography and within moments of our first flight in Iceland, we were hooked. The Mavic 2 Pro is a fabulous addition to our gear bag.
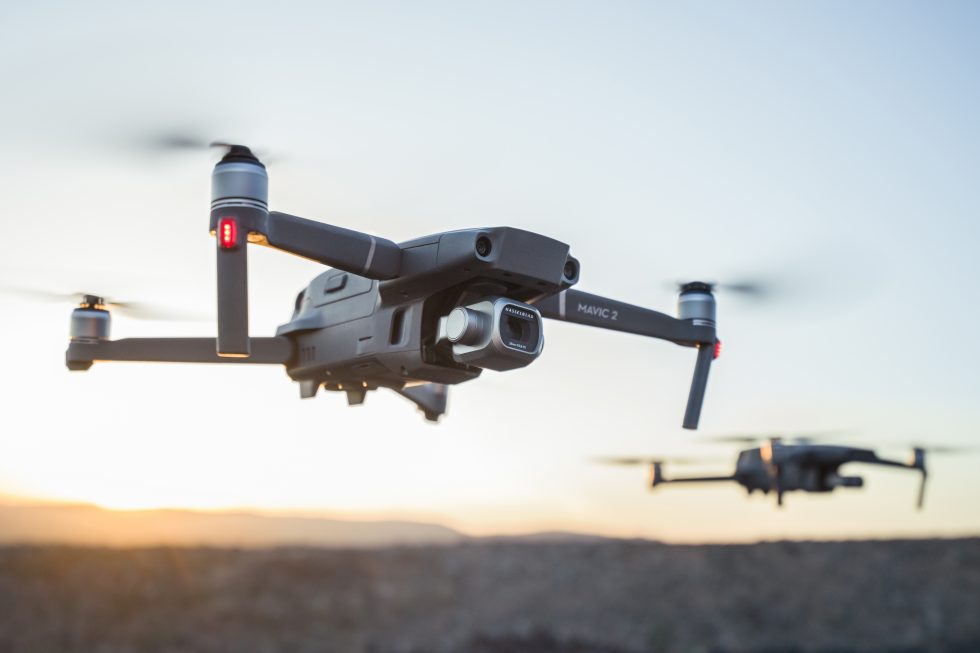
The most outstanding feature of the Mavic 2 Pro is the impressive image quality. The camera on our original Mavic Pro was 12 megapixels and although it was still a great piece of equipment, the image size did lack when compared to our full-frame DSLR and Mirrorless cameras. That is no longer even the slightest issue because the new Mavic 2 Pro comes updated with a 20 megapixel Hasselblad camera with a 1-inch sensor. The Mavic 2 Pro also supports a 10-bit Dlog-M color profile that yields higher dynamic range for more flexibility in the grading room while leaving greater space for post-production, which we couldn’t wait to test in Iceland.
The 20-megapixel upgrade is a fantastic evolution in aerial photography and really allowed us to implement drone work into our workflow more easily. Now, if we want to zoom, crop, or enlarge an image taken with the Mavic 2 Pro, we will have no issues and won’t lose any noticeable quality. It is also worth noting that the drone will shoot both JPEG and RAW and writes to a microSD card. We choose to shoot in both formats for greater freedom in post-production.
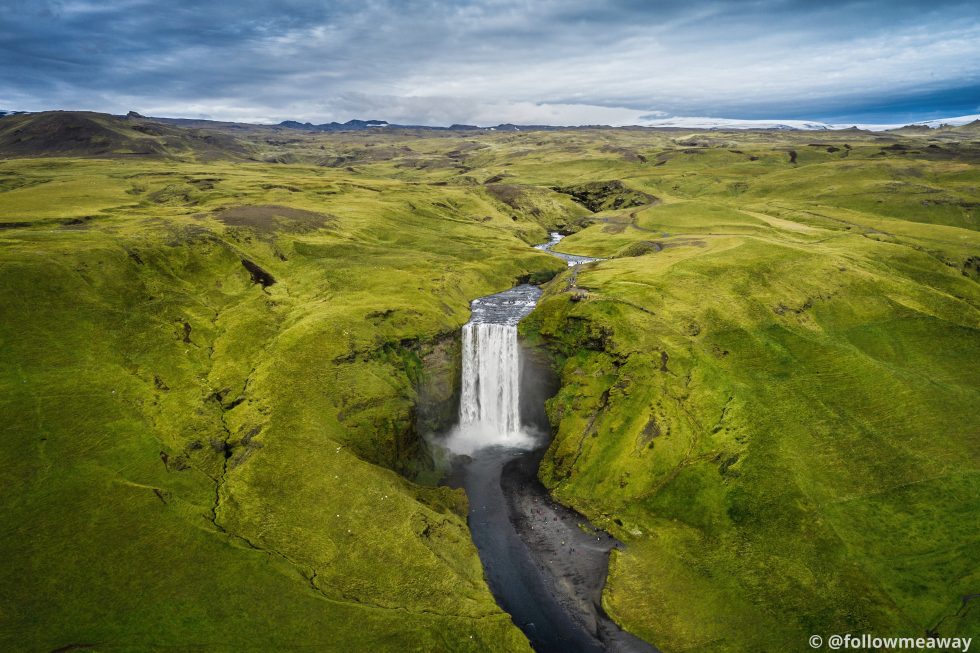
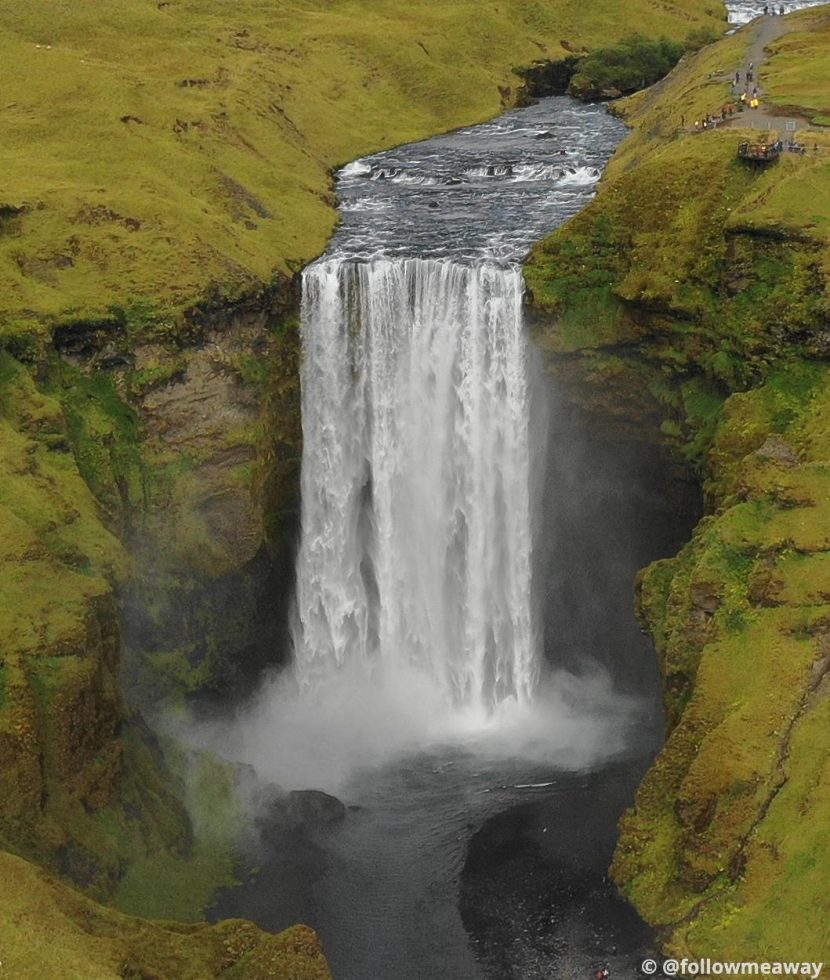
This image taken from Skogafoss Waterfall in Iceland is the perfect example to showcase the quality of the DJI Mavic 2 Pro. This was also the first drone image we took with the Mavic 2 Pro in Iceland. What you see here is an unedited photo straight out of the camera. Upon first inspection, you can see that the quality appears to be fantastic and it leaves you curious to see just how great a drone with 20 megapixels can do.
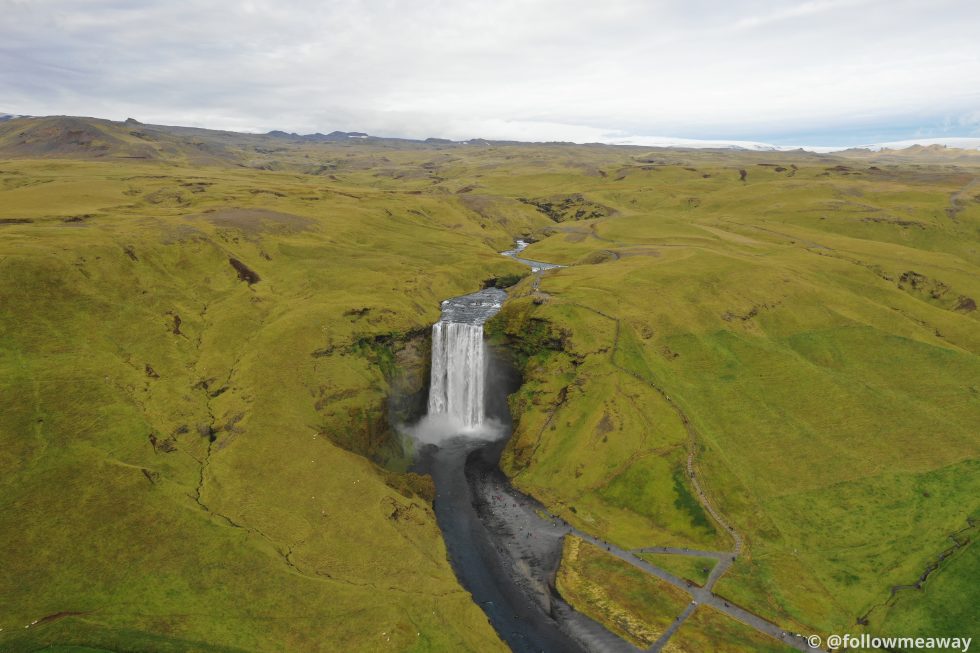
Although the Mavic 2 Pro does come with an updated camera, it does not come with a “portrait mode” feature like the Mavic Pro did. Thankfully, that doesn’t matter as the 20-megapixel quality allows for cropping later. We wanted this photo from Skogafoss Waterfall in Iceland to be portrait oriented so that we could more easily share it on our Instagram and Pinterest accounts. Here is what a vertical cropped version of this straight out of camera image looks like.
As you can see, the image quality isn’t reduced in the least bit and all features of the landscape show up crystal clear. You can even see that the tiny sheep in the photo are sharp and in focus. Can you spot them?
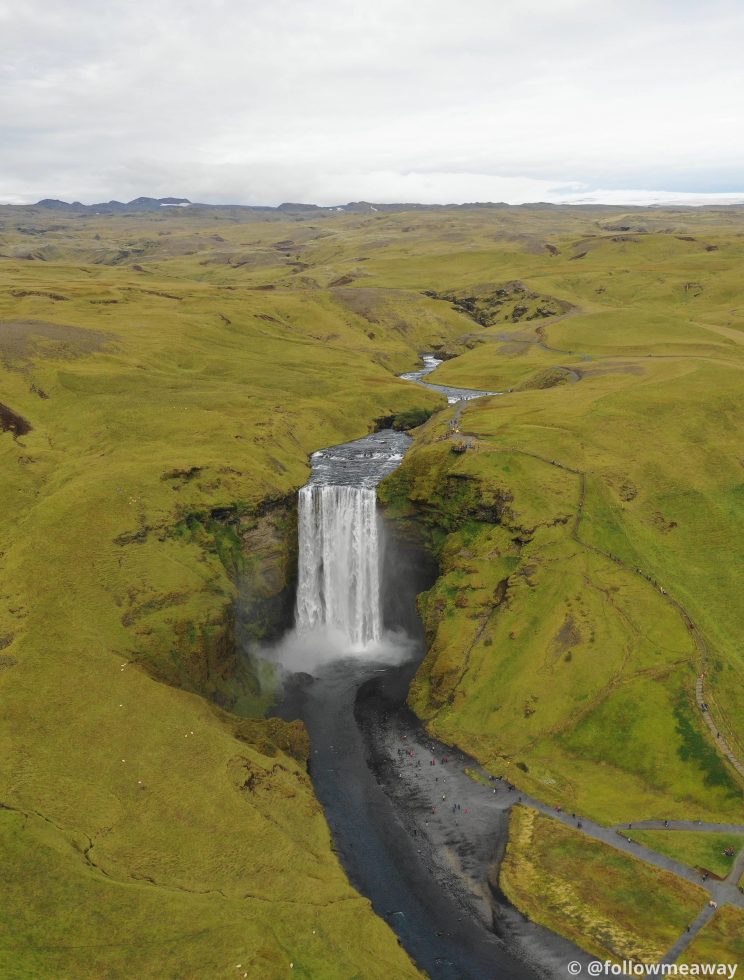
Finally, let’s say we wanted to do a real tight crop of this image. Sometimes tight crops are necessary in photography and shooting with a drone is no different. As you can see, once we crop this unedited image all the way until it is so tight it just features Skogafoss itself, there is still great quality in the image. Everything from the detail in the waterfall itself to the rocky cliffs surrounding it are sharp and in-focus, and the reduction is relatively minimal when compared to the original un-cropped image.
This is a serious testament to the superb image quality of the Mavic 2 Pro. If you are a traditional DSLR camera photographer and have been holding off on trying aerial photography because you are worried about potential reduction in quality, now is the time to give it a try. The Mavic 2 Pro will seriously impress you!
Shooting with The Mavic 2 Pro in Low Light
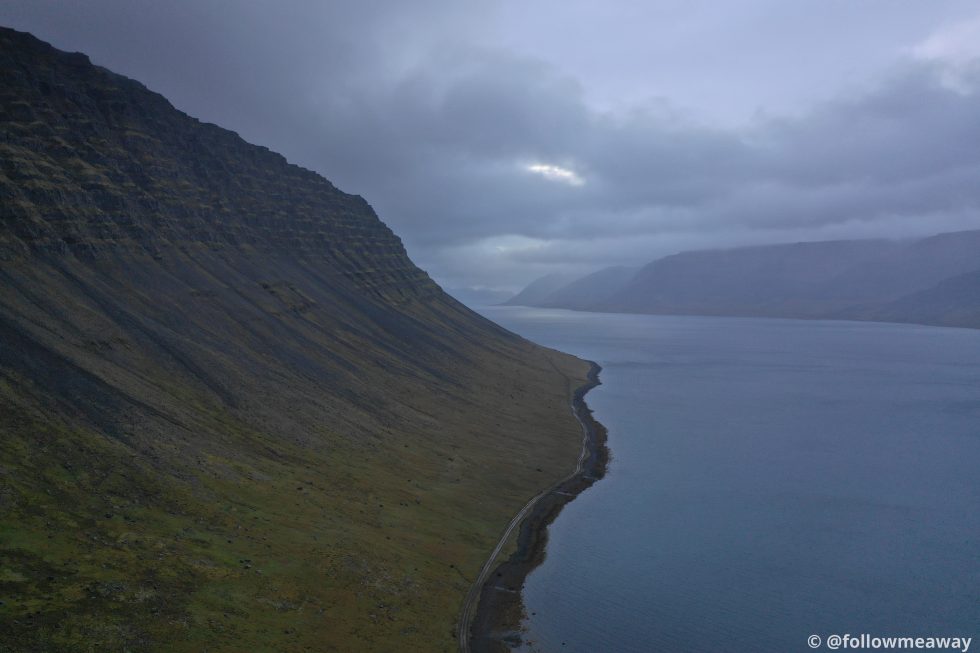
So how does all of this transfer to low-light shooting? During our time in Iceland, our schedule was so jam-packed we were driving 8 hours a day. That means that we may not have gotten to our desired location until sundown. When we arrived in the Westfjords, the sun had already set, but we knew we wanted to send up the Mavic 2 Pro for a flight so we could test out the low-light features.
For evening shots, the Mavic 2 Pro’s new HyperLight feature is a low-light setting designed to enhance your images while significantly reducing noise. It is also worth noting that the Mavic 2 Pro has an ISO range from 100-12,800, which is incredibly helpful when shooting in the dark or during low-light situations. Our Mavic Pro had a range of 100-3,200 so we immediately noticed a significant improvement.
In the image below, since there was still a bit of light left in the clouds, we shot on manual mode and exposed for the sky. We will bring back the color and light in the foreground later in Exposure X4, which we will discuss further below in this article. In the meantime, we wanted to show you what a true straight-out-of-camera low-light shot looks like on the Mavic 2 Pro. Just wait until you see the “after” later in this article!
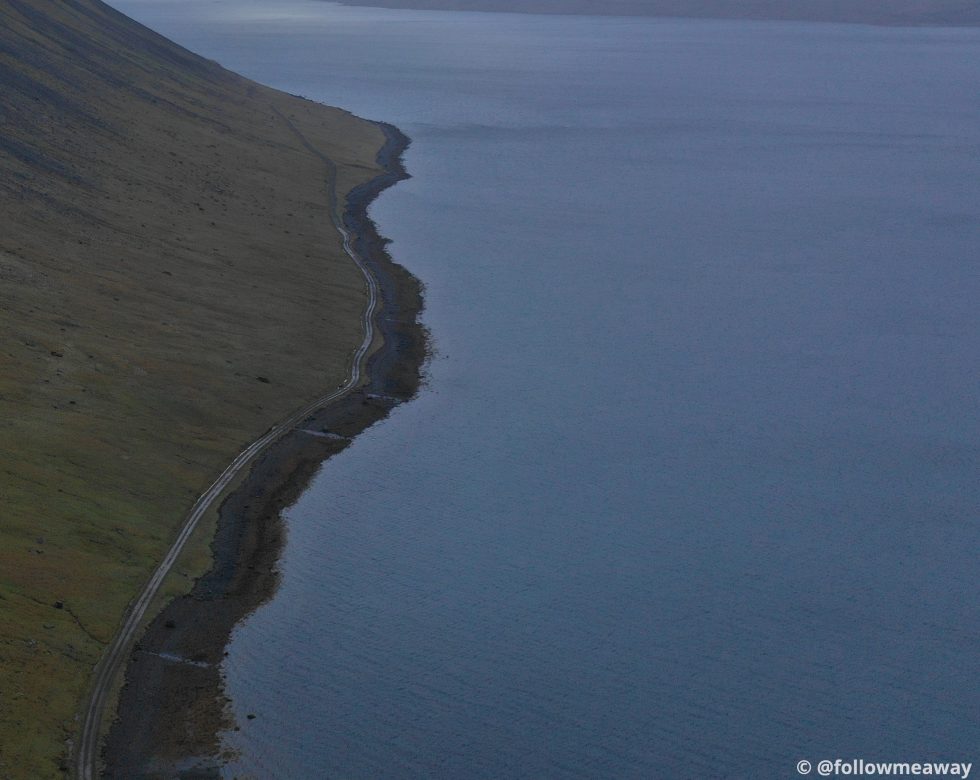
We wanted to see just how good the low-light quality of the Mavic 2 Pro is, so we cropped the unedited image, which you can see here. When inspecting the cropped image, you can still see great detail and image quality in the landscape. You can see the lines in the road, the detail in the water and beach, and the rocks along the fjord. We were quite impressed with the low-light improvements, and additional features such as the “tripod” mode make the Mavic 2 Pro a great asset to your camera arsenal. Tripod mode slows the speed of the drone down to just 2.2mph, which allows for easier night and low-light photography.
Editing Mavic 2 Pro Photos In Exposure X4
We have been editing with Alien Skin Exposure products in our workflow for years. Pretty much any photo of ours that you look at has been touched by Exposure in at least some way, and it is our favorite color grading tool on the market.
Over the years, Alien Skin has come out with many new improvements to Exposure. Exposure X4, the latest release, offers features like better RAW conversion tools, enhanced color toning tools, smart collections for organizing your images, and even light effects that you can add and rotate on any image. Alien Skin has evolved Exposure so much that it makes a wonderful stand-alone editing tool.
Since we already use Exposure in our DSLR/Mirrorless photography workflow, we were excited to try out Exposure X4 and all of the new features on our Mavic 2 Pro photos we captured in Iceland. We couldn’t wait to try some of our favorite tools coupled with some of the new additions Exposure X4 has to offer.
Exposure X4’s Outstanding Shadow and Highlight Recovery
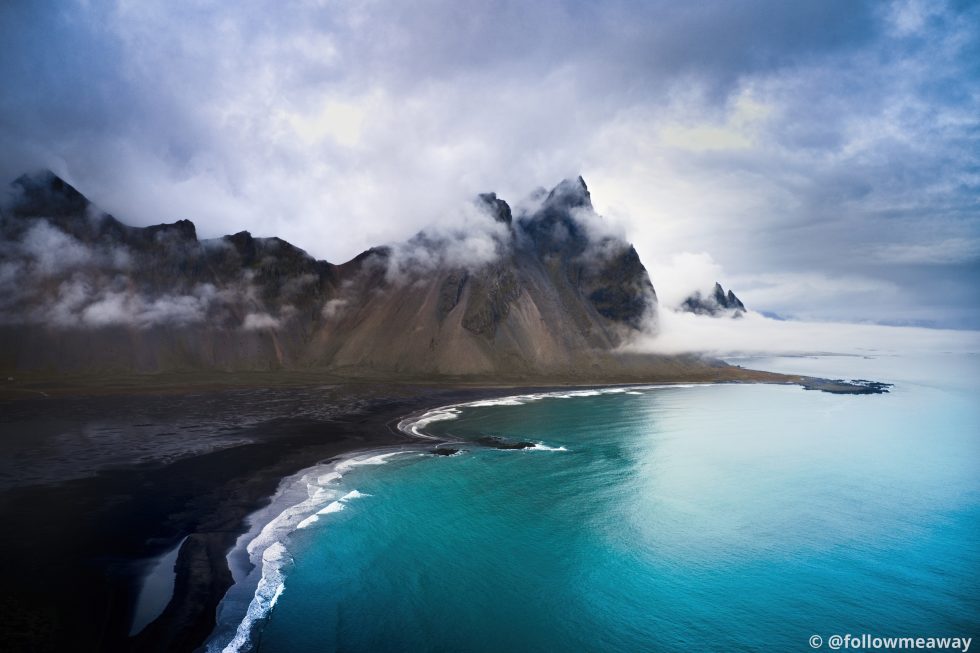
Vestrahorn Mountain, located along Iceland’s east coast, is one of our favorite places in the country. We had thought about our return visit to Vestrahorn for over a year, and never could have imagined we would be bringing a 20-megapixel drone with us along the way either. When we arrived, we were a bit sad that shadows had covered the mountain, but as they cleared, we realized they added to the moody atmosphere.
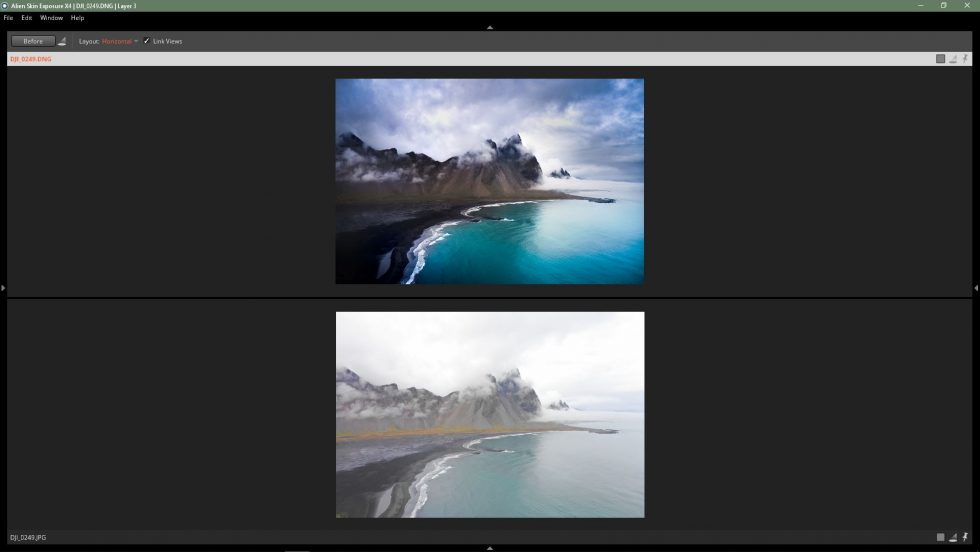
We shot this image on the Mavic 2 Pro in RAW and on manual mode. Unfortunately, during the shoot, we didn’t do a great job “exposing for the sky” as the day wore on, which led to little detail and separation in the sky with the clouds being a bit blown out. You can see the RAW unedited image in Alien Skin below. Pay close attention to the sky.
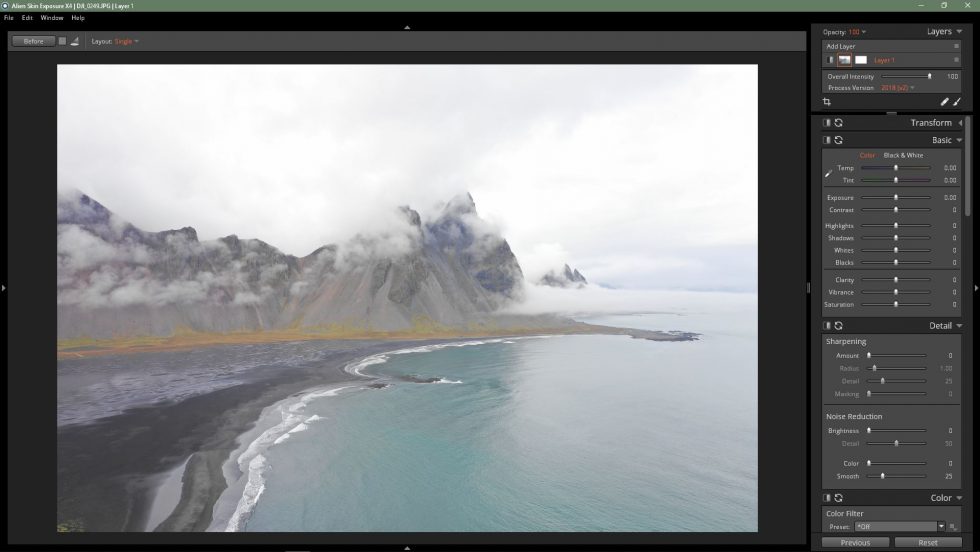
Luckily, we knew about the brand new Exposure X4 update, and wanted to see what it could do to help us bring back detail in the sky. One of the best features is the overhaul to shadow and highlight recovery, something this photo from Iceland sorely needed. Once we pulled the image from Vestrahorn into Exposure and applied the new and improved highlight and shadowing tool, we were able to recover all of the detail that originally appeared lost in the unedited shot. As you can see, using the highlights and shadowing tool allowed us to provide depth and drama to an image that would have been much more “flat” otherwise.
Exposure’s layering feature really helped us bring this image together to take it from the drab “before” to the striking “after.” Unlike other color grading programs on the market, Exposure offers the ability to create layers and masks, just like Photoshop. Couple that with the RAW processing and other features offered, and Exposure really is a powerful tool for editing drone photography.
In the screenshot below, you can see all of the layers used to create this image in the top right. If you look closely, you can also see the masks and where we “painted back” the area we wanted or erased a part we didn’t love.
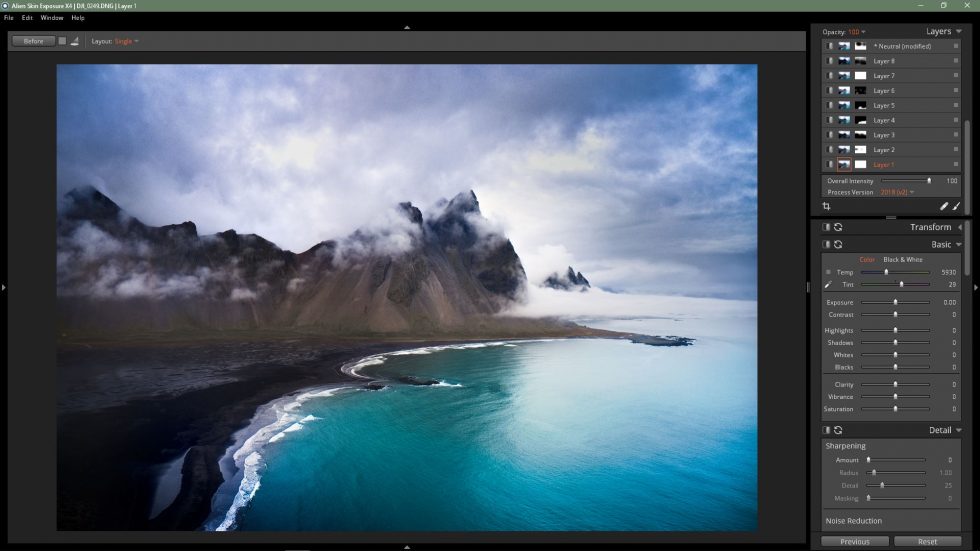
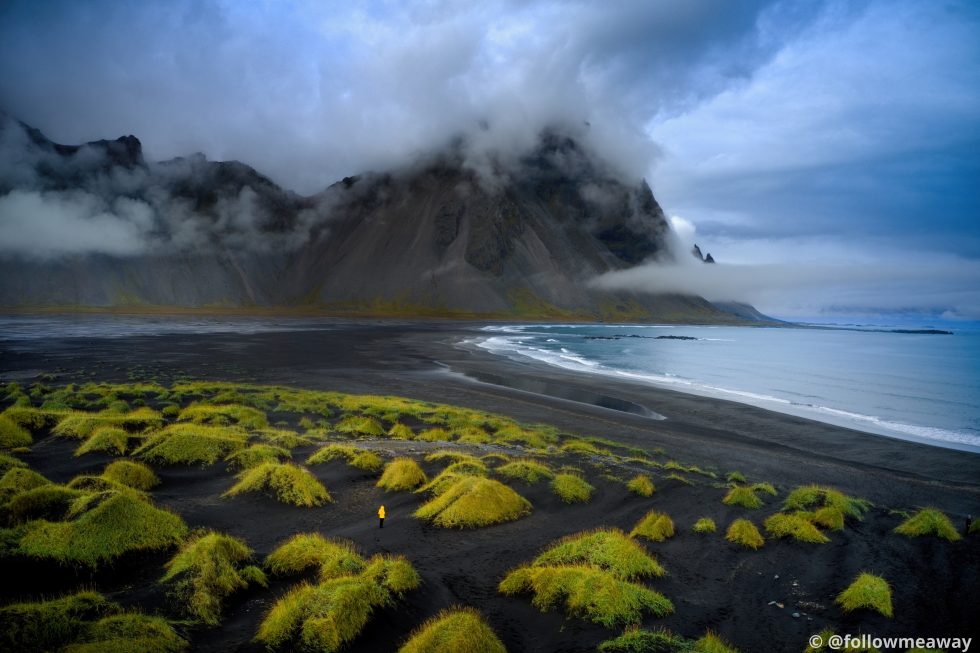
We used layers to help us achieve the desired look on the water, sky, and sand. We really wanted to make the mountain and the beach stand out to showcase the beautiful black sand, but we didn’t want that to affect other areas of the photo and layers made that easy. Similarly, we wanted to color tone the water and sky to add depth and drama, but we wanted to do so individually so the colors wouldn’t run together. The layers feature in Exposure is one of our favorite tools and coupled with the improved highlights and shadowing tool, we were able to create a great finished edit of our Mavic 2 Pro drone image.
Remember that Westfjords photo we shot on the Mavic 2 Pro? We shot it after it was already dark out and the Mavic did a great job shooting in low-light. Now that we are at the post-production stage, we brought the image into Exposure to see what we could do. Check out the straight-out-of-camera shot below to remind yourself of what the “before” image looked like.

To recover this low-light image in Exposure, first we brightened the image using a combination of the exposure slider and the Tone Curve tool. We love that Exposure offers a detailed curves adjustment tool, as it allows us to play around and really achieve the look and feel each image deserves.
You can see us begin to brighten the image using curves if you look to the right of the image below. As you can see on the left of the screenshot, we could also have chosen to use one of Exposure’s many preset options or created our own. If we were going to be editing multiple images from the same set, we would create our own preset and save it for future applications. Since we only edited one shot from the set, we didn’t use any presets and edited by hand instead.
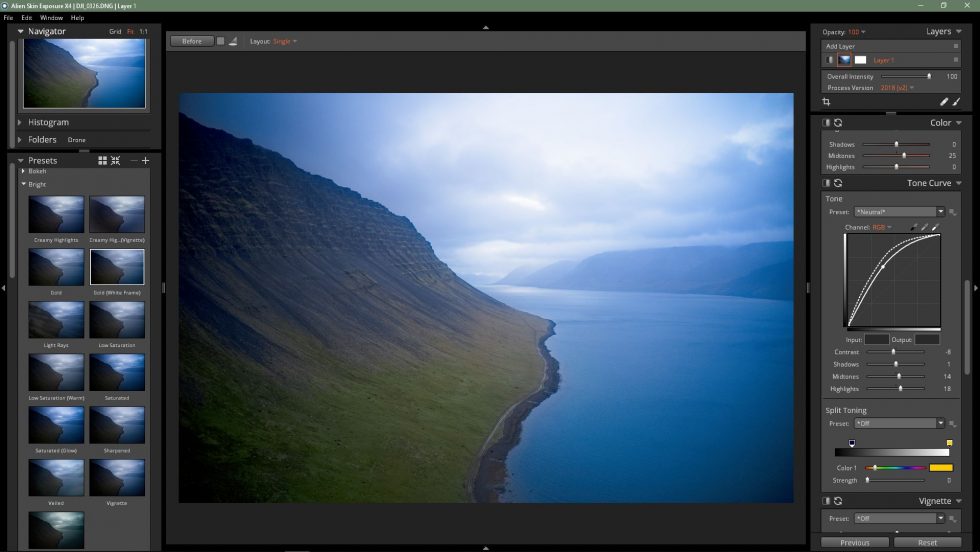
We also used the Tone Curve tool to darken the image to make a vignette, and then used the layers feature to paint back the darker area where we want to see it on the image so that our editing draws the eye to the featured parts of the photo. If you don’t want to go about it that way, Exposure’s Vignette tool that enables you to set and customize vignettes as you see fit.
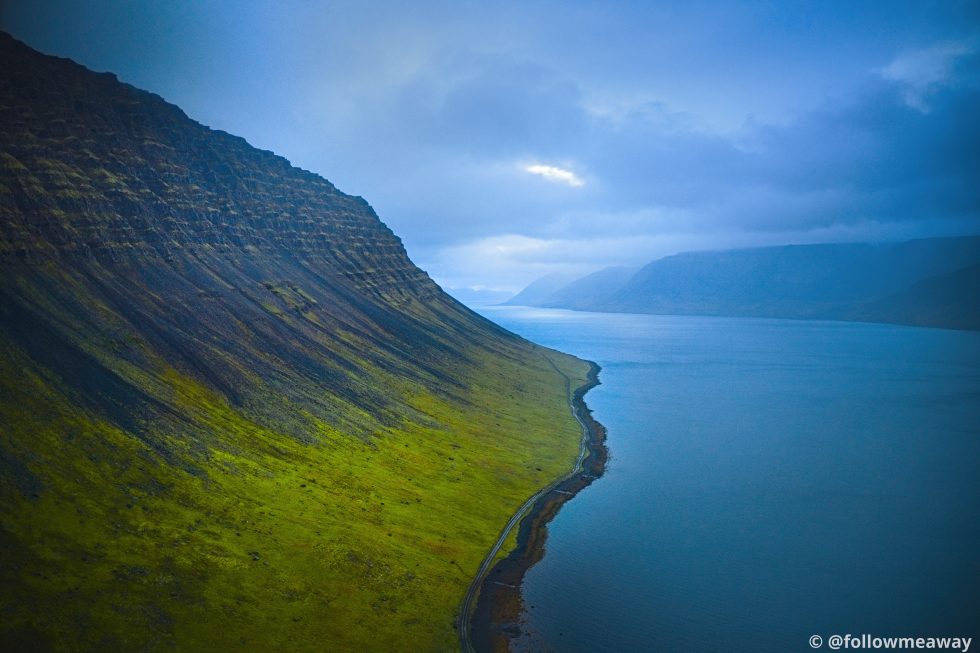
Since this image was shot after dark, we didn’t want to brighten it too much so that we would lose the quality presented by the Mavic 2 Pro. We worked with our favorite Exposure tools from HSL adjustments, curves, layers, and white balance sliders to bring the image back to life without making it look fake, overly done, or “too bright” for the time of day at which it was shot. This allowed us to edit a realistic version of what the Westfjords actually looked like during our visit. Below is the finished edit of this image!
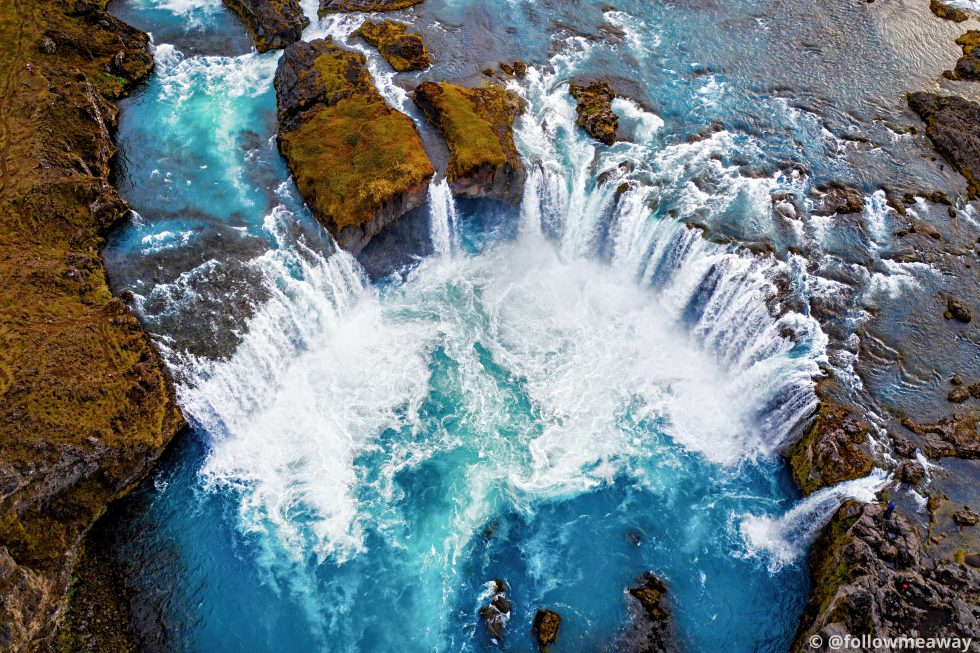
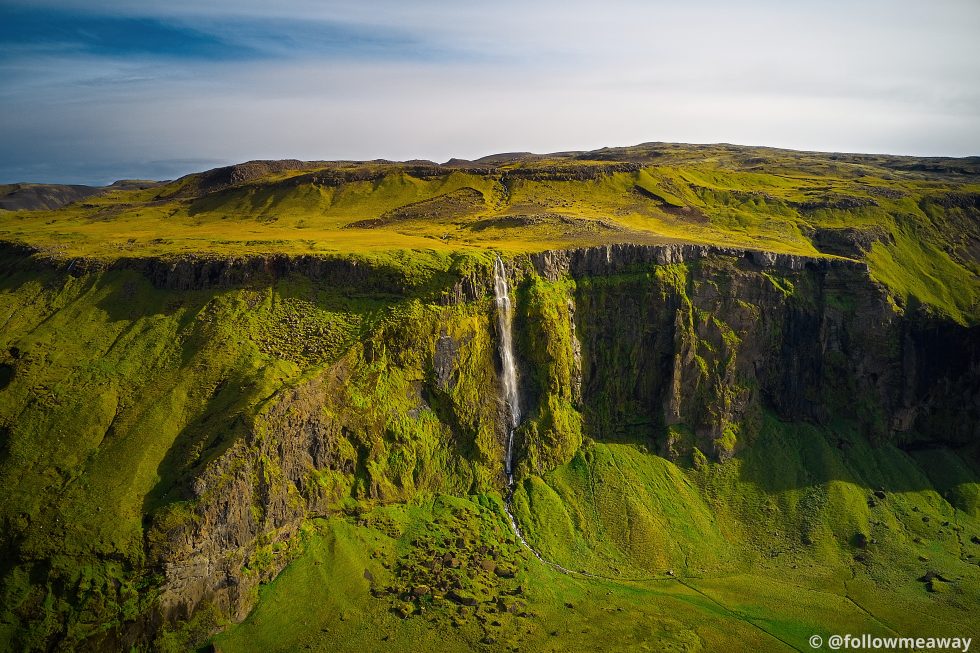
The Finished Product
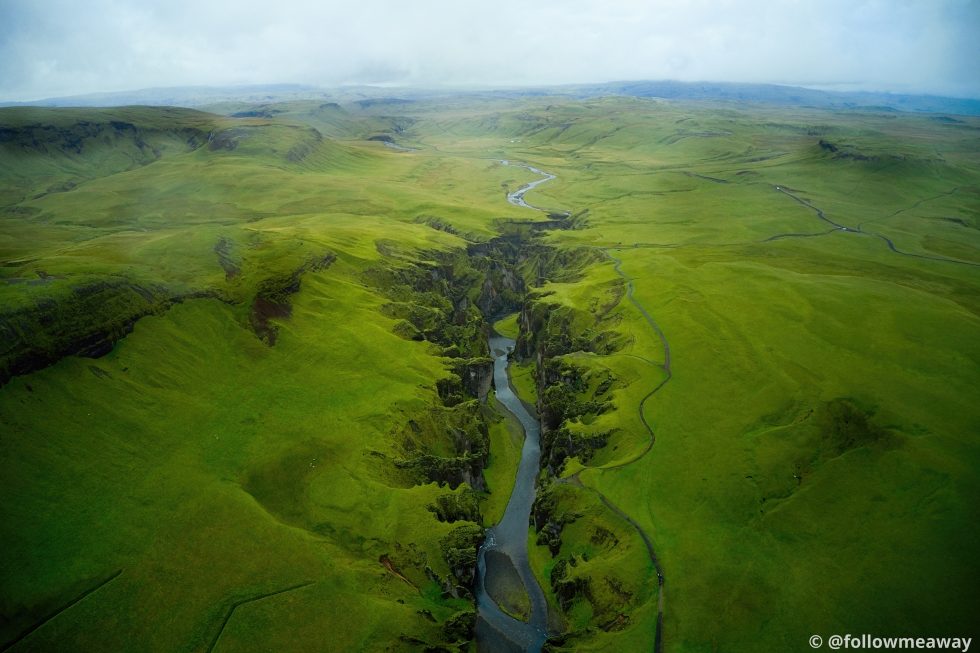
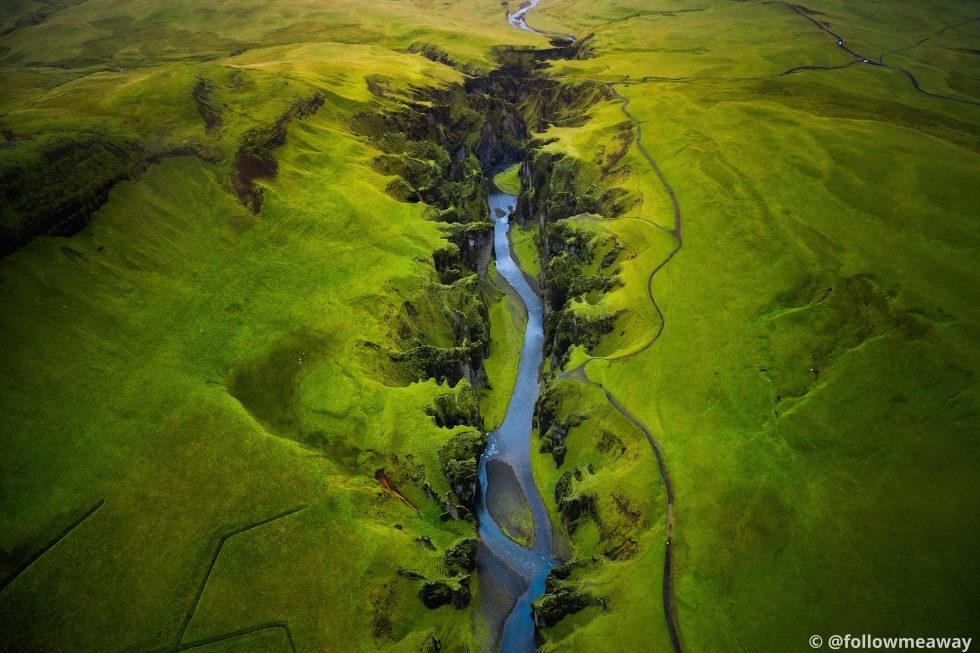
As you can see, editing in Exposure X4 really allows us to bring out the fabulous color tones and detail captured with our Mavic 2 Pro in Iceland. Below are some of our favorite shots from the trip edited in Exposure X4 and shot on the Mavic 2 Pro all around the country. Iceland is one of our favorite places in the world for landscape photography and although we didn’t get ideal conditions every day (it rained a lot), we were still able to make it work with Exposure X4 and the Mavic 2 Pro by our sides!
To learn more about the Mavic 2 Pro, visit DJI’s site.

To view more of Victoria and Terrence’s work, visit their travel and photography blog Follow Me Away. This article was produced in collaboration with DJI, makers of drones and aerial photography systems.
Try Exposure Today


