This is a guide to using the controls in Exposure for creating looks inspired by analog Infrared film photography. Infrared photography is unique, so we put together this article to help you get to know the Infrared panel, controls, and presets.
What is Infrared photography?
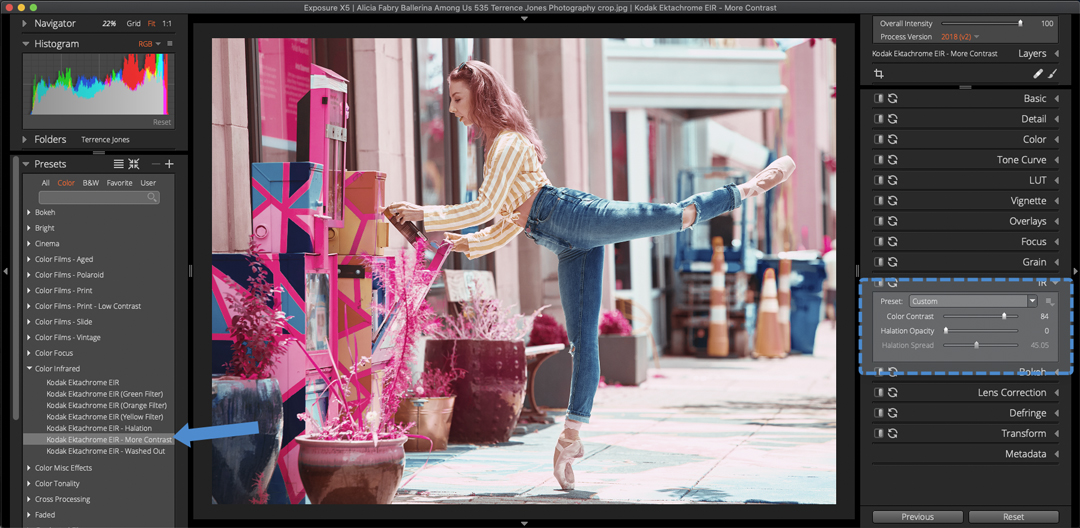
Infrared photography captures a different part of the light spectrum than traditional photography. The different wavelengths captured in this way create false-color or black and white images with dreamlike, psychedelic characteristics. Other attributes of IR photos include very dark skies, penetration of atmospheric haze, and portraits with a milky glow to the skin.
Infrared Controls
Apply simulated infrared photography characteristics with the tools in the panel.
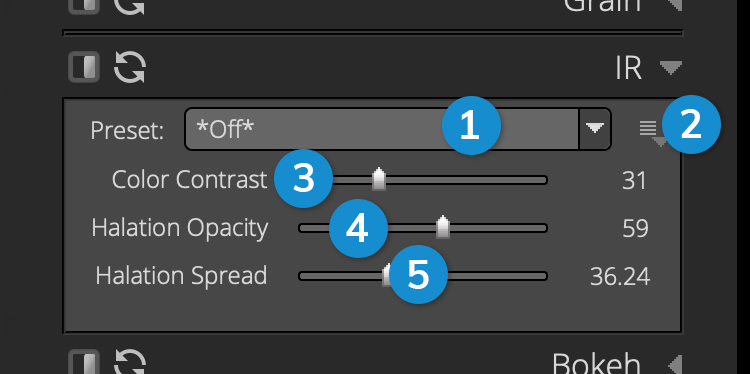
1 – Preset Dropdown
Select from several presets that only use the controls on this panel.
2 – Menu Button
Save, Delete, and Rename presets.
3 – Color Contrast
Controls what’s known as the Wood Effect in analog infrared film photography, named for IR photography pioneer Robert W. Wood. In black and white, this makes blue skies appear dark, while greens of foliage have a bright glow. For color applications, this gives foliage a red or pink tone.
4 – Halation Opacity
Halation is the bloom, or glow, around the bright values. Photographic films typically have a backing layer to prevent halation. That layer isn’t present in Infrared film.
5 – Halation Spread
Spread controls the distance of the glow from the highlights, or the width of the bloom.
Infrared Presets

The infrared spectrum of light is closer to that of thermal imaging than the visible wavelengths captured by traditional film or camera sensor. Infrared wavelengths penetrate atmospheric haze better than visible light, making Infrared film popular for landscapes.
The presets in Exposure can be used creatively for any subject. Especially the color infrared selections, which can give photos a psychedelic aesthetic. To make the effects more subtle, fine tune the strength of the look with the layer Opacity and the Overall Intensity sliders.
Black and White Infrared
The Wood Effect in black and white infrared photography will noticeably darken skies and oceans and brighten greens like foliage. The behavior is mainly caused by greenery strongly reflecting light, causing the distinctive glow. Analog Infrared film records radiant heat from objects, so the sky and ocean usually appear dark because they absorb light. Green from foliage, on the other hand, glows brightly because of the reflected wavelengths.
The Wood Effect can create more extreme contrast between the dark field of empty sky and bold, bright clouds. Similarly, bright highlights on crashing waves can benefit from the same treatment. In analog film, the darkening effects of IR films were enhanced by the use of color filters.
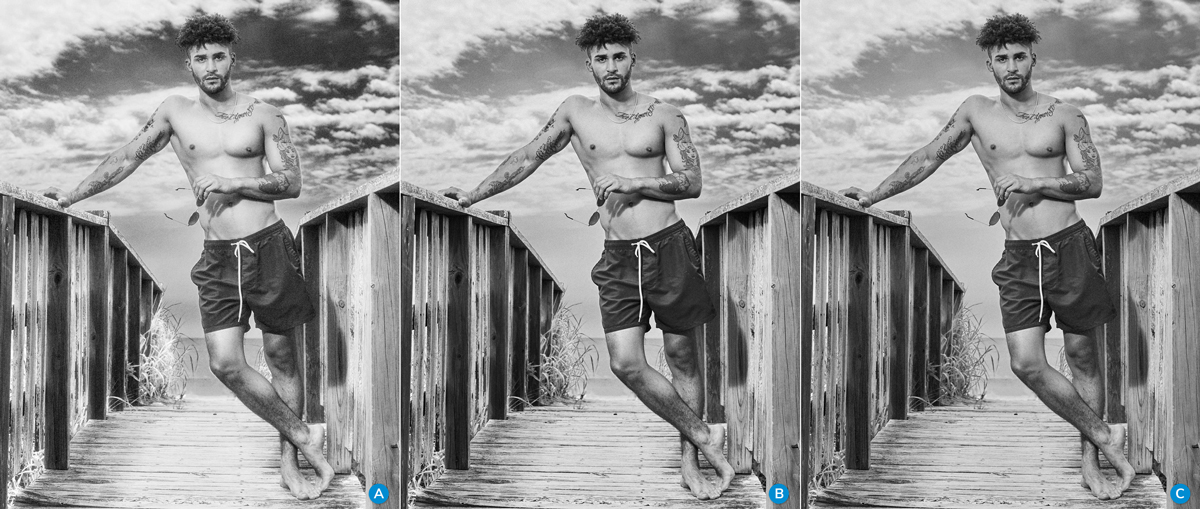
A – Kodak HIE
One of the most popular high-speed analog Infrared films. This family of presets have very strong Wood Effect attributes. Notice blooming around bright tones, bright glowing foliage, and intensified contrast in the sky.
B – Konica 750
The visible spectrum is more broad for this film, so the whitening of foliage and darkening of the sky is not as strong as Kodak HIE. These presets are a balanced middle ground.
C – Ilford SFX 200
This emulates a medium speed black and white film with extended red sensitivity. This preset is not as contrasty as the other black and white infrared presets.
Color Infrared
The Wood Effect in color infrared photography makes green foliage appear bright red. With infrared film, the shade of red or pink could be used to determine the health of plants.
Kodak Ektachrome EIR
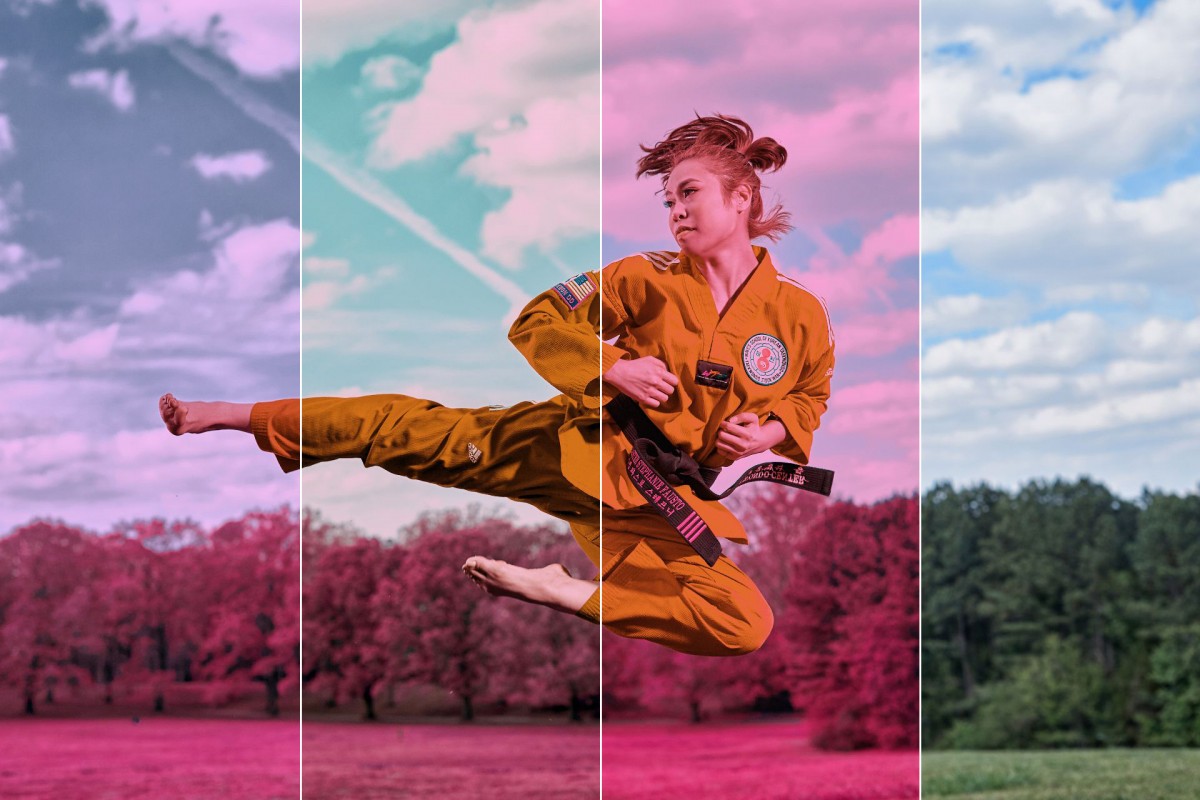
Infrared-sensitive transparency film with fine grain and medium sharpness. Color filters were used in conjunction with color infrared film. This blocks out visible light in specific spectrums. The presets in Exposure simulate the use of the common color filters green, orange, and yellow.
Infrared photography effects are another one of the ways Exposure makes advanced editing simple. Thanks for reading our guide. We welcome you to save a link to this article as a reference if you ever have questions about using the Infrared tools.
Try Exposure Today


Very helpful guide. I love the Kodak HIE film personally