
Exposure’s color constraints are a great way to make detailed layer masks. The 3d masking tools help you quickly apply edits to the foreground, the skin, or whichever area you choose. Learn how to use them in this video.
Photos: Scott Stulberg, Anthem in Art
Transcript
Defining Masks
Color constraints quickly generate detailed layer masks. Each constraint can be used individually to create a color mask, or they all can be used together for greater precision. Use the range presets or the eyedropper tool to set values for each constraint. Refine the mask with the handles to include more tones or to feather the selection boundaries. When selecting the hue, modify the color by rotating the wheel. For Luminance and Saturation, the handles on the top define the boundary, the handles on the bottom refine the feathering edge.
With the constraints defined, edits on that layer only apply to the area of the image specified by the mask. The mask thumbnail shows the mask in greyscale. The adjustments will be visible in areas where the mask is white.
Workflow Shortcuts
The selection eyedroppers make choosing exact color regions in the image simple. One bare single click on the image targets a range of values for, in this example, the color hue.
Using modifier keys while you click changes the eyedropper behavior. Hold Shift while clicking and Exposure will add more values to the selected zone as you click. Then press Esc to finish and close. Each click adds a new color to the selection, which produces a wider range of values. The center value of the range is the average of all the points you set. It will change as you set more points.
Hold Alt, or Option on Windows, to select all three constraint values for the target you select. It’s a quick way to set the middle zone for what you’d like to select, then move the handles to include more tones.
To set both feathering edges simultaneously, hold Shift while dragging the handles. Use Shift also to move all of the handles together in the same arrangement.
Reusing Masks
Masks defined with color constraints can be reused on other images, too. You can simply copy and paste layer masks from one image to the next.
The boundaries will automatically recalculate for the content of the image it is applied to. If the subject moves to a new position between shots, the same mask can be used on all of them.
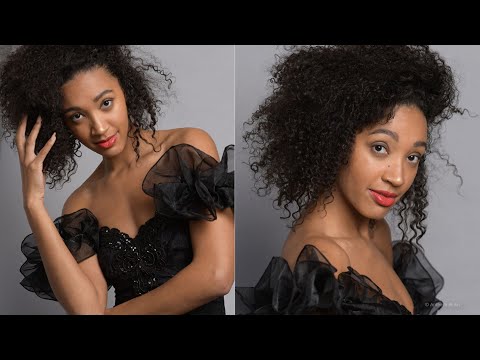
In this situation, we want to remove unwanted texture from the model’s skin in a group of images. Rather than retouch each of them by hand, smoothing effects can be duplicated for them all.
If needed, the mask for each image can be quickly customized. For example the brush can be used to refine the mask by removing unwanted areas.


