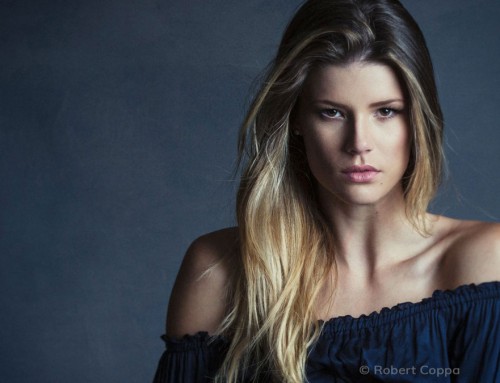
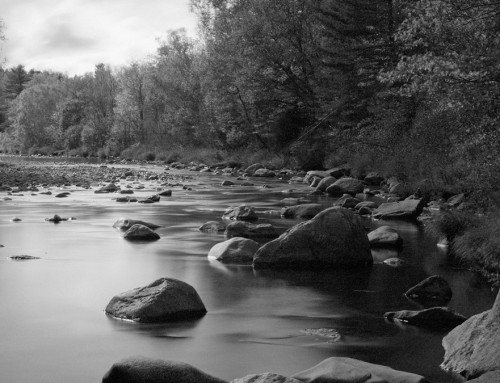
Image focus is a powerful way to direct the viewer’s eye. Controlling areas that are in and out of focus gives you loads of creative options in post-production. This video was made to show you how you can add realistic blurring effects to your images in Exposure.
Photo: David Mecey
Transcript
Defining Bokeh
The term ‘Bokeh’ refers to the visual quality of the out-of-focus areas of an image. The phenomenon occurs in all lenses unique to each model type. The tools in Exposure’s Bokeh panel enable you to replicate the blurring effects of many lenses and create many other creative effects.
When the panel is open, focus region controls appear in the large preview image. When the panel is closed, these controls disappear, but the blurring effects are still visible.
Focus Regions
Control where the out-of-focus areas appear with focus regions. They specify areas to protect from the blur. There are three different types of regions: Radial, Planar, and Half planar.
Add a noticeable blur before placing a focus region to visualize the placement of the fading edge. Once you position the controls where you want them, adjust the blur settings to your preference.
A Radial focus region is added by default. Radial regions are a great option for portraits to draw attention to the subject. Click and drag within the region to move it. Stretch and resize with the handles. Drag the dotted circle to adjust the transition from clear to blurred.
Delete the selected focus region with the trash can button
Planar focus regions come in two varieties, planar and half planar. Planar blurs the image in both directions from the center line, while half planar blurs the image in only one direction.
Again, move the region by dragging. Click and drag the solid line to change the angle. The dotted lines indicate where the blurring effect reaches the maximum.
Because the planar region blurs in both directions from the center line, it can be used to create a tilt-shift look. This can do lots of creative effects like making landscapes look like miniature models. It also works well with close-up portraits to focus attention on the eyes.
Blurring Controls
Begin making adjustments at the top of the panel and work your way to the bottom. The presets list is a quick way to find the effect you’re looking for. There are creative aperture shapes, motion effects, and presets that simulate the look and feel of real lenses.
Control how much blur is applied with the Amount slider. At zero no effect is applied. Zoom adds a smear to the effect like zooming the lens while the aperture is open. Twist alters the zoom effect to create spiral and spinning motion effects.
The Creamy slider controls the appearance of the distinctive bokeh highlights. When the slider is placed at an extreme positive value, it will make very smooth, buttery highlights. In contrast, extreme negative values have hollow highlights that look like rings.
Curvature controls the inward curve of the sides of the aperture shape. It isn’t available if the selected shape has no sides, like a circle or a heart.
This control shows the base shape of the aperture. Click it to select a different shape. You’ll see these shapes in bright areas of the image in the blurred sections.
The controls in the Highlights section enhance bright specular areas in the photo. Brighten highlights in the image with the Boost slider. Raising the Threshold slider makes more areas of highlights appear. In the brightest areas you’ll see bright flares in the shape of the aperture.
If your original image already has grain, bokeh effects will remove it. Use grain matching to reintroduce that grain. Adjust the Strength and Size sliders to match the grain in the unblurred areas of your photo. Exposure’s grain panel isn’t affected by the Bokeh blurring. If you’re it to add grain, it’s best to turn that panel off while you make adjustments to grain matching.
Depth of Field
Depth of field is a beautiful way to isolate a subject. In Exposure, you can add depth of field effects using the bokeh tools and layers. You can create as many layers as you’d like for more accuracy, but 3 layers works for most situations. In the Layers panel, create a foreground layer that’s out of focus, a middle layer that’s in focus, and a background layer that’s also out of focus.
There are a number of ways to create detailed masks in Exposure which we cover in other tutorials on our website. Adding a believable depth of field effect depends greatly on the quality of the selection you create, so take your time and make sure it’s as accurate as possible. You don’t want to use the layer opacity to control blur effects as they would blend with the image below creating halos, instead always keep them at 100%.
For the Foreground layer, use the bottom edge of the selection for the new focus plane. Use a half-planar gradient, and set the feathering edge at the focus plane. Copy the mask you create for the subject, and paste it to the background layer. Apply another half-planar gradient, and adjust the feathering edge of the background content. Then Invert the mask from the Actions menu. At this point, you’re ready to apply the blur.
The presets help you quickly find a look, and you can customize it easily. You’ll want to remove the radial focus region that’s applied by default. Once set, copy the adjustments from the background to the foreground layer. Using only one type of blur on each image helps the look be more believable. You can make adjustments to the amount of blur for each layer individually to reflect how far the area is from the camera.


