Blending modes are one of Photoshop’s many powerful tools. I’ve written about them before. If you missed it, check out the article.
This time, let’s take blending modes a step further by using them to blend effects. Here’s a procedure for applying effects to specific luminance values in Photoshop. Let’s do something simple. For example, we’ll add a color tone to the shadows of an image.
Color toning effects are easy to make with Exposure. Check out the Split Toning video to see how to create these effects with a few simple clicks.
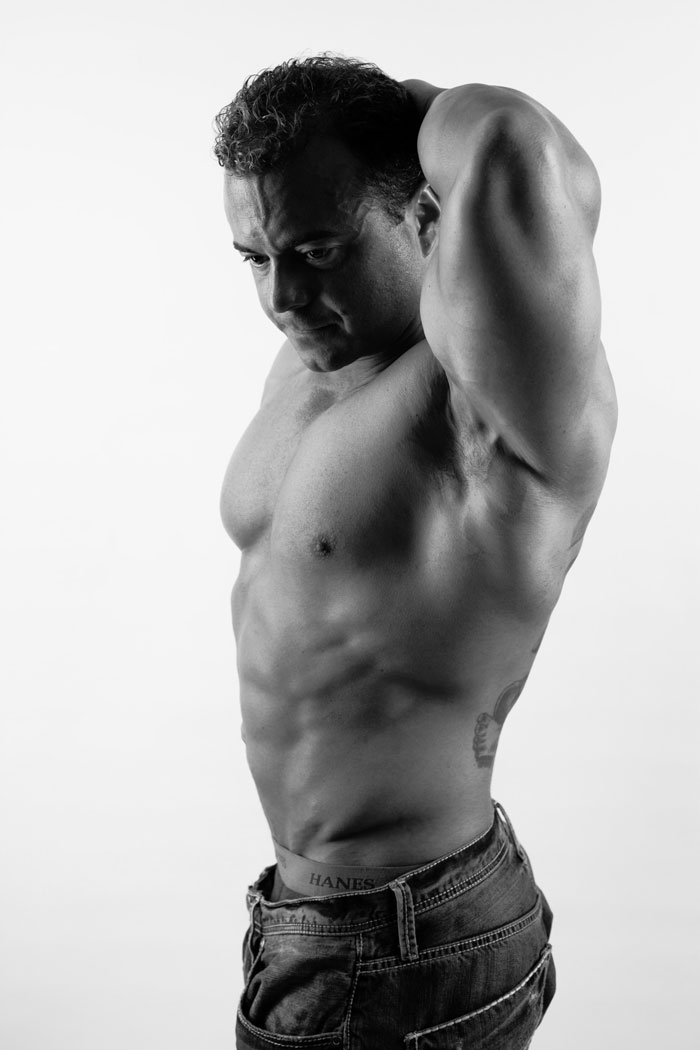
Original Shot – Image © jimmy beech – Model: Jason Salazar
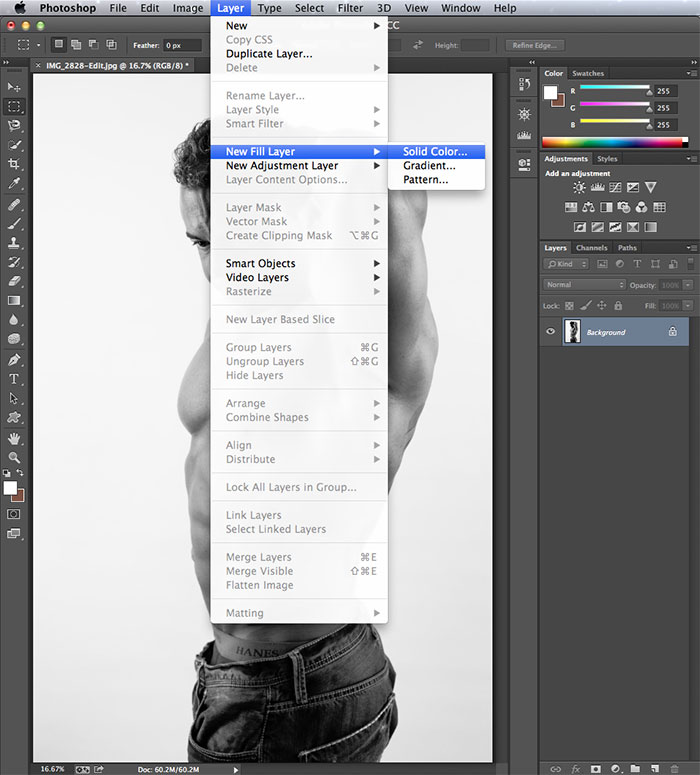
With your image open in Photoshop, create a new Color Fill layer.
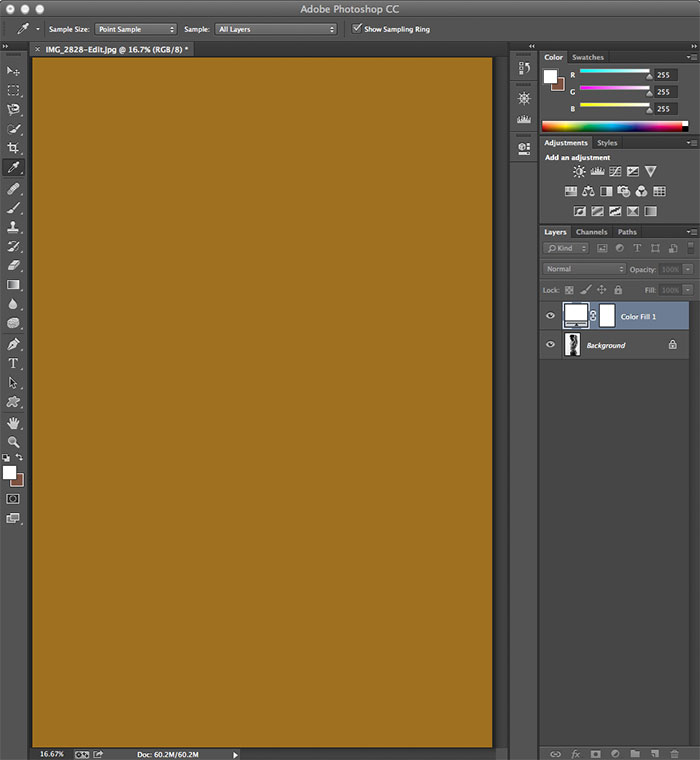
Choose a color, I’ll use something easy to see.
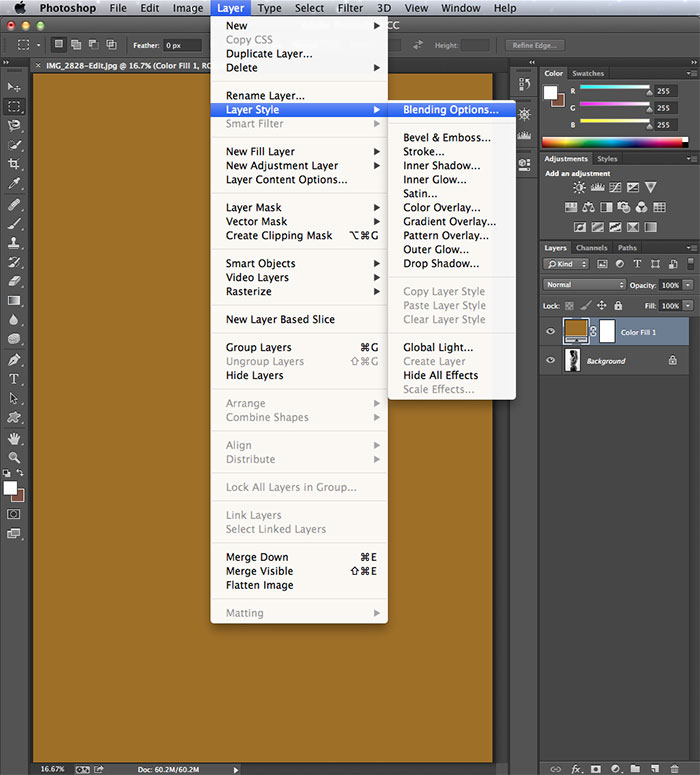
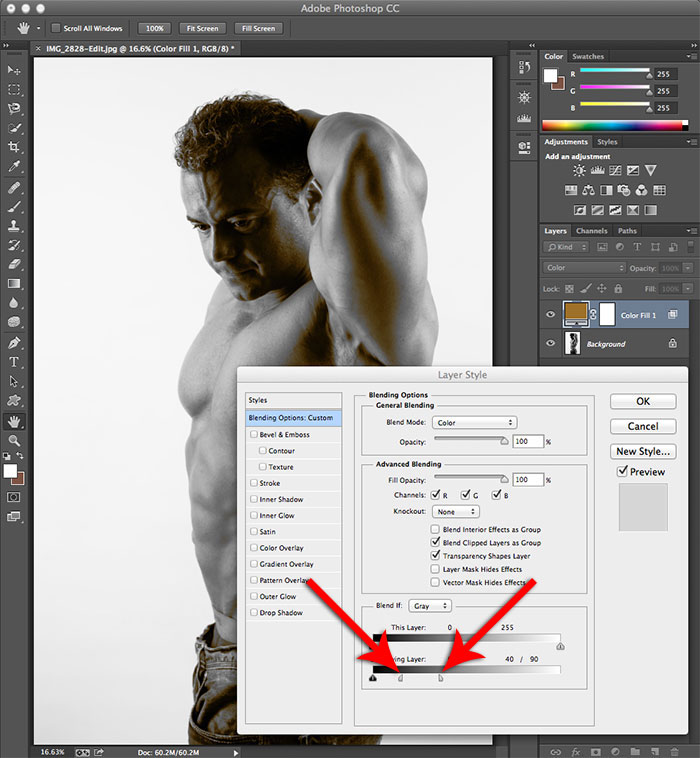
Open the Blending Options dialogue. You can either Double-click on the layer in the Layers Panel or go to Layer-Layer Style-Blending Options.
At the top, set the Blend Mode to Color.
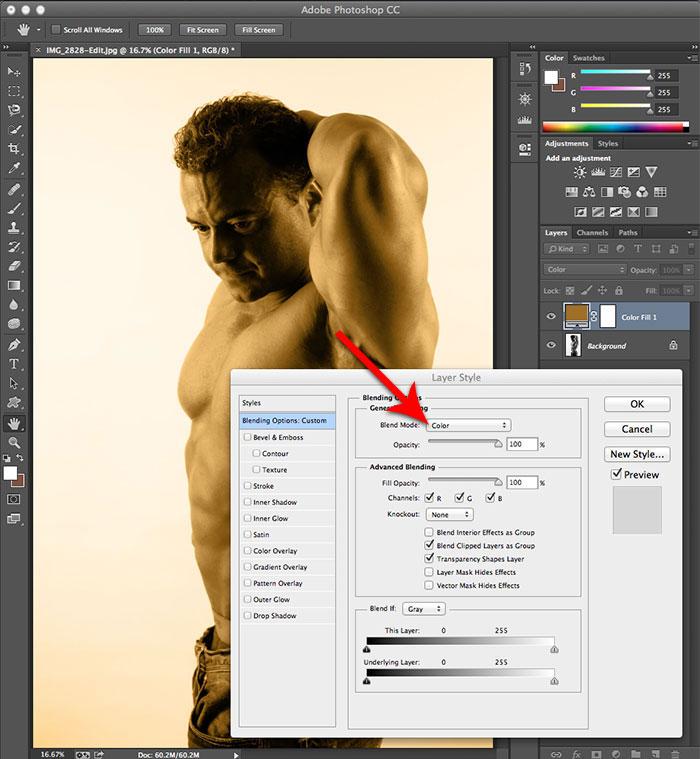
The box labeled ‘Blend If’ is where we will make our adjustments.
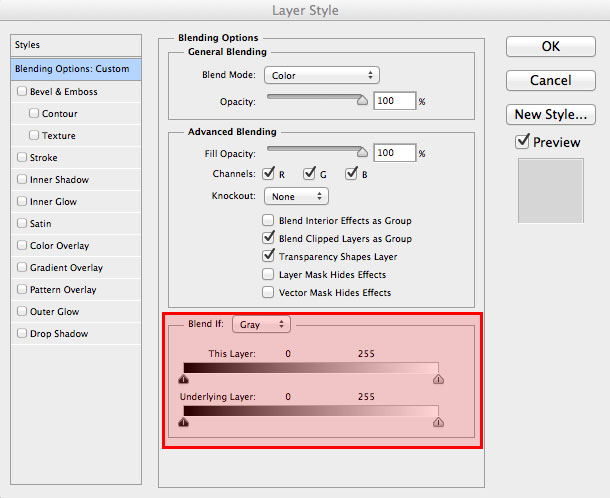
The top strip, ‘This Layer,’ will tell Photoshop to blend the values inside of the selected layer. Adjustments made here won’t do anything in this example because there’s only one value in a solid color layer.
The bottom strip ‘Underlying Layer’ tells Photoshop to restrict the effect of our selected layer (Color Fill layer) to the designated luminance or brightness value of the layer(s) beneath. This is where we want to make adjustments.

The handles are color coded. The dark handle, on the left, controls the dark output value. This is the value at which our color fill layer stops affecting the darks in the layers beneath. The right handle behaves the same way in relationship to the light values. Right now, our Color Fill layer affects all of the values of the image, from 0 (black) to 255 (white).
Grab the handle on the right (the white value) and drag it down to a moderately dark value in the gradient strip, like 60. You can see in the image that we’re only affecting the darker values.
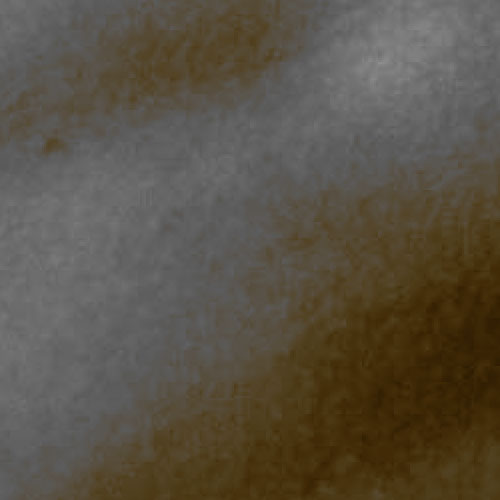
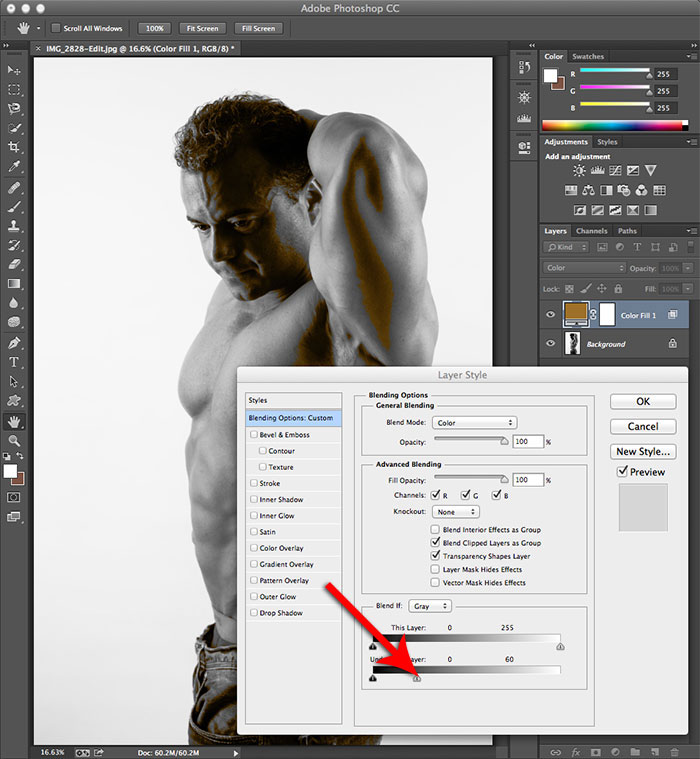 There’s one problem, the effect is blocky. Take a look at the magnified detail below. You can see where the edges of the selection are rough. This won’t work. We need to fix it.
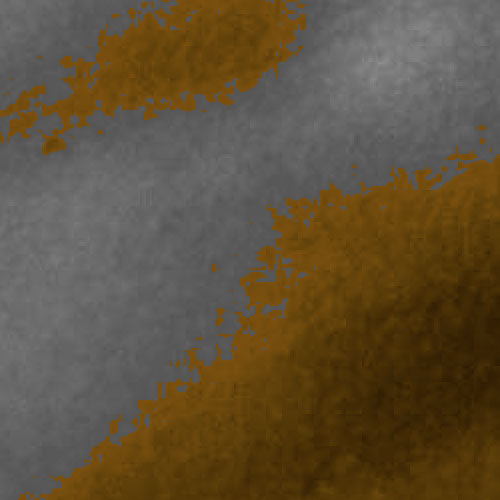
This detail is at 200% magnification.
We need to tell Photoshop to gradually affect the lighter values less as we approach the endpoint, just like feathering. To do this, hold the Alt/Option key and adjust the right half of the handle up a few values. Then do the same with the other half.
Below is a magnified shot of the same detail after we made the adjustment. The jaggies are all gone! This is what we want.
This detail is at 200% magnification.
It’s up to you to decide what looks best for your shot. I usually make adjustments to the layer opacity as well as making tweaks to the blending start and end points.
This technique can be used for virtually any effect. Use it to add color tones or try using gradients, or texture layers. You aren’t restricted to using the Color blending mode either–it works for Exclusion, Overlay, Screen, etc. The possibilities are endless.

Final, Image © jimmy beech, Model: Jason Salazar
—
This shot was of a friend of mine, a personal trainer and an aspiring bodybuilder, Jason Salazar. I stuck him in front of my camera one afternoon. He’s a good sport for letting me use the shot. Thanks, Jason!
Try Exposure Today


Cool technique.. especially the explanation of ‘Blend If’ option. Thank you!