Tony Sweet produces great photography work. In the article below, he illustrates how he makes Exposure’s black and white controls work to his advantage. The remainder of this article is from him.
—
Exposure is the best film emulation software out there. Trust me, I’ve used them all. The B&W capabilities in Exposure are on par with more dedicated B&W programs, and it has additional properties unique to itself.
#1: Silk Loom
Let’s start with an image from one of my favorite indoor “grunge” locales, the Lonaconing Silk Mill. It’s in the mountains of western Maryland. Color can work well for this shot, but black and white replicates the feeling of the old working mill more accurately.
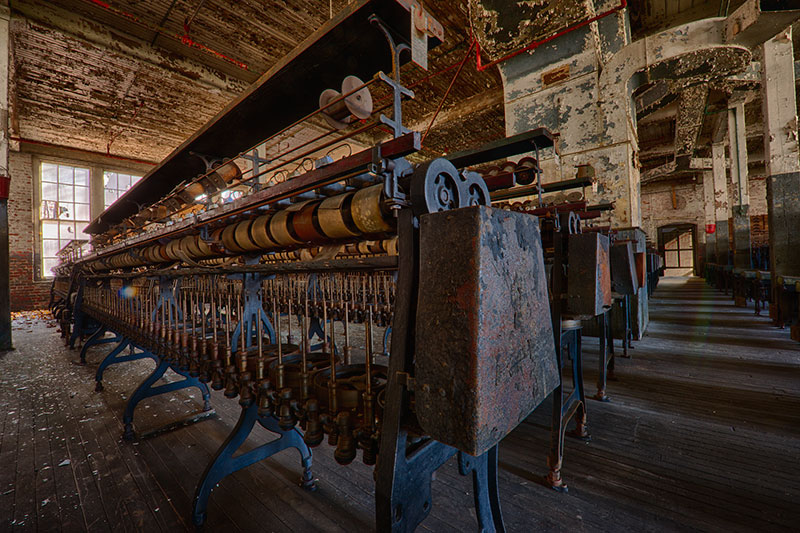
The finished color image is pictured above. It’s best to convert to B&W after the color version is finalized. The order of operation is important to get the richest tones.
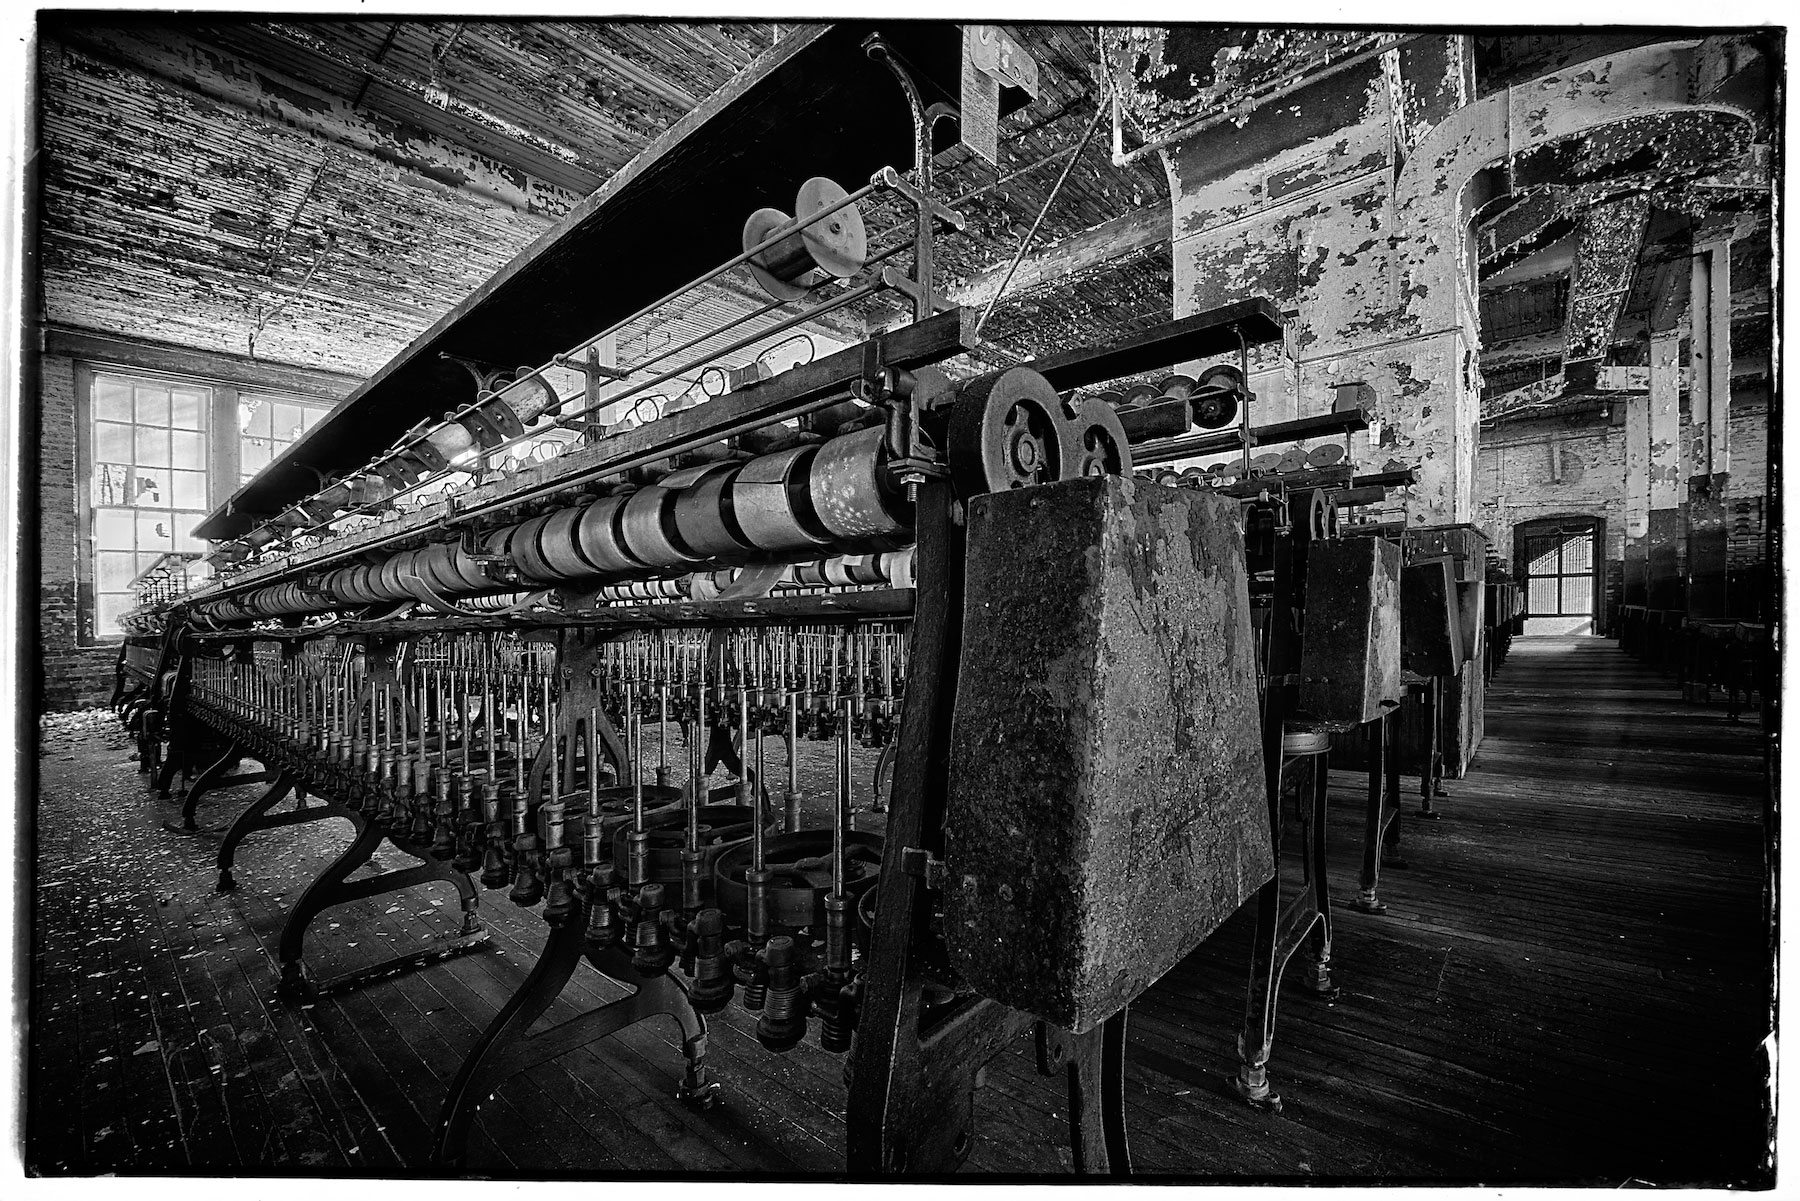
In Exposure, there are a bunch of film options in the presets panel on the left. I scrolled through the list to see what was available. I settled on Kodak TRI-X 400 with Dust & Scratches. I made one small adjustment to the preset–I added a touch of sharpness on the focus tab with one of the group presets. Below is the final.
Click on the image above to view a larger version of the final.
#2: National Building Museum
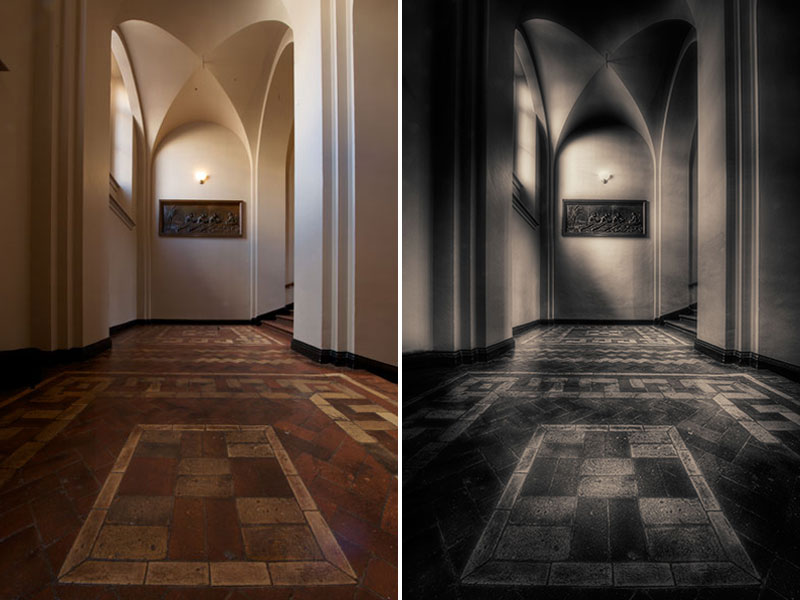
The National Building Museum in Washington, DC is an extremely cool place to photograph. It’s huge. No one bothers you, and you are allowed to use a tripod. The shadows and moody light can be pretty spectacular; those were the conditions we had during this shoot.
I suggest that you find out what time it will be the least crowded during your visit. Then you’re good to go.
I’m going to build a custom look for this image. Here are the steps:
- Leave the preset set to Neutral (B&W).
- On the Tone tab, boost the contrast to taste.
- In the Split Toning section, I chose one of my favorite presets, Platinum (warm).
- On the Focus tab, apply the Sharpen – Low Radius – 25 group preset.
The sharpening presets are unique to Exposure. The results depend on the image, but, in my experience, they are almost always effective.
Click on the image above to view a larger version of the final.
One of the great features in Exposure is on the Age tab. I particularly like the lumping and distortion controls for the Vignette. These features are unique. In Exposure, the various levels of “Lump” create uneven vignettes. I feel that this uneven-ness enhances the mood, feeling, and asymmetry of this image.
#3: Tremont, Great Smoky Mountains, TN
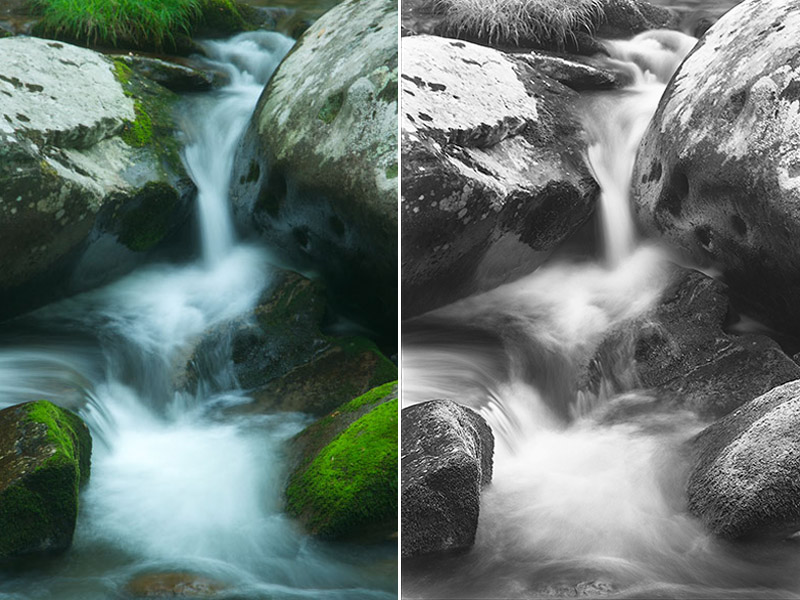
Springtime in the Smokies is always inspiring. The mountains are full of flowing water and lime green moss; both attributes make for beautiful B&W shots.
I’m going to build another custom preset for this image. Here are the steps:
- Leave the preset set to Neutral (B&W).
- On the color tab, apply the Green Color Filter group preset.
- Color Sensitivity, choose the Only Red group preset.
- On the Tone tab, choose the Harsh Landscape Tone group preset.
- On the Focus tab, apply the Sharpen – Low Radius – 25 group preset.
I made some tweaks with the sliders on the Tone tab in order to brighten the water. I increased the contrast, opened up the shadows, darkened mid-tones and brightened the highlights. It was just a few tweaks to pull out the detail I wanted.
Click on the image above to view a larger version of the final.
My advice, mix it up with Exposure. This will teach you how the very cool and unique black and white effects can add another layer of creativity to your work!
—
Tony Sweet is a workshop instructor, lecturer, author, occasional columnist, online instructor for Betterphoto.com, and is a Nikon Legend Behind the Lens.
Visit http://tonysweet.com
Try Exposure Today






Enjoying all the articles. Thanks for the info.
I’m sold. I’m definitely saving up for the bundle. I can’t wait to get more creative with Alien Skin. I also think a good editing program can even change how you shoot. When you can get creative with editing, I believe it changes how you see light and framing, even during shooting.
Thanks for all the articles and posts!
I enjoyed the presentation that Tony did for another plugin company. Just by chance, my former hobby of about 40 years ago has been “awakened” with all of the various photo adjustment software available. Unfortunately, all of my photographic equipment both camera and dark room are now just a pile of useless junk.
The camera technology is moving so fast that it’s hard to keep up. Raw seems to be the “in thing”!
I do have a digital camera, but not a DSLR, so my photographs are limited to jpegs.
Photography can be an additional asset to use with my Dye-sublimation process. With Adobe going subscription only, my choices are Corel and Lightroom which I both have.