My man Felix Kunze is back on the blog with a neat workflow tip for all of you. In his last article, he mentioned a shoot he did in Taiwan with Melany Bennett. We didn’t go over too many details about the shoot, what he did to the shots, or what the shoot was all about. Let’s talk some of the nitty-gritty in this article.
In a loose convo between us, Felix mentioned a few pivotal editing practices with Exposure. I benefited hugely from his advice. Of course, I didn’t let him know that. It didn’t cross my mind to use the software in the way he does. Shh… don’t tell him. I’ll never hear the end of it. Later I combed through our emails and put together his workflow.
The Shoot:

‘Do you like this dress?’
‘I know where we’re gonna shoot it, can you open your eyes in the sun?’
‘just count me in’
’1, 2, 3, open up’
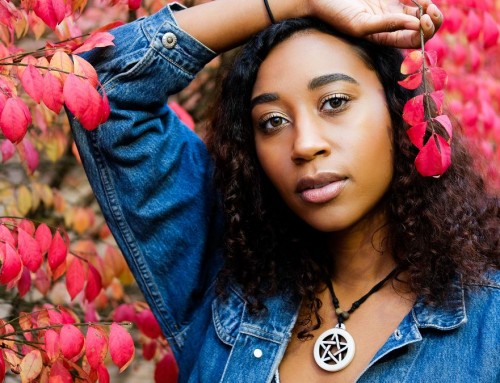
Melany Bennett and I found ourselves free for several hours at a time while visiting Taiwan for a charity project. During our ‘off time,’ we combined our fun explorations with a little shooting. It was just for grins, we made a ‘lost in Taiwan’ story of sorts. The way the story unfolds on my website is a representation of the free-flowing, no-agenda hours we had when we weren’t committed to our other project.
I mention ‘Hair by Melany, makeup by Melany, wardrobe by the check-in man that let you take an extra suitcase,’ and it really is true. She is blessed with a naturally beautiful face and lovely cascading hair–not much makeup or hair styling was needed. When I first met her, she had just gotten off her flight with a bunch of suitcases in tow. Her response: “The airline let me take an extra bag.” So a big thanks goes to the check-in person for letting Melany take more. The extra wardrobe made our DIY shoot much easier, and much more diverse.
Personally, the last time I did a project like this was at the beginning of my career. It was a freeing and inspiring phenomenon to simply shoot for the pleasure of shooting again.

‘Jump in, we’ve got all these locations written in Chinese for the cab driver, show it to him’
‘Is this place on there?’
‘Yes, I think it’s this squiggle here’
The Edits:
Exposure’s split toning blew my mind. My absolute favorite: Cyanotype. I’m happy to share my little workflow tweak that Jimmy went crazy over. Gosh, he’s a handful, isn’t he? Here’s what I did.
I chose one of the first shots in the shoot, had my way with the sliders to make the look just right, saved the preset, and then used it for the rest of the shoot. After I finished the first image, I based the rest of the settings on the master preset.

‘You seriously want me to pose with a juice box?’
‘Just throwing it out there’
‘Just tell them I think it’s ridiculous, tell them I’m ridiculing myself’
‘I’m sure they’ll think that anyway’
I processed just about everything in chunks of photos. I would change little bits on the contrast and grain as the shoot went along. The images grew subtly stronger as I made adjustments. I thought the photos toward the end felt much cleaner and not just because of the location. The growing tone, contrast, and grain enhancements really helped bring the shoot together and helped tell a stronger story.
Now I can’t live without Exposure. I like to think of it as my little secret. People have asked me how to achieve certain tones, or the look and I simply can’t stop myself from recommending it!
—-

‘Hair by Melany, Make-up by Melany, Wardrobe by the check-in guy that let me take an extra suitcase… What are we doing here, Felix?’
‘Being happy’
Handful–Really? That’s all you got, Felix? I prefer something more catchy. How about ‘Señor Super Cool’ or ‘Master of Awesome?’ ;-)
Felix’s class on CreativeLIVE starts up today. Hurry on over to see him and Sue Bryce for “The Lighting Challenge–Natural vs Studio.” Sue is speaking on natural lighting scenarios, while Felix speaks on using studio lighting setups. This is Sue’s first experience with studio lighting, so she’ll be asking Felix plenty of questions, even the ones that we’re either too afraid or too embarrassed to ask.
Interested in the course? Enroll here.
Try Exposure Today


Very nice pictures!
Would you be able to let me know which preset from ASE has been used for above pictures?
Arek
Hi Arek,
Felix shares a lot of what he does in Exposure in his classes on CreativeLIVE. Most of the time, he picks through the Polaroid presets and adds split toning from the Tone Curve panel. Here’s a link to his current class: http://www.creativelive.com/courses/lighting-challenge-natural-vs-studio-sue-bryce-and-felix-kunze