Fashion and glamour photographer, Andrew Foord, returns to the blog with with a humorous take on the importance of timing. If you missed out on his introduction article, check it out, here. The rest of this article is from him. Thanks, Andy!
—-
Ask me why I’m such a good comedian…Okay, why are you such a goo–TIMING!
I know it’s an old joke, but it gets the point across. There are many reasons why timing in photography is so important, but let’s not just talk about them, let’s look at a few examples, too.
You’re probably wondering what the perfectly timed shot looks like. Don’t worry, we’ll get to that in a minute. Let me give you a little background for the shoot, first. For this series, I wanted to get messy, really messy. If you haven’t done a messy shoot like this before, give it a go. It makes for a low-stress environment when everyone is laughing and having fun.
Lighting and Camera Settings
I needed to light the powder from the side in order to preserve its texture. One strobe with a silver beauty dish and grid did the trick. It was positioned slightly elevated above the subject, tilted down at a 45 degree angle. I used a silver reflector opposing the model to fill in the shadows of his face and neck.
The strobe was set at full power, and I used my trusty light meter for proper exposure. I set my light meter to 1/200th of a second–my camera’s maximum sync speed–with 100 ISO. The meter gave me an aperture value of F/13. Below is a diagram.
Shutter speed, strobes, and freezing motion
Speaking of sync speed, let’s pause here for a moment. I hear a lot of photographers use this term in the wrong context, so let’s make sure we’re all on the same page. Sync speed is the maximum shutter speed for which the curtains are completely open at the time of exposure. This is when the flash fires. Every camera and strobe models have different sync speeds, which you can easily discover in the manual or online.
As a rule of thumb, a good shutter speed to use with studio strobes is 1/125th of a second. Some strobes let you shoot with a higher shutter speed, but it may require a little research before you can start clicking off photos. If you’re just getting started with using strobes, set your camera’s shutter speed to 1/125th for now. This can produce a crisp freeze motion shot; however, the freezing doesn’t come from the camera, it comes from the light.
The flash lasts only about 1/1000th of a second. A fast pop combined with low ambient light and a small aperture–F13 in my case–the camera sensor will only ‘see’ the light from the strobe.
Timing
With my camera and lights in place, the next thing to focus on is… you guessed it, timing. I advise everyone to shoot with both eyes open. This lets you keep one eye in the viewfinder for composition and the other eye on your powder-thrower. I told my assistant, the models 7 year old daughter, when I count to 3, throw the powder–hard, try to hit your dad in the ear and knock him off his feet.
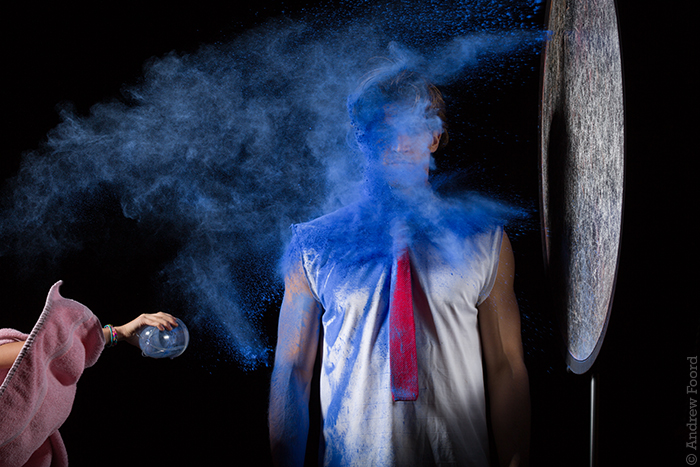
Always account for human error when you’re on set. Not on the photography portion alone, but with your assistants, and models as well. My assistant did a superb job of hitting her dad in the face with the powder, but when my count got to 3, she would pause a moment before throwing. It’s not a huge deal, most of the time, but this reinforces my shoot-with-both-eyes-open suggestion.
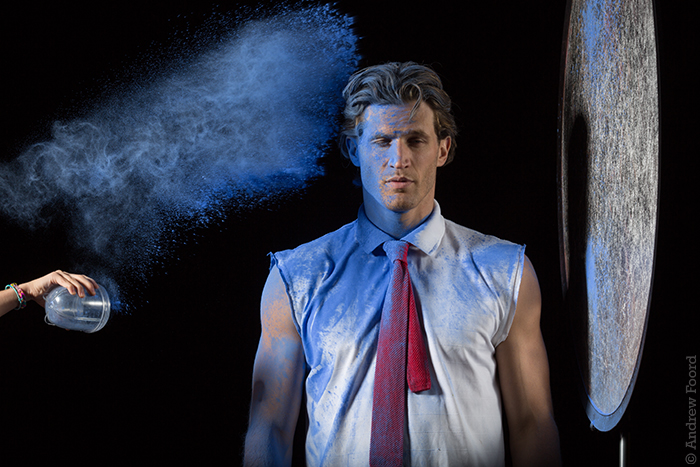
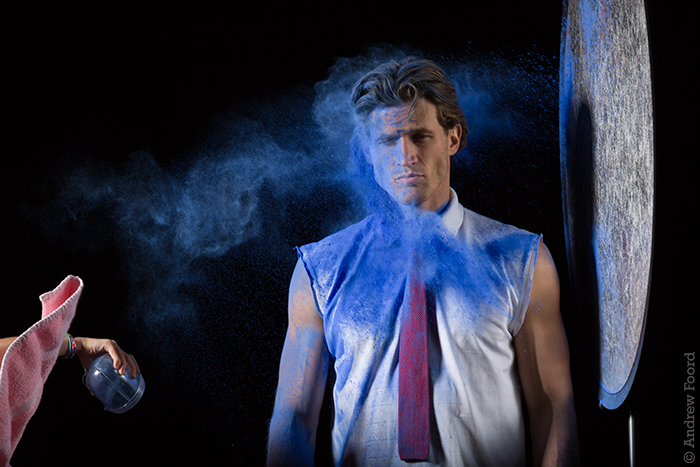
As you can see in this photo, the powder is just hitting the side of his head, and we can still see his face clearly. This was the shot I wanted. It wasn’t easy, and luck played a part in it, but I ended up with an awesomely timed masterpiece. It was a great experience, and a lot of fun. Give it a try!
Try Exposure Today


