I’ve had the pleasure of using Exposure X for a couple of months now, and I love the new brush feature. Not only is it great for layering filters and effects, but it’s also pretty handy for portrait retouching. In this dodge and burn tutorial, I’ll show you how to use the brush tool in Exposure X to do global and local dodging & burning and give your portraits a beautiful, natural polished look.
Dodging and burning (D&B) is a technique where you selectively lighten (dodge) and darken (burn) areas of an image. In the case of a portrait, which is what I use in this article, this means areas of your subject’s face.
Global dodging and burning sculpts and contours the face in a similar fashion to makeup. Local dodging and burning happens at a micro level to even out the appearance of the skin. When performing either process, I suggest that you do local work first before moving to global. There are several methods you can use to apply dodge and burn to an image. The method I discuss in this dodge and burn tutorial is using a brush with a tone curve adjustment applied to it, similar to how I would do the same thing in Photoshop.
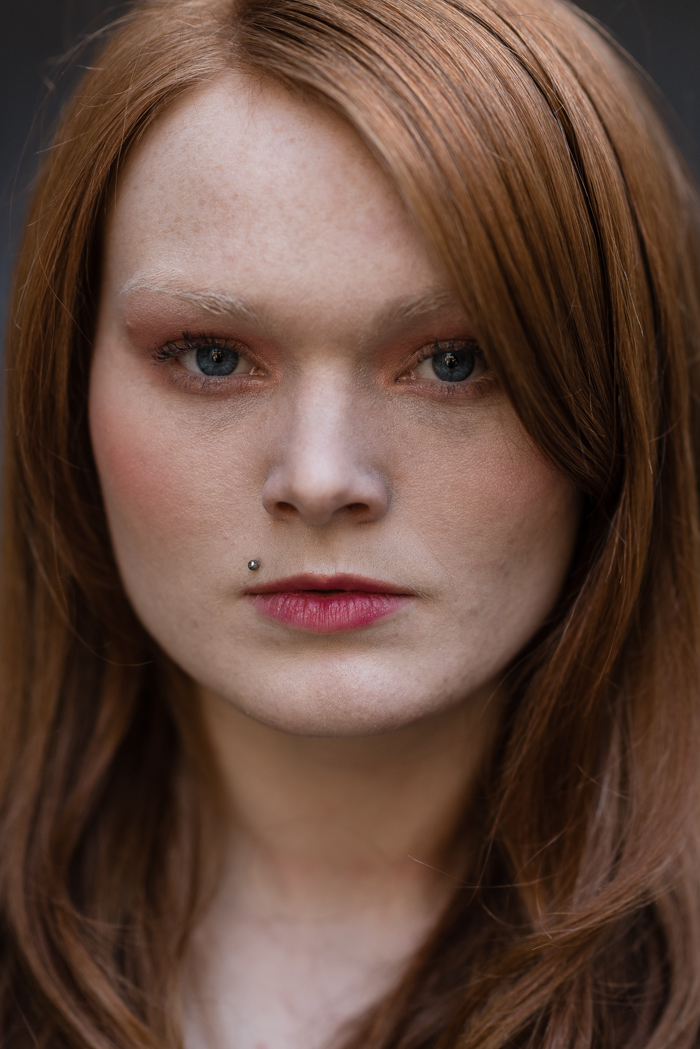
Let’s take a look at an image. This is a portrait I snapped of Emily at the end of a session. There is natural light coming from straight in front of her and the image, while nice, looks a bit flat.
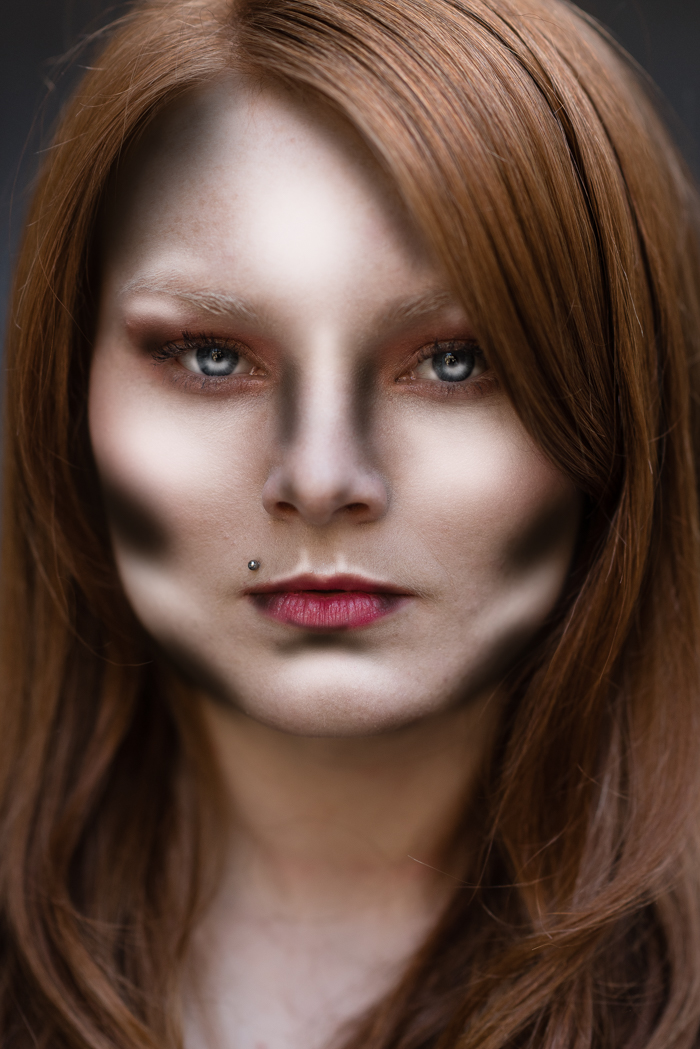
In the following picture, I painted areas of her face with exaggerated strokes to demonstrate the technique globally. The dodge (white) and burn (black) are used to add more dimension to her features. I’m aiming for a natural look to this image, so I want this to be more subtle, but you can choose a more dramatic look if you prefer.
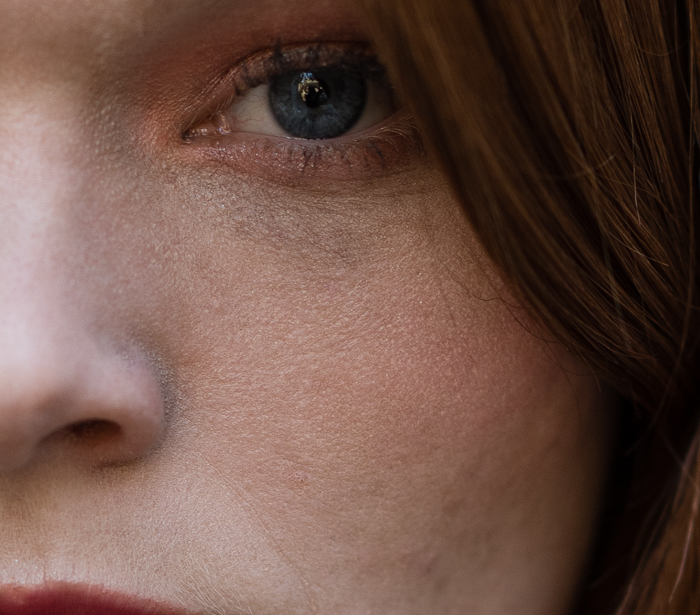
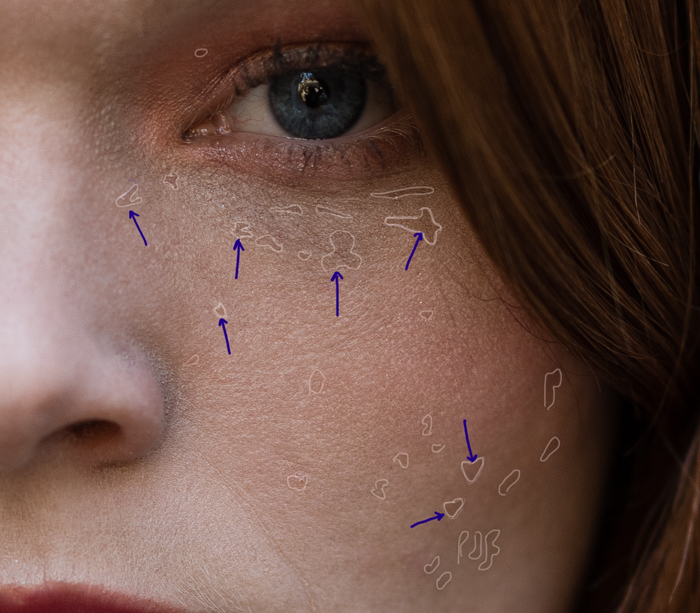
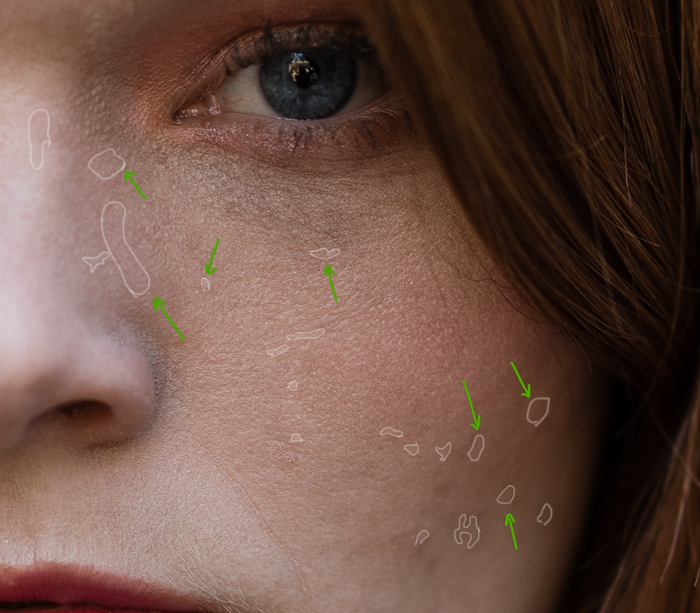
If we zoom into the image, we can see that areas of her skin are patchy due to how light reflects from and how shadows are created by the texture of her skin. She has natural freckles which make those areas of her skin darker as well. I don’t want to obliterate her freckles. I just want to even out her skin, and tone down some freckles that could be mistaken for blemishes for this portrait.
The Technique
Open up the image in Exposure X and press Reset (⌘R on a Mac or Ctrl R on a PC) to reset all controls to their default values and make sure nothing is being applied to the image before you start.
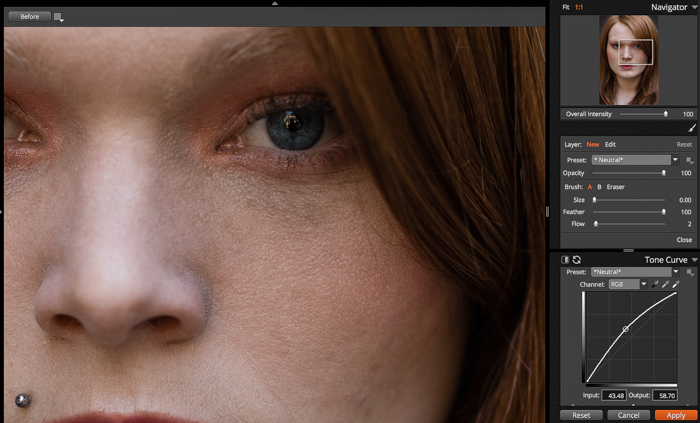
To create my brush for dodging, I click on the Brush icon (F5 shortcut) and in the brush panel I make sure the word ‘New’ is highlighted orange.
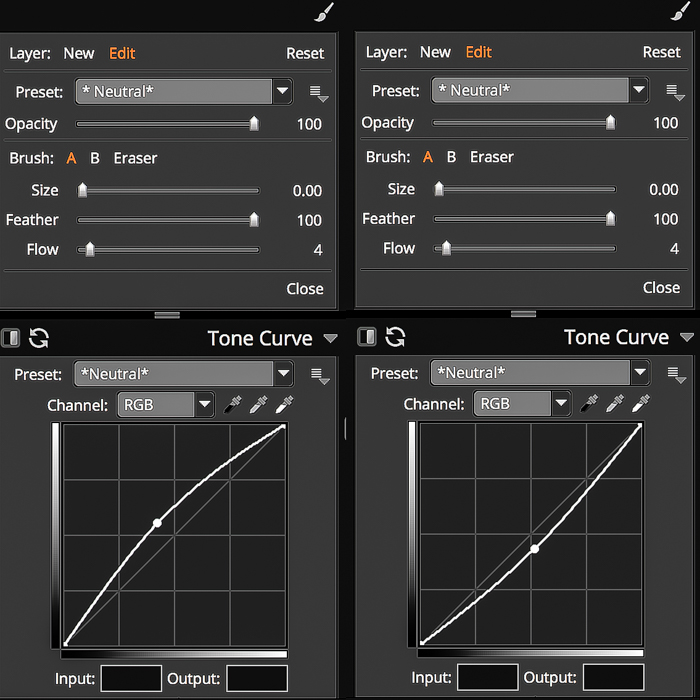
There are plenty of presets available in the drop down list if you know what effect you’re after. I prefer to use curves to make adjustments, because of their flexibility. I can adjust the curve up or down later in my editing process if I use a curve this way. Most retouchers would use a curve adjustment layer for this kind of effect. So I’m demonstrating this process using the same methods I do in Photoshop.
After I make a choice, in this example it’s Neutral, I scroll down to the Tone Curve panel and pull the curve up slightly from the middle. This sets the curve effect on the layer I create for the dodge brush.
I adjust the size of brush A all the way down to zero, set feathering to 100, with a very low value for Flow (between 2 and 4). Then, I’m ready to start brushing. I will do a lot of this work zoomed into the 1:1 ratio, but I recommend that you zoom back out to Fit view on occasion.
During local D&B, I will swap between the dodge and the burn pins as I work on an area, rather than doing all the dodging on the whole face and then all of the burning after. This helps me make sure I don’t go overboard on either the dodge or the burn. In many areas, you want to meet in the middle, rather than bringing everything up to the lightest part, or vice versa. You can adjust the feather and flow settings to meet your needs for the location you’re working. Just remember that using a low flow and going over an area multiple times gives you more control. It’s faster than altering the area way too much with higher flow and then having to erase and start that area again.
Here is the image after I finished all the local D&B. You can see that her skin is much more even.
After finishing with local tweaks, I move on to global D&B. If this seems like a lot of work, well that’s true, it can be. I assure you that the effort is worth it. All the skin texture remains, there is no appearance of the skin having been blurred, and it looks very natural.
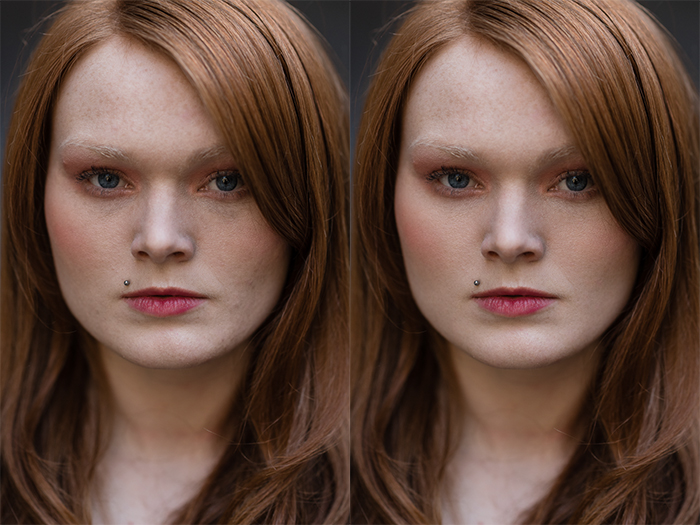
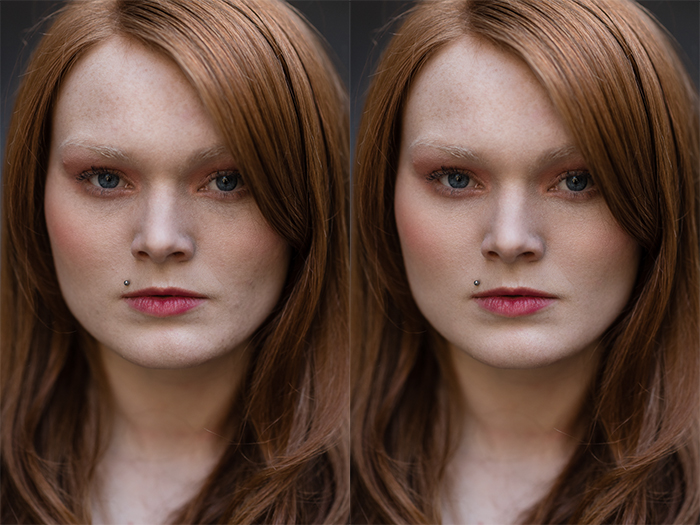
Below is a side-by-side example of why local dodge and burning is worthwhile. Our starting image is on the left with only global dodge and burning applied. On the right is a shot with the same global tweaks along with the local adjustments, too. There is a noticeable difference between the two images.
The image below includes the local D&B. It looks more refined and the skin has a great-looking, natural feel to it. In my opinion, the time spent performing dodge and burn was well worth it. I finished the image off with a touch more local D&B to the eyes and lips, and I applied a personal preset based on the Color Films – Polaroid – Polachrome preset. I then used the brushing tool to selectively sharpen areas such as the eyes, and to apply grain while keeping it off the skin.
I hope you like the finished image and that you found this dodge and burn tutorial helpful! The best part is that our entire retouch has all been accomplished inside of Exposure X. It’s a great option for those who don’t have the patience or access to Photoshop or who don’t want to use other programs which can blur the skin giving an artificial look.
Try Exposure Today






Interesting article!
Very informative. Thank you. I’ve been using Exposure X as a quick option on my Macbook when away from the power of my iMac. I’m finding it an excellent environment to work in. Great tips here. Thanks.
Great read, thank you!!