I first started using Alien Skin Exposure nine years ago. It was a clever Photoshop plug-in that made the job of giving a film look to my digital files much more convincing than was possible in Photoshop. I worked on 16-bit TIFF files and exported the final edit. If I wanted to make further adjustments later, I had to bash even more pixels. With the arrival of Alien Skin Exposure X, the application has grown up. At its heart is an effortless design that keeps you editing in the moment instead of fighting the distractions of technical gizmos during post processing. Exposure is the path to easy photo editing.
An Easy Photo Editing Workflow with Exposure X
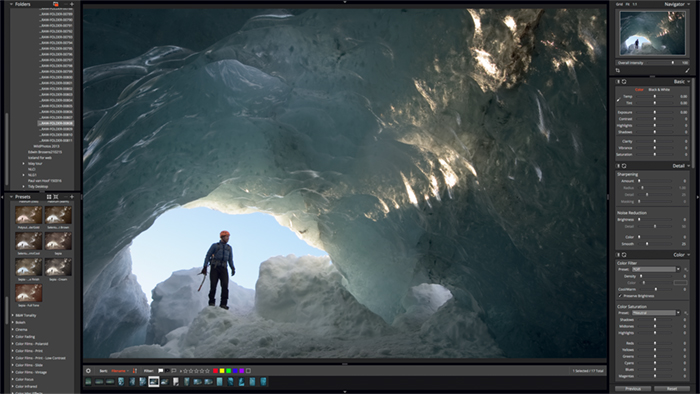
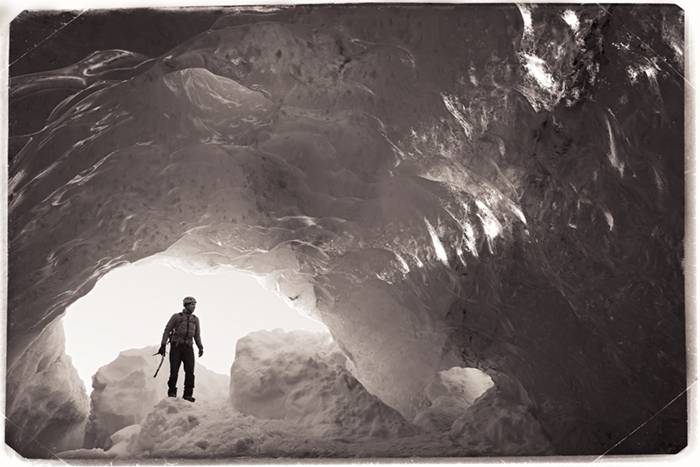
The best way to explain how easy it is to edit your images with Exposure X is by demonstration. I’ll use a recently made image taken in Iceland. This one shows our guide, Einar Sigur∂urson, entering the Crystal Ice Cave, which he originally discovered. This and other caves under the Vatnajokull ice sheet are rapidly retreating as the ice sheet shrinks, so I want to create an effect that suggests this photo was taken in the past, so now it’s only a memory. The effect I choose has to support the intention of the picture, rather than to simply “look cool.” Exposure has many presets suggesting “the past” that will work well with my vision for this shot.
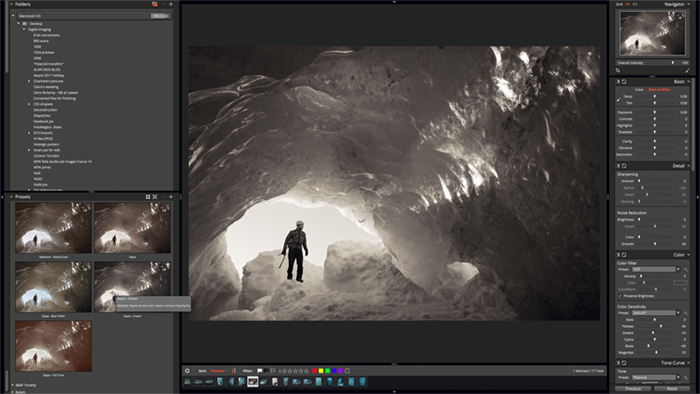
Before applying any other adjustments, I choose a preset. Previewing effects is as easy as hovering over the palette of presets and viewing the image in the main window. It changes to show the effect you mouse-over. There are so many choices! Much of the journey through Exposure is one of exploration. It’s a fun, easy photo editing process. Simply look through preset options to see if they serve the cause. For this image, the Color Sensitivity – Orthochromatic preset has a transformative effect that opens up the lighting where it’s most needed.
Note: While you are processing, you can see your starting point most easily by holding and pressing the space bar or key.
Whether I’m editing a regular picture or applying filters, my first port of call is always the white balance selection tool. It might seem counterintuitive to use this with a monochrome image but in fact, sampling off a neutral part of the image (without a color bias) improves the overall tonality. A nice touch here: while the image is in monochrome, the sample inspector shows the colours of the original image, making sampling much more reliable. This handy tool is just one of the easy photo editing capabilities of Exposure.
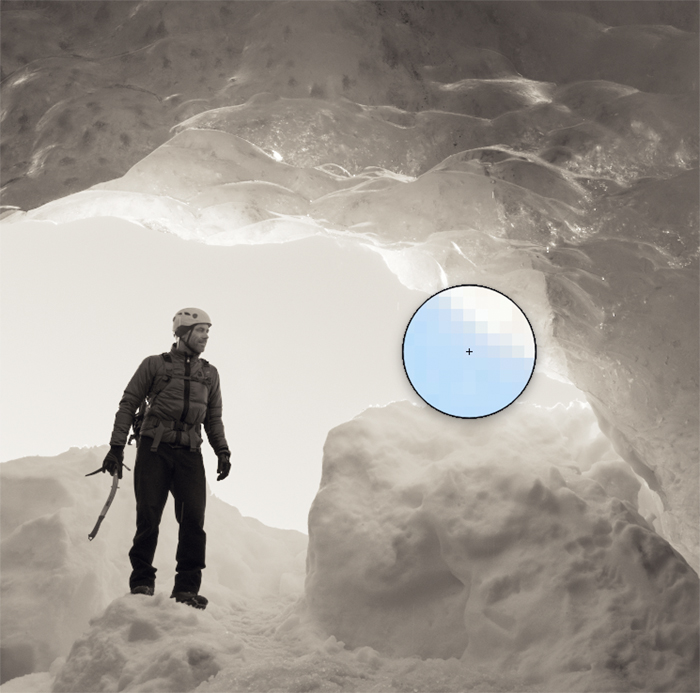
I’ve opted for a Sepia-Cream split tone in this image but I can manage the colour balance and relative split with the controls on the Tone Curve panel. After much sliding about of both colors, I discover that the preset produces the best balance and needs no further editing.
I love Exposure X and believe it is a major step forward for Alien Skin as it shapes up to provide a real alternative to the established image editing solutions, as well as to make easy photo editing still provide substantial creative potential.
—
If you’re interested in more fresh ideas and new ways of shooting nature, my latest e-book, You are not a Photocopier: from snapper to artist in six lessons is available from my website:
Try Exposure Today


