
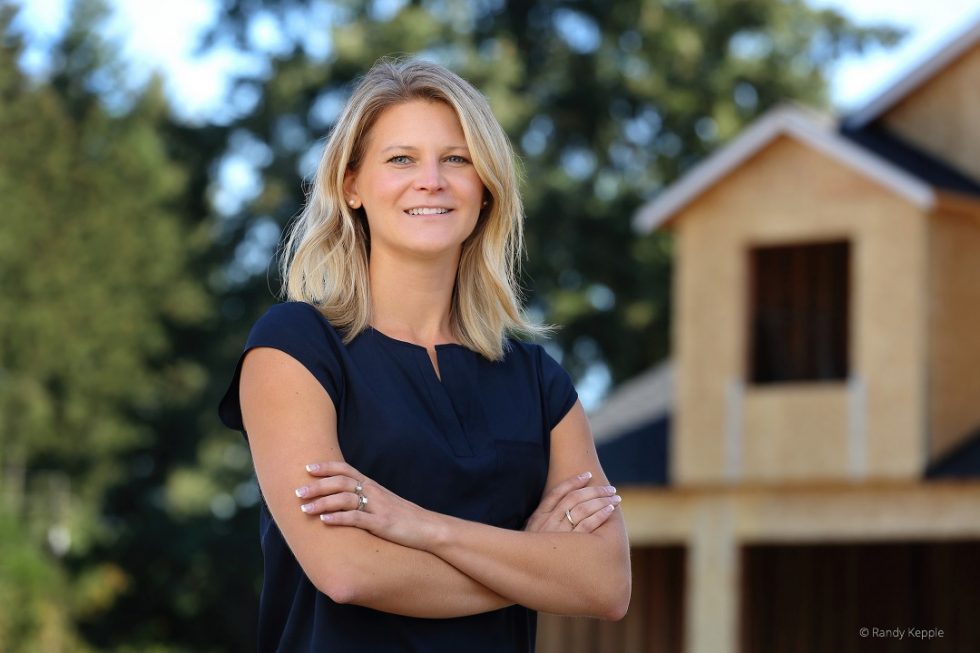
A professional headshot is the calling card of digital identities.
When it comes to the business of photography, whether you’re just starting out or a seasoned professional, one of the essential skills you can master is the art of the headshot. Actors, musicians, politicians, business professionals, and singles looking for love all need great headshots. It can be a great source of diversified income or the entire focus of your business.
A professional photographer’s workflow is built on three basic cornerstones — speed, consistency, and quality. Exposure is designed from the ground up to be a centralized solution in your workflow without monthly subscriptions or bloated catalogs. Exposure helps you work quicker, maintain consistency in your work, and preserve a high standard of quality, with lots of creative tools.
The biggest pain point in professional photography, especially headshots, are the time constraints. It’s easy to lull yourself into thinking you can fix it later in post production, but this is going to kill you on the back end. Taking the time to maximize your workflow, from capture to delivery, will save you countless hours on the backend. Let’s take a look at how Exposure fits perfectly into a headshot photography workflow.
Preparing for Success
Testing your setup in each new location is an important step in maintaining consistency in your headshots.
Typically, you pick a location, set your lighting and exposure, and go. My best advice is to use whatever method works for you to nail your exposure. Use manual camera settings for f/stop and shutter speed, set a custom or manual white balance (eliminate auto settings) and minimize any variables. Remember, consistency, quality, and speed will earn you money in the headshot photography business.
My basic corporate headshot lighting is typically a traditional 3-light setup. A main light (large octabox with grid), a background light (8-inch reflector with a 30-degree spot grid) and a hair light (strip bank) and a reflector. I prefer shooting with a 70-200 towards the long end of the lens. The compression lends a cinematic feel and is very flattering for headshots. My exposure is normally f/11 for the main light, with the background and hair light at f/8.

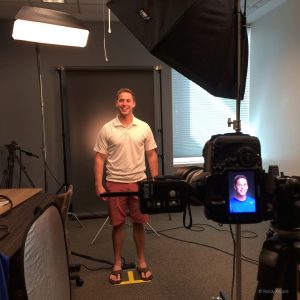
When shooting a lot of photos in one setting, tethered shooting can save you a lot of time. This setup was used for a recent corporate client, who purchased headshots for over 400 employees.
Sometimes, I prefer shooting tethered to my laptop. Exposure’s monitored folders feature is great for photographers wanting to shoot tethered. It used to be that shooting tethered meant dealing with a lot of technical issues and was isolated to the realm of commercial advertising studios with huge budgets and a team of assistants. Technology has simplified the entire process to the point that it’s practically plug-and-play. If you decide to shoot tethered, test the workflow a few times before your shoot. Don’t wait until you’re on set with your client!
The reasons for shooting tethered could easily be the topic of an article on its own, but the primary benefit is confidence and feedback with your subject. When it comes to headshots, this is invaluable. You can show them in real time what works, and what doesn’t work, as well as how to look more dynamic and engaging.
Simple: Because No One Likes Complicated
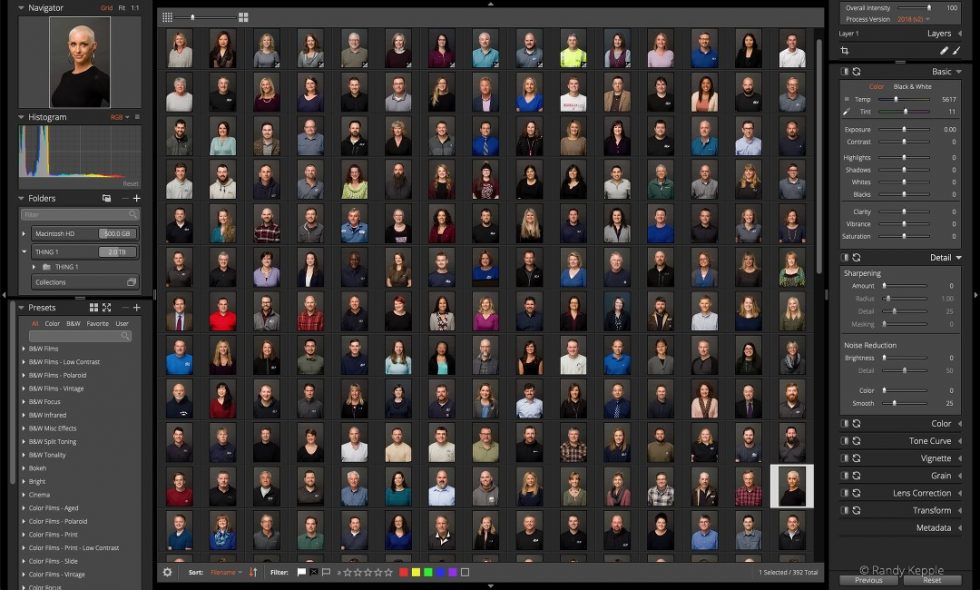
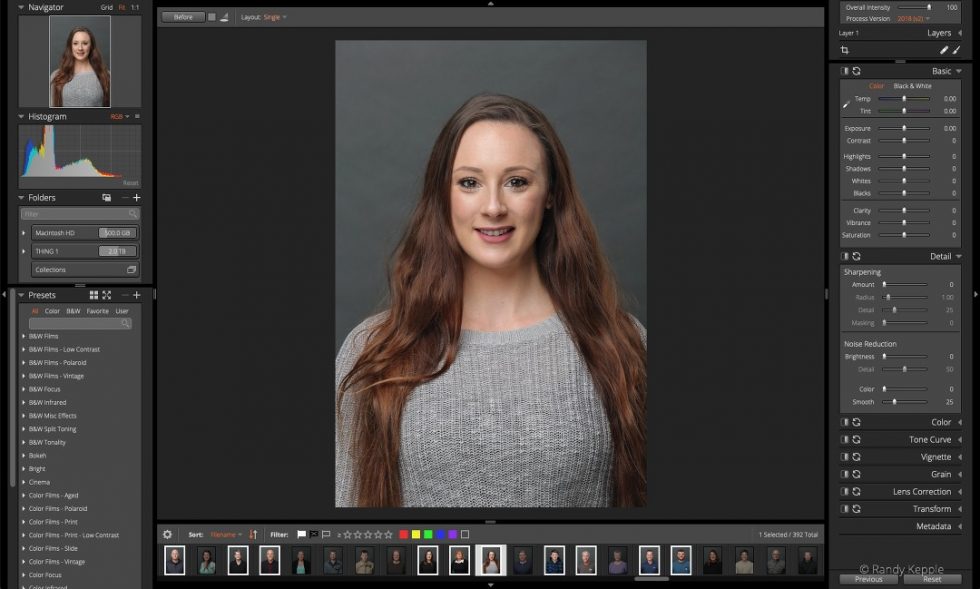
Exposure streamlines photo editing, enabling you to efficiently view, select, mark your favorite images, and apply creative edits without changing modules.
First of all, Exposure is fast. One of the reasons it’s so fast is because there’s no importing, catalogs, or complicated and confusing filing systems. Simply point Exposure to a folder on your computer and you’re instantly up and running. Previews at full screen are instantaneous. That means you are culling and editing your shoots quicker.
There are tons of organization options to bookmark, flag, rate and sort images just like Lightroom or other software. Unlike Lightroom, you can make changes to your file systems outside of Exposure and those changes are automatically updated in Exposure. You have the freedom to move, rename, and add folders. The filtering and organizational tools in Exposure are intuitive and deceptively simple in speeding up your workflow.
Quick tip: All my client files are on an external hard drive, and the first time I launched Exposure, I was only seeing my laptop’s internal hard drive. To access files on external drives, you have to click the plus icon in the Folders panel and bookmark those drives.
Exposure’s interface features panels that are customizable. Set it up the way that you like. Go into the preferences and toggle on/off the panels you use. No need to dig through confusing menus or hidden settings to discover controls. You are always working in one workspace.
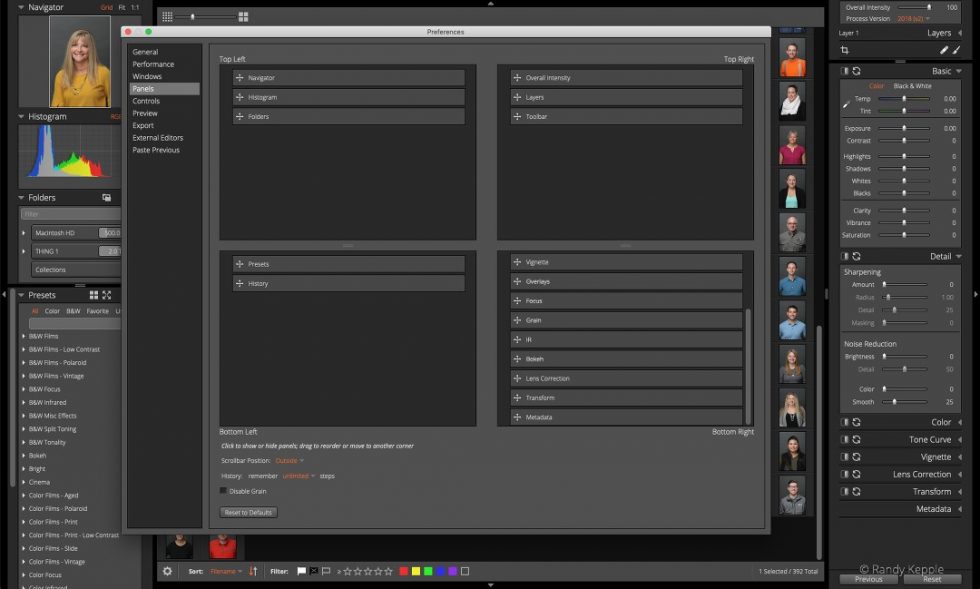
In Exposure’s preferences you can easily move control panels between quadrants, or hide panels you don’t use.
All of your edits (RAW or JPEG) are saved to a small sidecar file, and stored in a folder that lives with your originals. No bloated catalog files taking up GigaBytes of hard drive space. Best of all, these changes are non-destructive and you can always go back to your original file.
Pro Tip: Culling Your Selects
My edit (culling) process is an “edit-in” method. This one took me years to wrap my head around. I’m still not sure why it works as well as it does, but it’s the best thing I’ve ever done.
The edit-in method is similar, in theory, to the days of film and contact sheets where you’d circle the frames you wanted to print. Exposure replicates that as a digital contact sheet. Double-click your first image and it will fill your screen. Using the left/right arrow keys, you can quickly navigate through your entire shoot. Use the Shift and +/- keys to (pick/reject) photos and automatically advance to the next image.
In Exposure, photos rated with pick flags are highlighted in grid views, and photos with reject flags are darkened.
The culling process is the bane of my existence. I used to dread it more than any step in the process. Learning to edit-in, instead of selecting which ones to delete, was a paradigm shift.
Quick tip. It’s essential for me to take the time to properly set my lighting, exposure, and white balance, so my files are very consistent. Then, rather than waste time tweaking RAW development settings in Exposure every shoot, I save my settings as a custom preset. Exposure can automatically apply those custom presets to my images. It’s a great time saver!
Professional Grade Tools
Ideally, the perfect software for any photography workflow is the one that gives you all the tools you need to get your work done. Exposure closes this gap nicely with everything you need for a headshot photography workflow.
Whether your images are on a network drive or you work in various locations (home, studio, plane), your edits are automatically saved and dynamically updated in real-time. No need to worry about quitting in the middle of an edit session and losing all your work. You can even share your editing library between computers (Dropbox, network drives), which is really helpful if you like to bounce between working on your laptop and a desktop.
Once you have culled your shoot down to your selects, all you have to do is select the first image, adjust your settings for the perfect RAW conversion, copy those settings, select all the images from your shoot and paste those settings across the entire set of images. Bam! Check, please!
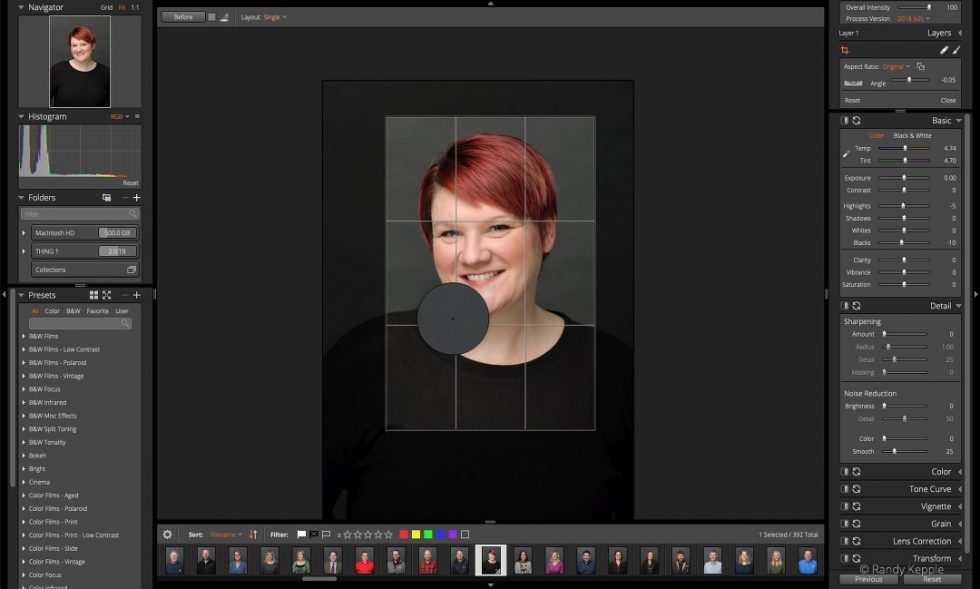
Use the color picker tool to automatically set white balance based on a sample area. Shown here, it’s used to make sure the grey backdrop is neutral.
After selecting the best images for my client, setting up the RAW file conversions and cropping, the next step is applying metadata to my images. There are a number of reasons for doing this. It’s always a good idea to embed copyright information and licensing as metadata with your images. I always like to add client information as well (location, description of the job, whether there is a model/property release, etc.). This metadata is embedded in your file when you are ready to export your images, and helps to underline your copyright and licensing with clients. You can also apply metadata to your files on ingest if you are downloading directly from your camera’s memory card to your hard drive through Exposure.
The final steps before exporting your images and sending them off to your client are retouching and creative styles. Exposure has the tools you need to remove blemishes, whiten teeth, skin softening, brighten eyes, and using the brush tool, you can selectively apply your edits.
You can stack styles and effects in layers, similar to Photoshop, and change their opacity to really dial in the look you want. And if you’re a fan of keyboard shortcuts (essential for workflow), there are lots of keyboard shortcuts for superfast editing, organization and navigation.
Final Thoughts

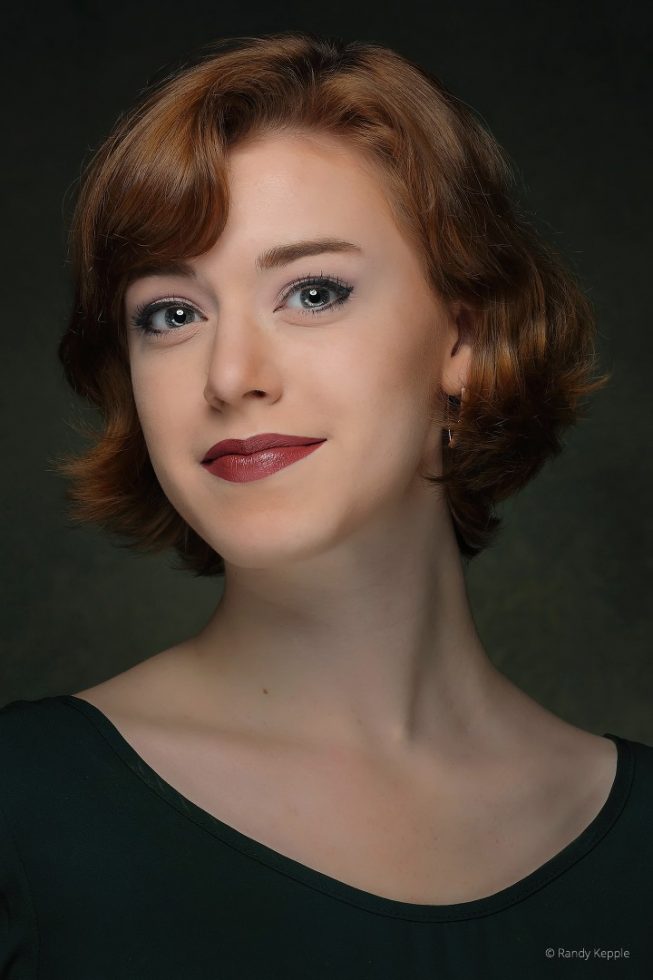
Headshots may not be the most exciting type of portraiture to shoot, but they can still capture a lot of your subject’s personalities.
A good headshot can change people’s lives. That’s not an understatement at all. If they look good, they feel good, and if they feel good, they’re confident. There’s nothing more rewarding than seeing your clients getting promoted, elected into office, landing the role of a lifetime, or finding the love of their life. All because of a great headshot!
Whether you’re a casual shooter or a professional photographer, you’ll appreciate the creativity, simplicity and flexibility of a workflow with Exposure at the center. Work smarter, not harder. Download the free, fully-functioning trial and see for yourself.
In terms of facial expressions, several options can work well for each subject and still fit within your clients’ needs.


