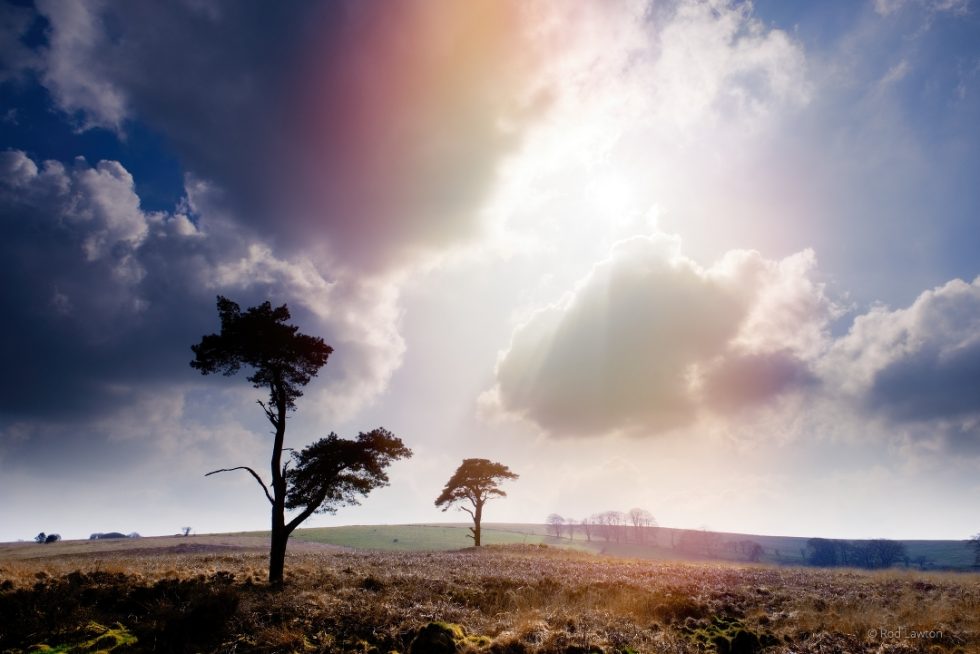
Like many photographers, I’m fascinated by landscapes. They can be spectacular, beautiful and evocative, but sometimes the very literal interpretation captured by the camera doesn’t quite match our perception of a place and the effect it has on us. Sometimes it’s necessary to simplify, isolate, exaggerate, and intensify aspects of the picture to properly capture the impression it’s left on us, and which we want the viewer to share.
When we experience a scene, we do it with our eyes, our minds, and our imagination. The camera can’t do that on its own, so that’s why we need photo editing software like Alien Skin Exposure X4! It’s particularly well suited to recapturing the fleeting moods and impressions we felt at the time.
So here’s a short guide to how I see and capture landscapes and some of the tools I use in Exposure X4 to capture the light, colors, and mood that these scenes evoke.
Transform Tools
First, some practicalities. If you use an extra-wide angle lens to capture a landscape and your camera is angled upwards to include the full height of your subject, you’re going to introduce some converging vertical or perspective distortion. This is most noticeable with man-made structures, but can also make trees and mountains lean in towards each other. If this is part of the picture’s dramatic appeal that’s fine, but converging verticals are an unwanted distraction that often just looks like sloppy oversight.
This is where Exposure X4’s Transform tools come in. The first thing I do is check the Constrain Crop box.
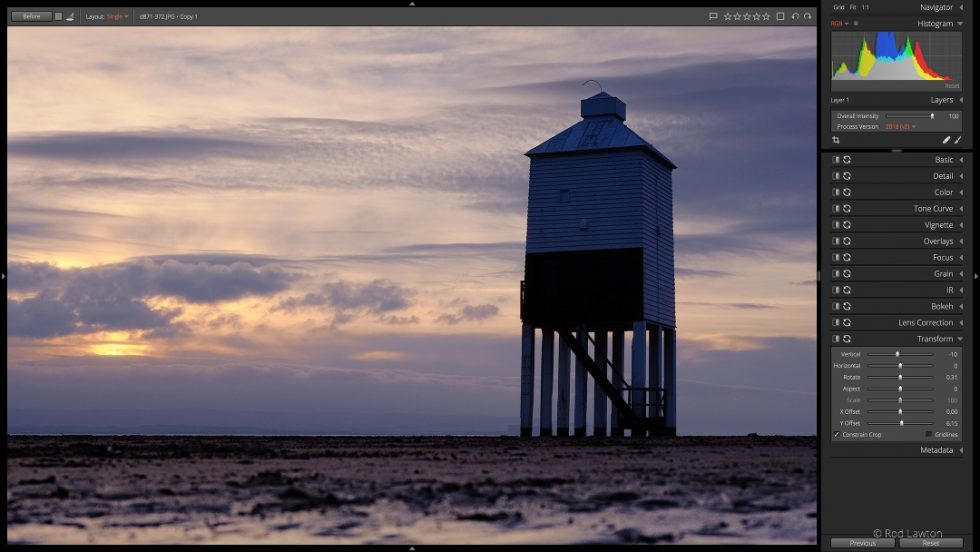
Exposure’s Transform Panel is a great first step for correcting visual distortion
This saves me from having to manually crop out diagonal wedges at the edge of the picture later. Next, I use the Vertical slider to remove any keystone distortion – this is pretty easy to do by eye. This can often reveal that the image isn’t actually straight, so it’s useful to be able to correct this with the Rotate slider. Finally, if I find I’ve lost too much of the top of the image, I drag the Y Offset slider to the right to bring it back.
I find it best to carry out perspective corrections first and then add subsequent effects on new adjustment layers. This is especially true with frames and borders.
Here are the before and images for that shot:
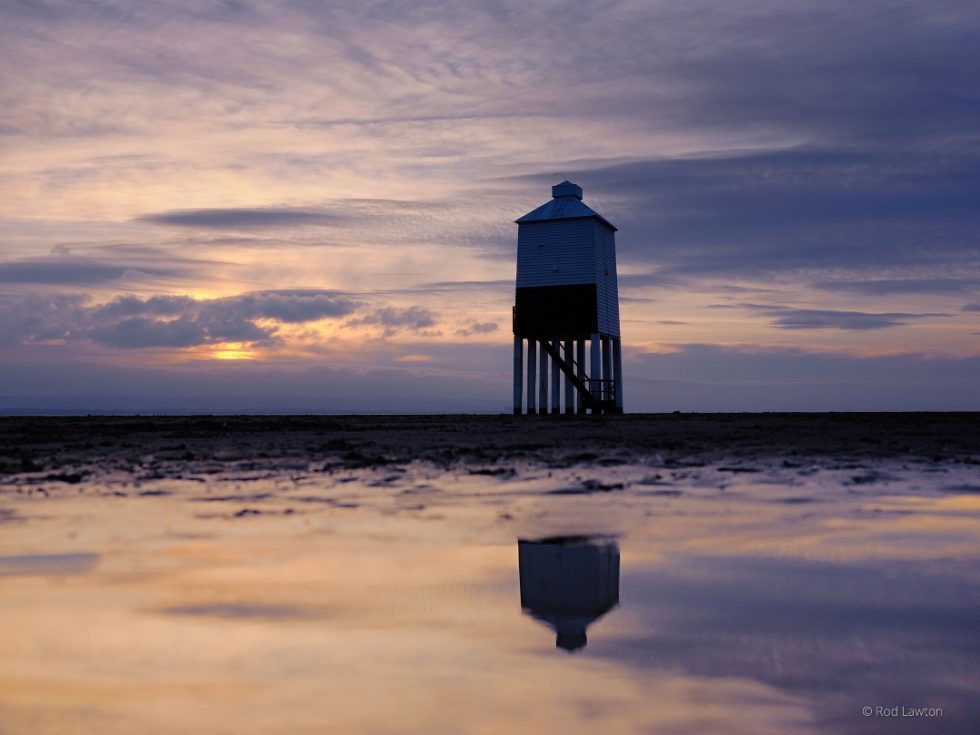
Original, unedited image
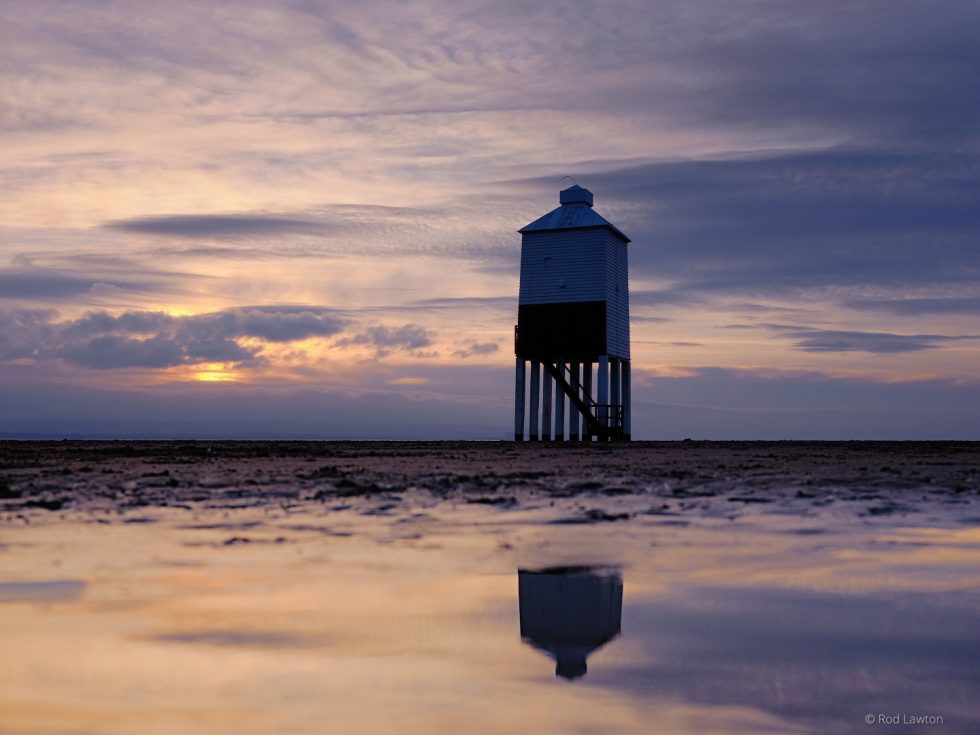
Visual distortion corrected using the Transform panel
Highlight and Shadow Recovery, Layers, and Masks
I often don’t need to apply perspective corrections, but I usually do need to tackle one of the biggest issues in landscape photography, which is balancing the brightness of the sky and the foreground when there may be 2EV or 3EV difference in brightness between them.
The expanded highlight and shadow recovery introduced in Exposure X4 makes a big difference here. As long as I’ve got the exposure right, I can use a gradient mask on a new layer to select the sky alone and adjust not just its brightness but its colors too. Usually, you can extract up to 1EV of additional highlight detail in skies in Exposure X4 – one of the many great reasons for shooting RAW files rather than JPEGs.
I don’t always stop at simple exposure corrections. I will often add some clarity to the sky to make clouds stand out more clearly, increase the contrast, or add a little magenta shift to the white balance to give late afternoon lighting that little extra warmth and depth.
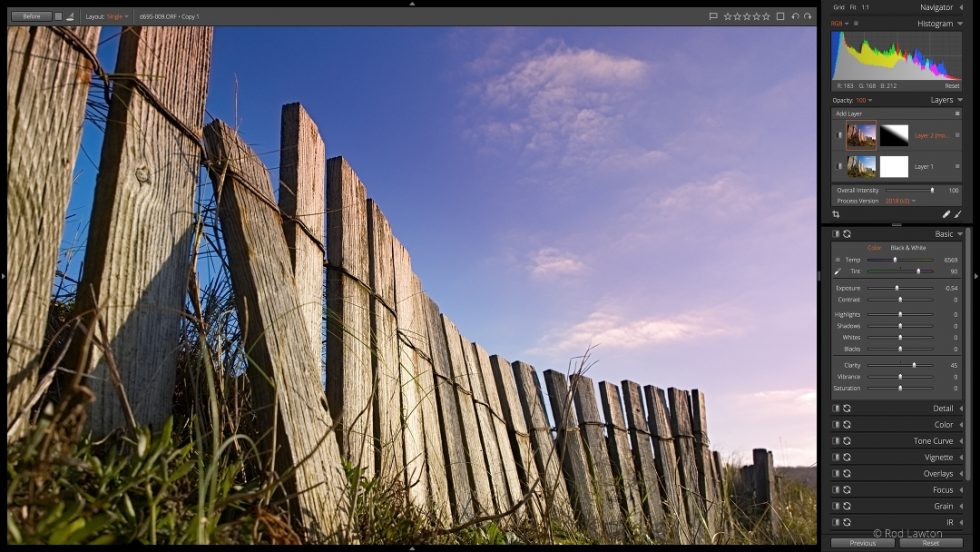
Boosting the image clarity can make clouds stand out more clearly
Sometimes I’ll base the exposure on the sky and use a gradient mask to brighten the dark foreground, or I’ll expose somewhere in the middle and use adjustment layers on both the top and bottom parts of the picture. The great thing for me is that I can position masks precisely after the event, choosing exactly the right transition to blend the effect in smoothly – that’s not always easy to get right when you’re using analog graduated filters in the field.
Here are the before and images for that shot:
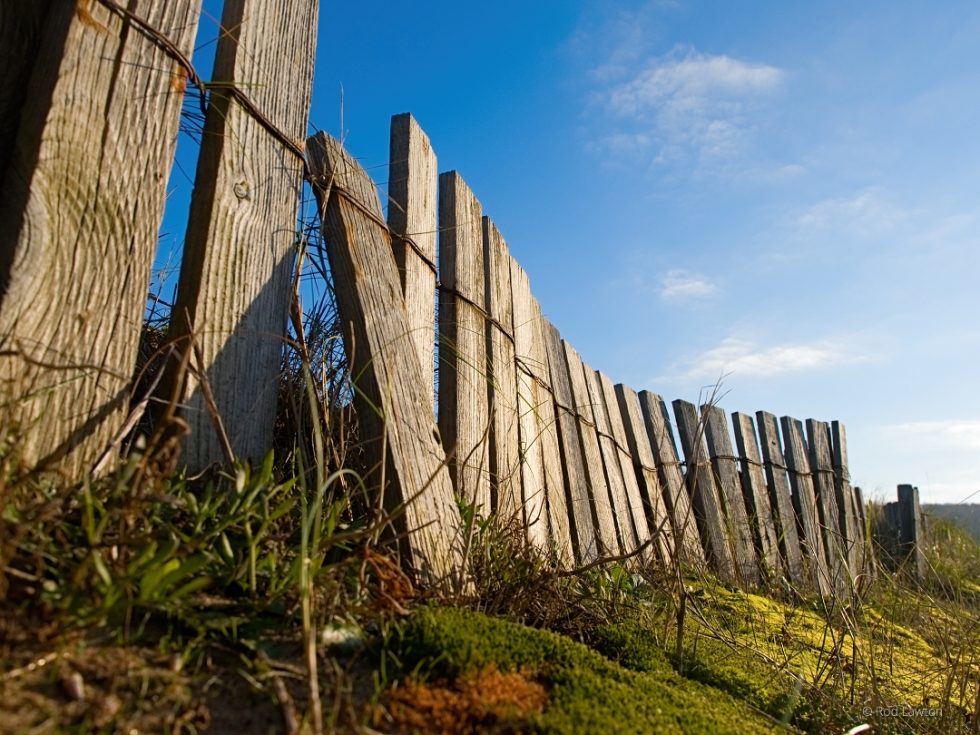
The original, unedited image
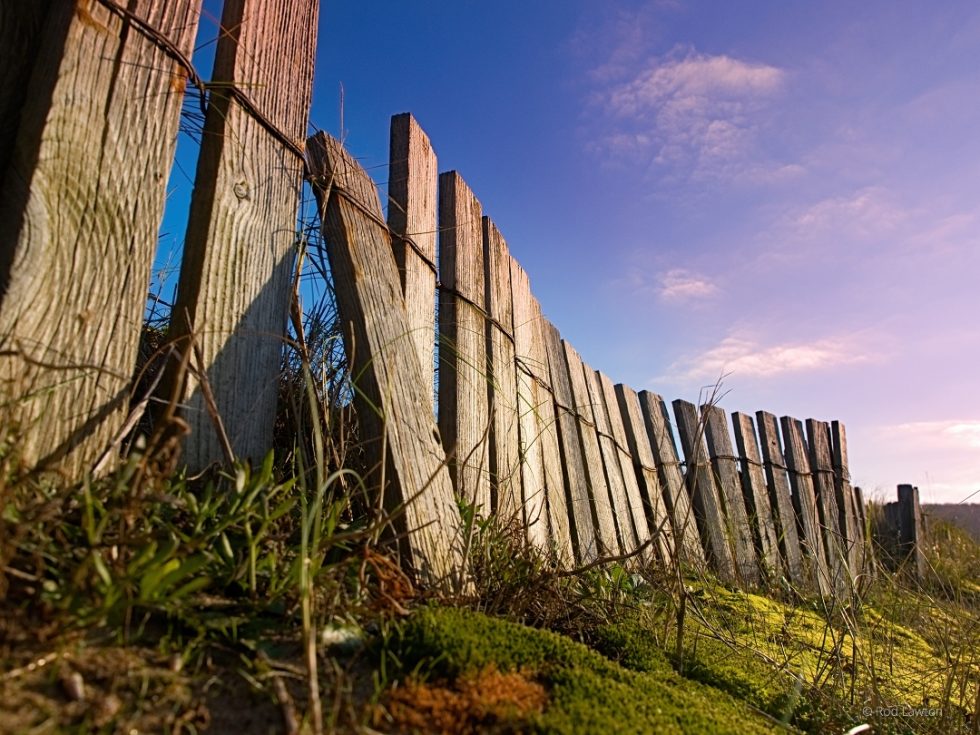
Corrected with a clarity boost and a magenta shift to the white balance
Light Effect Overlays
The adjustments I’ve described so far are essentially technical corrections, but landscape photography is as much about atmosphere as accuracy, so I will occasionally use the movable light effects in Exposure X4 to add some drama and warmth to the lighting. Modern lenses are extremely good at suppressing internal reflections and lens flare, but very often you need these effects to help emphasize the light. You most often see lighting effects applied to portraits, but they can enhance outdoor scenes just as effectively.
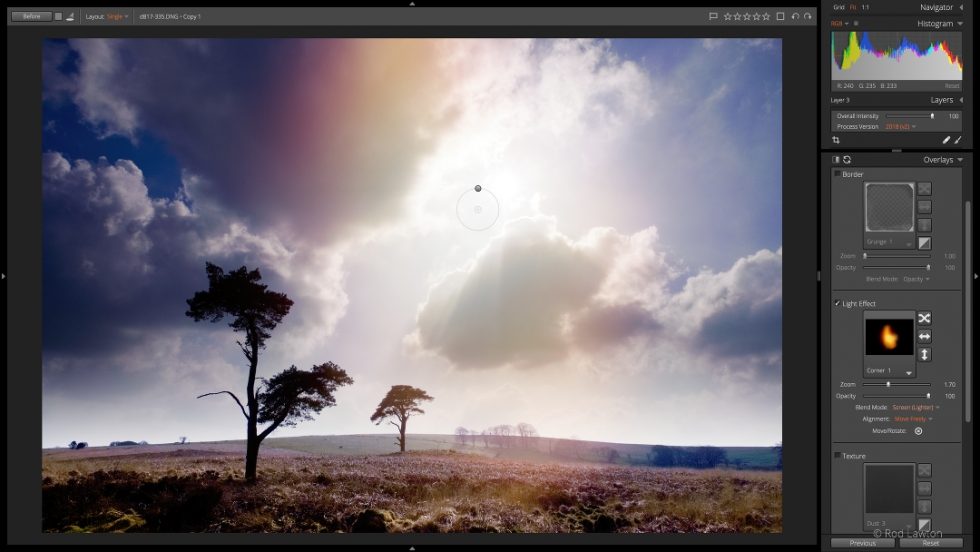
Exposure’s moveable light effects add atmosphere to your landscape photos
I find they have a practical benefit as well as a pictorial one. I often shoot with the sun in the frame because I like extremely strong contrasts, but this will often leave the sun and the areas around it as a blank white region that just looks ugly. The solution? I add in one of Exposure’s freely moveable light effects to exaggerate the brilliance of the sun, not hide it, and also to blur and diffuse the hard edges left behind at the edges of overexposed areas.
Another set of before and after images:
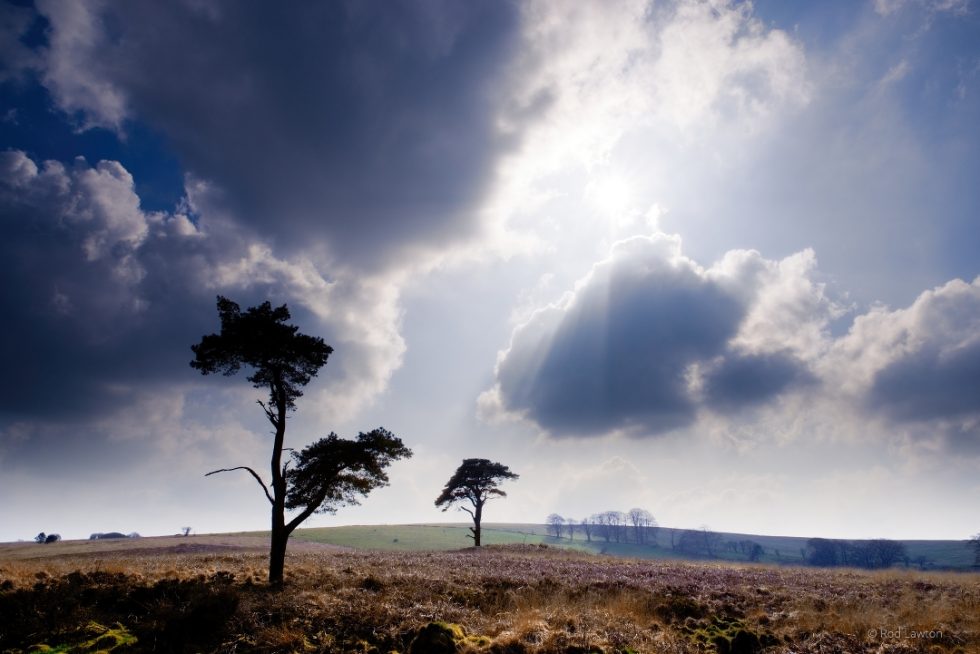
The original, unedited image

Edited with a moveable light effect to bring drama and warmth to the scene
Color Adjustments
Perspective correction and light effect overlays have their place, but RAW highlight and shadow recovery and gradient filters are the mainstays of my landscape photography – together with color adjustments. Sometimes it’s just a case of tweaking the white balance setting, sometimes I take a look through Exposure X4’s presets library to get some ideas for different treatments for a picture, and sometimes I make manual adjustments to the colors. Well, two colors in particular!
I’m quite sensitive to greens and blues. Grass has to be the right kind of ‘green’ and blue skies have to be properly ‘blue’, and this means making some targeted adjustments in Exposure X4’s Color panel.
In Compact mode, these tools look pretty simple – you choose a color range and then adjust the hue, saturation, and luminance for each. It’s effective, but the color ranges are pretty broad. You can deselect the Compact box and see an expanded view, but the real power lies in the HSL option under the Group by menu. Here, you get targeted adjustment tools for hue, saturation, and luminance, and instead of guessing at the color range you want to adjust, you can drag up and down directly on different areas of color in the photo.
I use two specific color ‘fixes’: one for blue skies, one for green grass. Some cameras record blue skies with a cyan tint, so I shift the hue of blue skies to the right to reduce the cyan with a subtle shift towards magenta, and I reduce the luminance and increase the saturation.
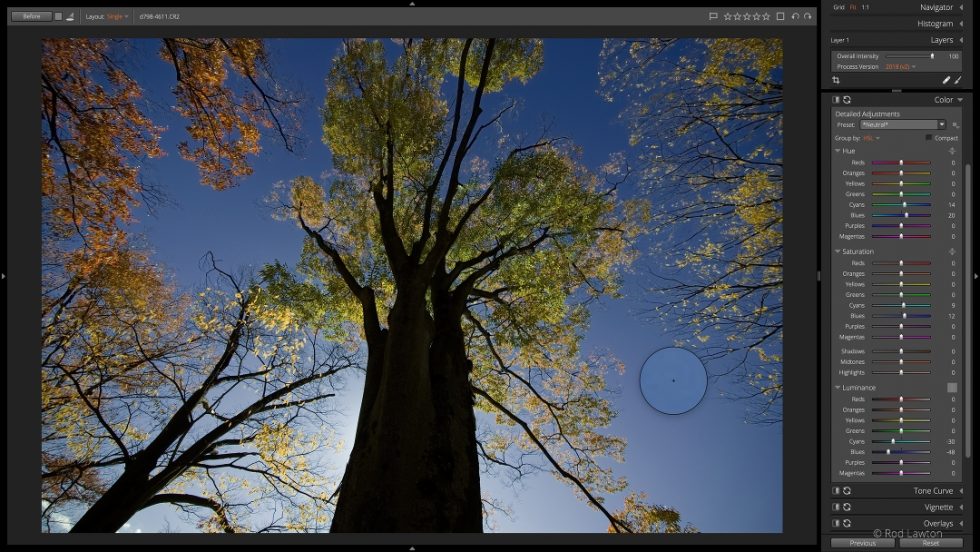
Exposure’s HSL tools target adjustments to hue, saturation, and luminance, which works great for adjusting skies and grass
The before and after versions:
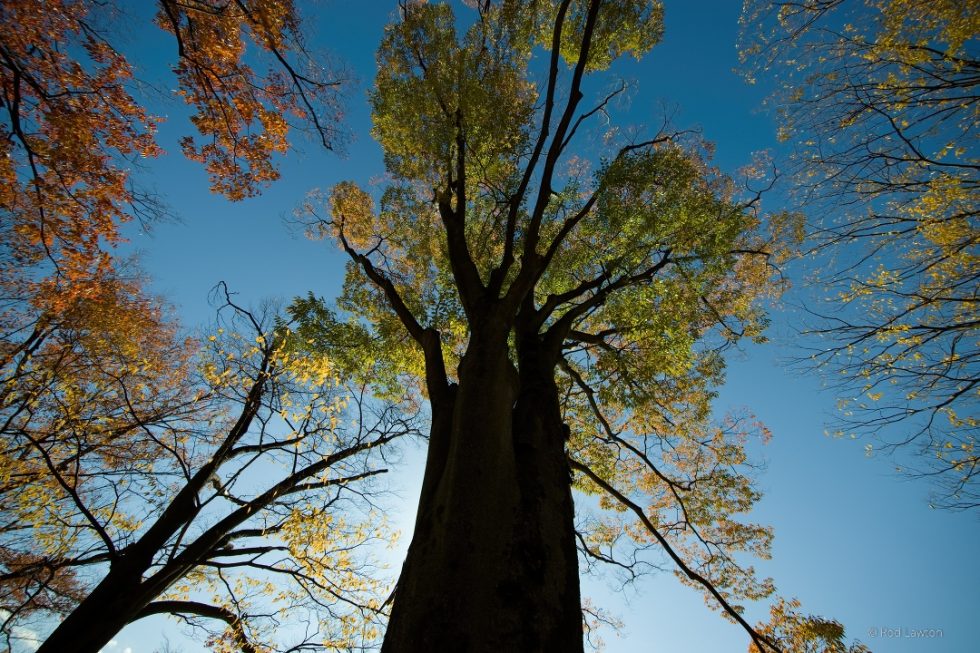
The targeted hue adjustment tool enables subtle shifts in hue
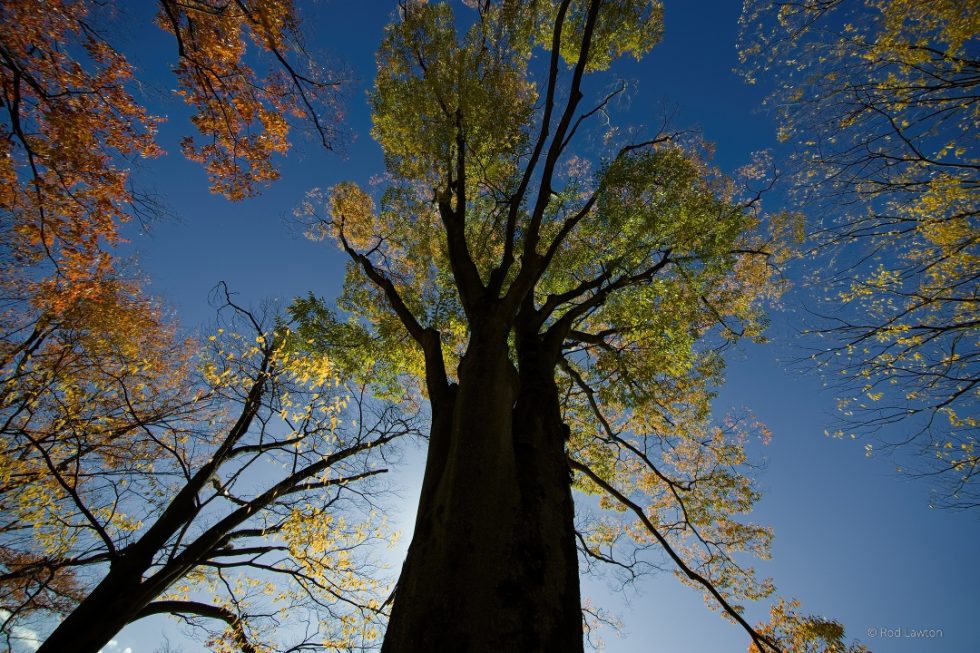
Edited to reduce the cyan of the sky and shift it towards magenta
I also don’t like yellow, burnt-looking grass. The solution for this is to use the targeted hue tool and drag upwards on an area of grass to shift the hue from a yellow color towards a cooler green.
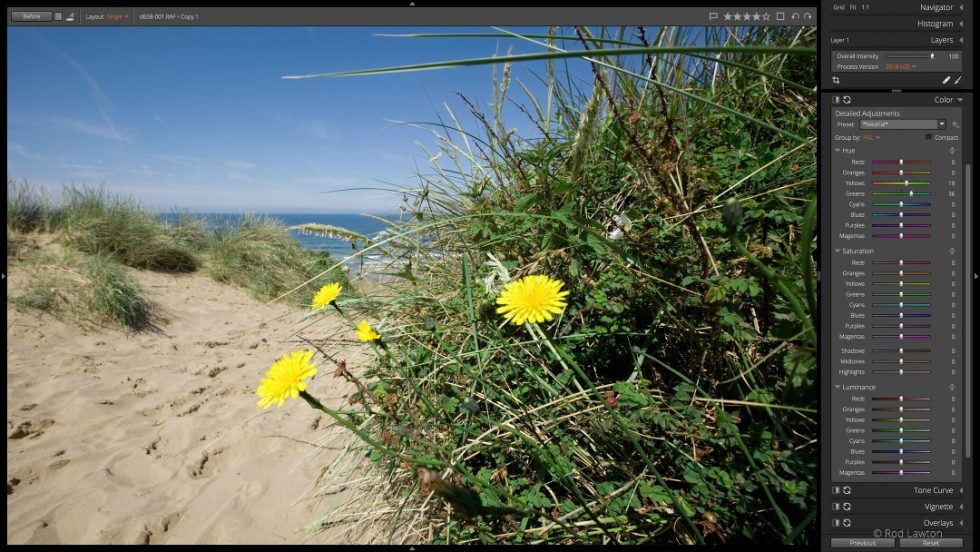
The targeted hue adjustment tool enables subtle shifts in hue
The final set of before and after images:
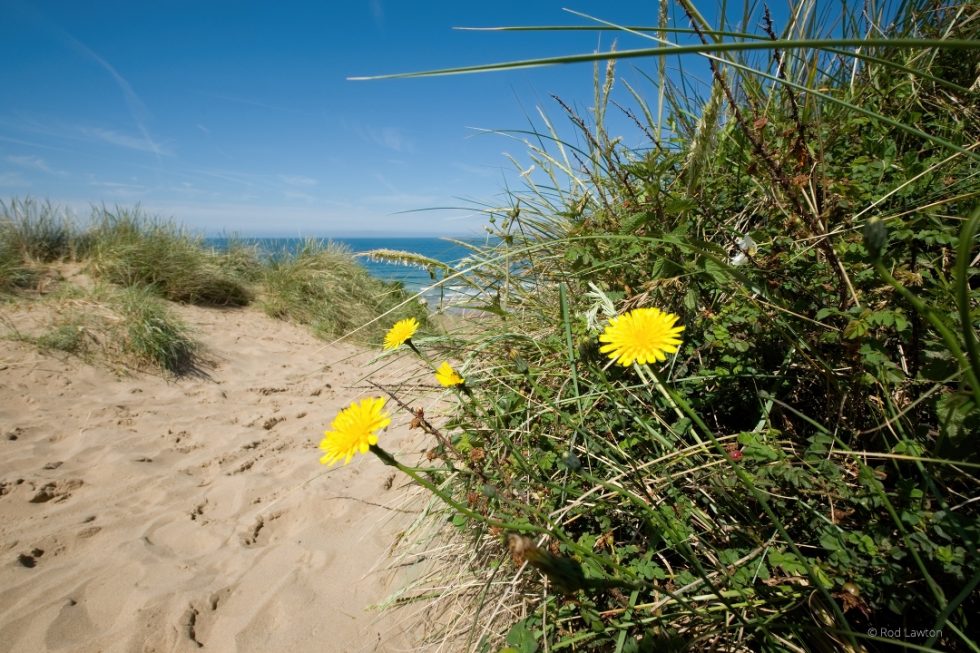
The unedited shot, with yellow, burnt-looking grass
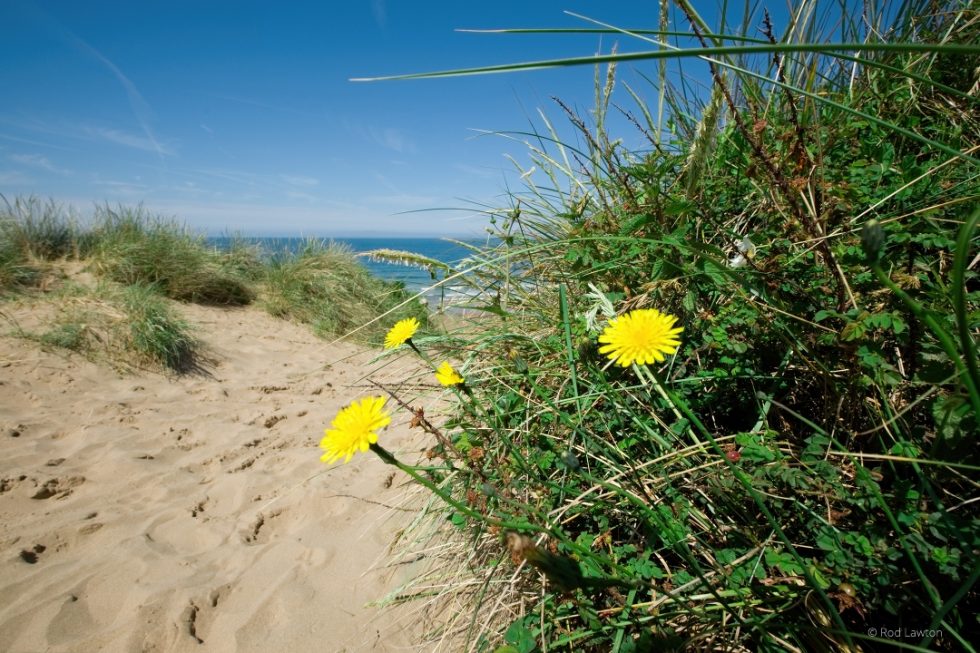
Color corrected using Exposure’s targeted hue adjustment tool
Closing Comments
I don’t use all of these adjustments on every image, as each situation is different. But I can usually see what I need to do to a landscape photo to enhance it to my liking, and it usually means applying one, two, or more of these techniques.
What I particularly like about Exposure X4 is not just its technical adjustments, which can be found in other fully featured photo editors, but the way it responds when these adjustments are applied and the subtlety, richness, and variety of its presets. I am a technical writer by profession but I think it’s important to edit images with a combination of instinct and emotion and not be ruled by histograms, numbers in dialog boxes,and technical ‘accuracy’, whatever that is!
Try Exposure Today


“You can deselect the Compact box and see an expanded view, but the real power lies in the HSL option under the Group by menu. Here, you get targeted adjustment tools for hue, saturation, and luminance, and instead of guessing at the color range you want to adjust, you can drag up and down directly on different areas of color in the photo.” This is double dutch to me, there is no demonstration of HOW I make these moves.
Check out our Color Photo Editing video, Greg. There is a thorough demonstration of the tools in Exposure’s Color panel Rod mentioned. Here is a link to the video.