
This is a guide that shows you how to use Exposure’s gradient tools. Gradients control where editing adjustments apply to your images with a smooth fade. We put together this article to help you get the most out of using them.
What are gradients?
Gradients create a layer mask and a fade transition for the effects on that layer.
All photos © Michael Gillman
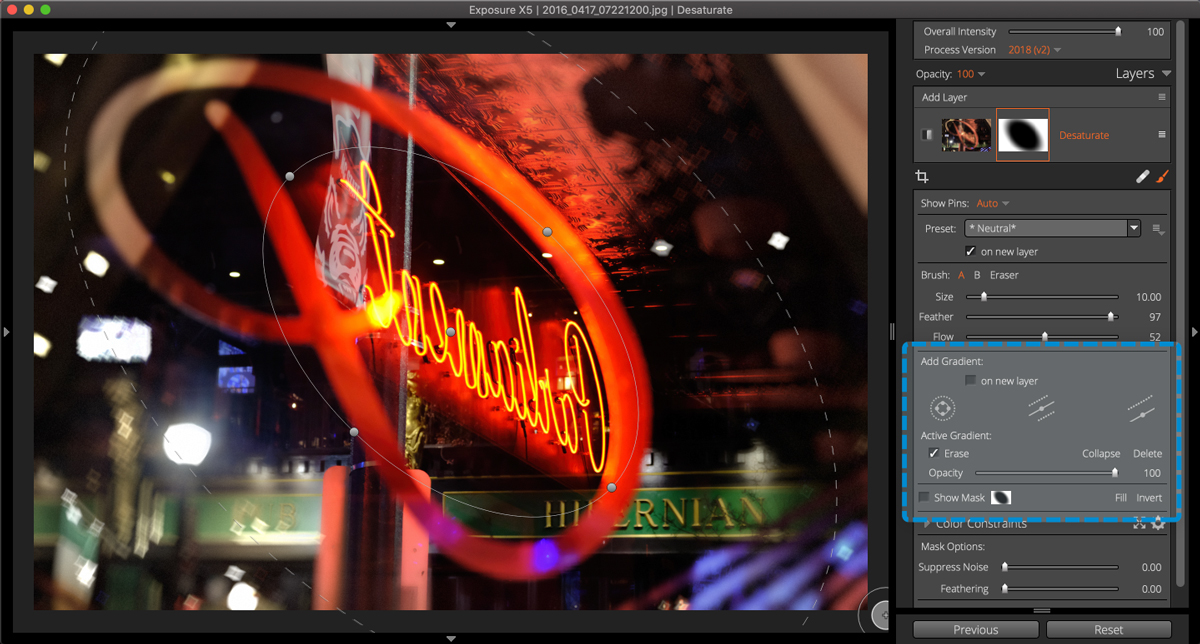
When the Brush tool is open, the gradient controls appear on the large image in the middle of the screen. Close the Brush tool to hide the gradient tools from your view. When closed, the effects are still applied to your image. Press F5 on the keyboard to toggle the Brush tool open or closed.
Gradient Tools
Create and modify gradients with the tools in the panel. The Brush tool must be open to access these controls.
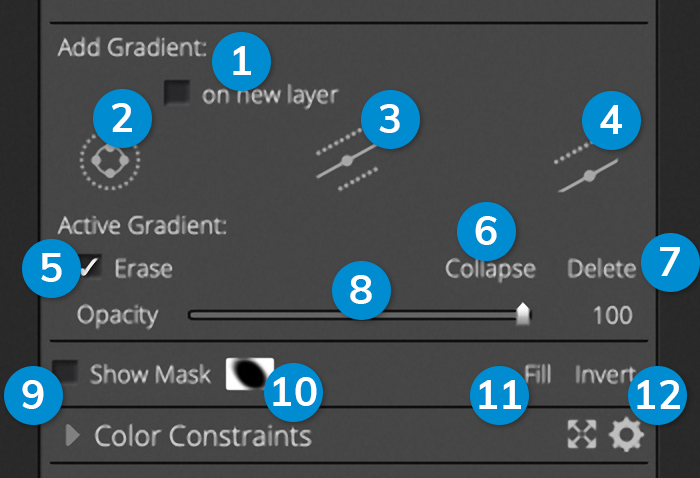
1 – On new layer
Automatically creates a new layer when a new gradient shape is added.
2 – Radial Shape
Round gradient with faded edge that radiates from the center. Defined by a center point, a solid line, a dotted line, and several handles. These are very flexible, and can be adjusted to work in widely diverse scenarios.
3 – Planar Shape
Linear gradient with fades in both directions from the center line. Defined by a center point, a solid line, and two dotted lines to control the fade. Planar shape gradients are great for linear subjects, such as landscapes or architectural photos.
4 – Half-Planar Shape
Linear gradient with an adjustable fade that only falls off in one direction from the center line. Defined by a center point, a solid line, and one dotted line to control the feathering edge. These are perfect for darkening an overexposed sky or enhancing a horizon.
5 – Erase
When on, the gradient is inverted.
6 – Collapse
Hide the in-preview controls for the selected gradient shape.
7 – Delete
Remove selected gradient.
8 – Opacity
Controls the strength of each gradient, individually.
9 – Show Mask
Toggle mask overlay on large preview image in the middle of the screen.
10 – Mask Thumbnail
Display of selected layer mask.
11 – Fill
Reset all added gradients and brushing effects by filling the mask.
12 – Invert
Reverse the polarity of the mask. Note this is tied to the Erase checkbox.
Creating Gradients
Gradient shapes define a mask with a smooth transition between effects. To create a new gradient, select a gradient shape. Move the cursor to the preview area to display the gradient controls.
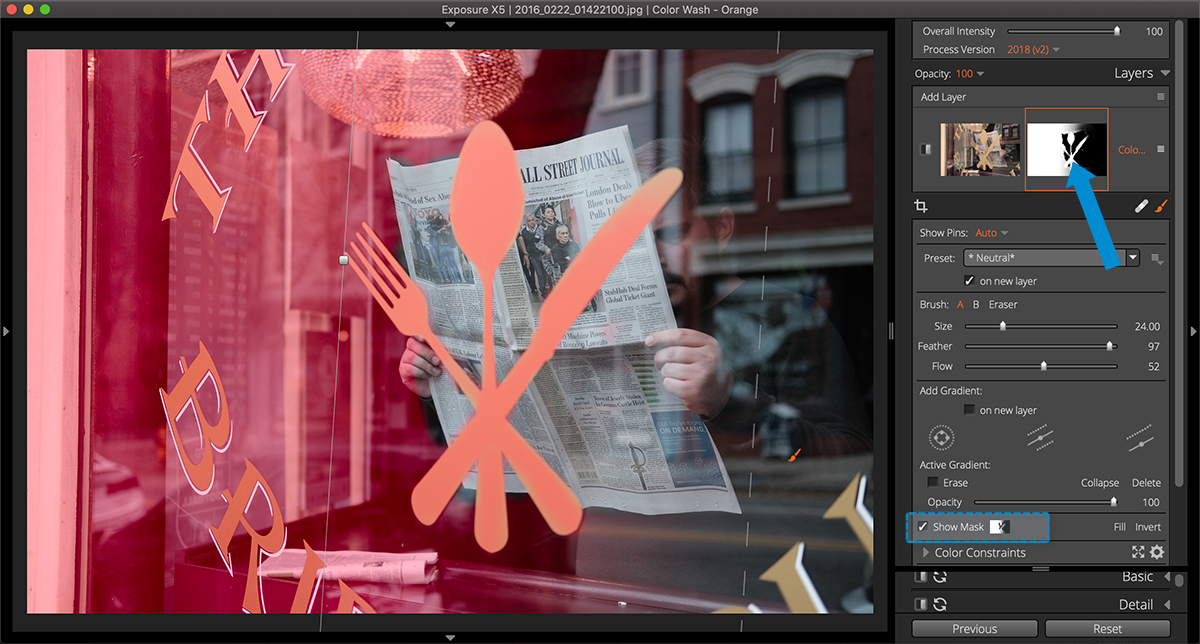
Gradient shapes can be seamlessly integrated with other forms of masking. The Brush tool, for example, can be used to paint areas of the mask by hand. Additionally, the color constraints controls can be used to generate detailed masks based on the colors in your photo. Learn more about using those masking features in our 3D Color Masking Deep Dive video.
Note the On New Layer checkbox in the Add Gradient section. When this option is active, selecting any of the gradient shapes will create a new layer with that shape rather than apply multiple gradients in the same layer. When using multiple shapes on the same layer, press collapse to shrink the region controls. Expand collapsed regions by clicking the center handle.
Toggle Show Mask at any time to visualize the mask on the large preview image in the middle of the screen.
Controlling Gradients
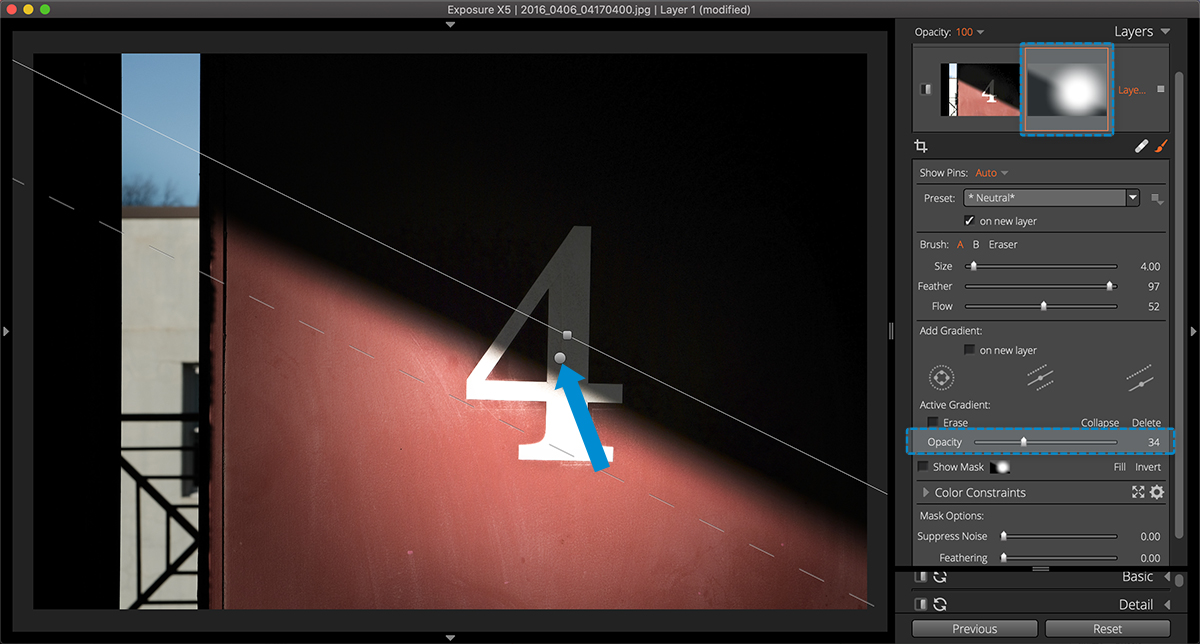
Use the center handle to relocate the shape. For radial shapes, use the handles to stretch and rotate. For linear shapes, use the solid line to rotate. Adjust the transition of the effect with the dotted line.
Control the opacity of each individual gradient shape with the Opacity slider. Any adjustments made to gradient opacity will display in the mask. Shapes with lower opacity will appear grey rather than black or white in the mask thumbnail.
Check the Erase box, or press Invert to reverse the mask.
Remove unwanted gradient shapes with Delete.
This is just one of the ways Exposure makes advanced editing, simple. Thanks for reading our guide. You’re welcome to save a link to this post as a reference if you ever have questions about the gradient tools.


