
Exposure uses a catalog-free workflow, so importing images to access them isn’t necessary at all. Simply tell Exposure where the photos are and you can begin working. This includes when copying photos from a camera card to a computer, and also when browsing images on a portable drive. Exposure has powerful functionality for managing this process, and offers automatic solutions to handle the process for you. The article below is a guide for opening images with Exposure.
Opening Images
There’s no importing steps in Exposure. In the Folders panel, navigate to folders containing images and begin working. The edits in Exposure are recorded in small sidecar files within each folder, so backups are easy.
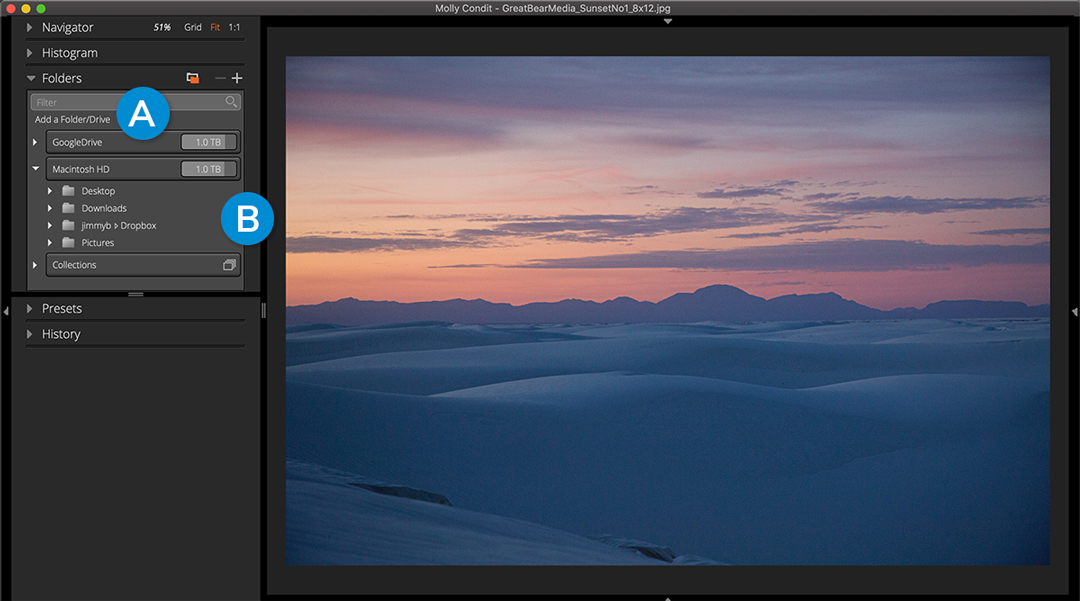
A – Add a Folder/Drive
Click here to add new locations on your computer to access and edit images.
B – Image Sources
Browse photos in the sources listed here. Select an attached drive, or use a Dropbox folder, or other collaborative shares like Google Drive.
Copy From Card
Accessing images on camera cards in Exposure is the same no-import process. There is an extra step as Exposure copies files from your photo card onto your hard drive and then adds the folder bookmark in Exposure’s folders panel.
When a card is inserted into a card reader, Exposure will recognize the card and open the Copy Photos From Card dialog. If you’ve turned off the automatic detection of camera cards, this process can be manually initiated from the File menu.
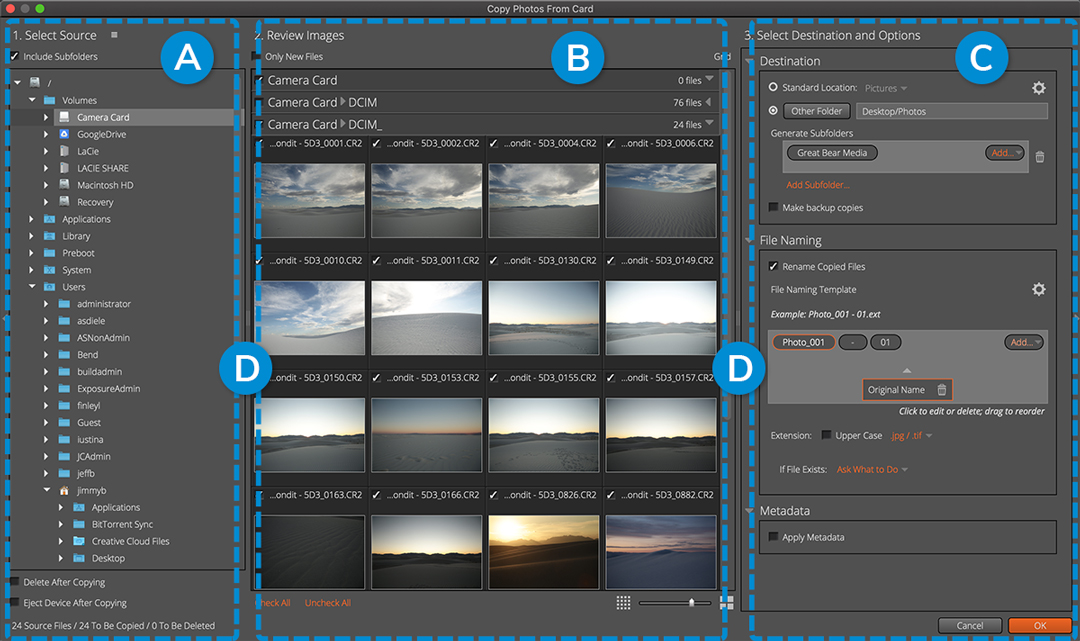
A – Select Source
Direct Exposure to the images you wish to copy.
B – Review Images
Browse, inspect, and select images to copy.
C – Select Destination and Options
Set details for the save location, including file name, keywords, and other organization tools.
D – Splitter
Click and drag the splitter to expand that area of the user interface. There are additional ways Exposure’s UI can be customized to fit with your workflow. See the user guide for personalizing the workspace.
1. Select Source
Begin the process by selecting the location of the images you wish to copy. Exposure enables you to copy images from multiple sources simultaneously to make this process quick. The copied files can be automatically organized, eliminating headaches from shooting with multiple cards, multiple cameras, or when working with other photographers.
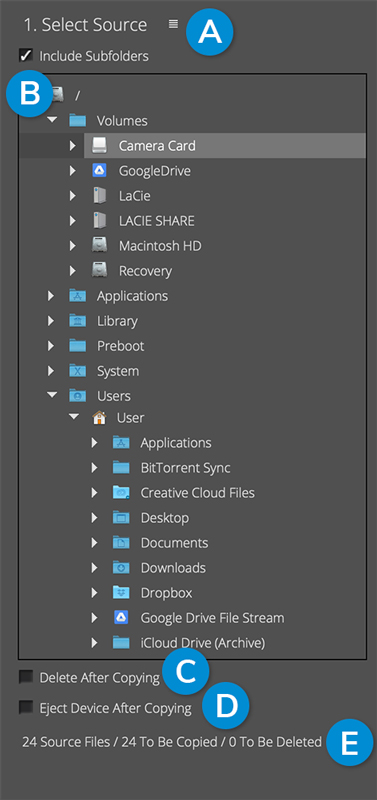
A – Location Shortcuts
Access recently used and common folder locations on your computer.
B – Include Subfolders
View images contained in subfolders to browse images quickly.
C – Delete After Copying
Automatically delete the selected images from the camera card after they are transferred to the computer.
D – Eject After Copying
Eject card from computer when the transfer is complete. This enables you to safely remove cards when they are finished transferring.
E – Transfer Data
Information about the current settings for copied images.
2. Review Images
Browse, identify, and select images to copy from the source locations. Quickly select all images without creating duplicates when only new files on that card are displayed.
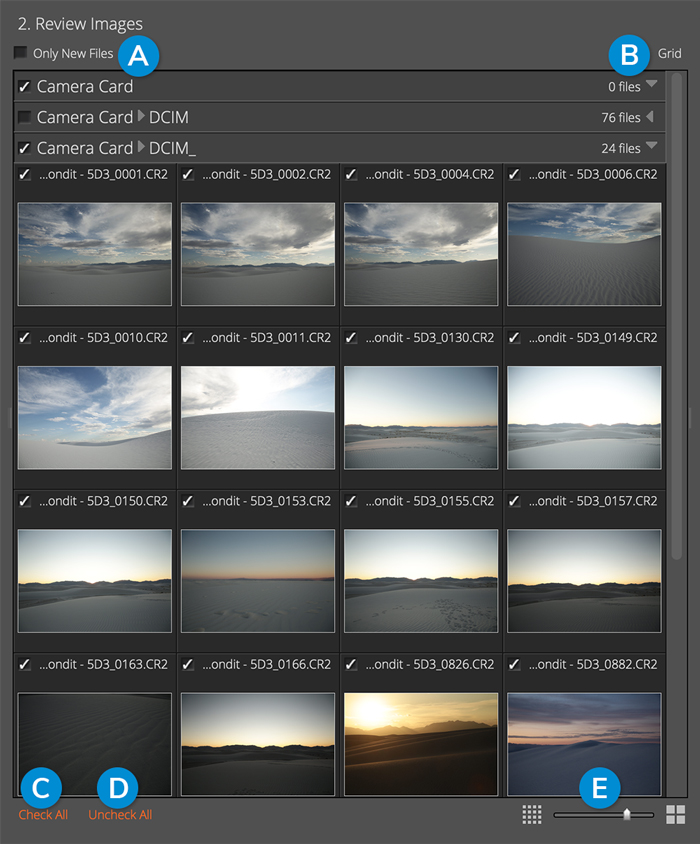
A – Only New Files
Enable to only display images captured on that device since last ingested.
B – Grid/Single View
Display a grid of images as thumbnails, or a single image at a larger view. Disclose and hide folder contents when the view subfolder option is active.
C – Check All
Select all images available within selected cards.
D – Uncheck All
Deselect all images.
E – Thumbnail Size slider
Change size of images in grid.
3. Destination and Options
Set options for how copied files are handled in the third section. Include details for where the files are saved, how they are named, and what metadata information to include with the images you transfer.
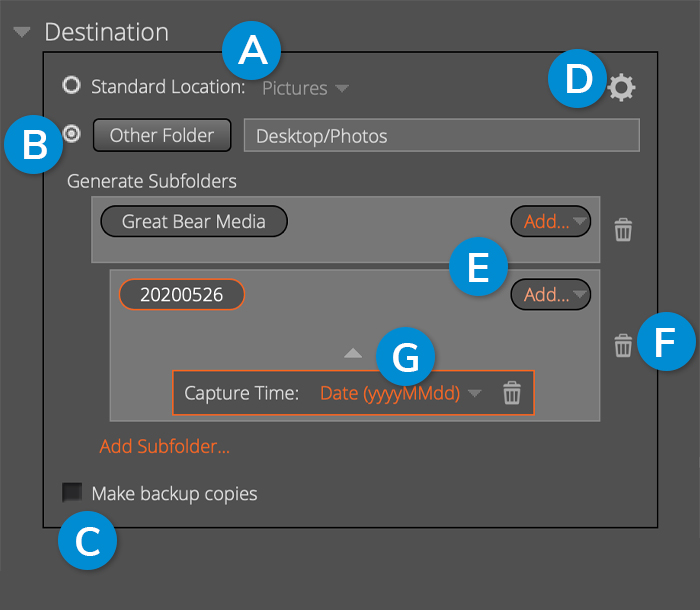
Destination
Specify the location where photos will be copied to. Include subfolders to automatically organize with image metadata. You can have Exposure separate photos into folders by shoot date, camera model, or camera serial number.
3 images – Desktop/Photos/Great Bear Media/20190831
11 images – Desktop/Photos/Great Bear Media/20191101
10 images – Desktop/Photos/Great Bear Media/20191102
1 – Standard location
Select from locations on your computer such as Pictures, Documents, and Desktop
2 – Other Folder
Specify a location, which could be on an external drive or a shared folder. This includes generating subfolders. Subfolders generated using image metadata will organize images automatically as they are copied.
3 – Make backup copies
For an extra level of precaution, create an immediate backup of all images copied during each process.
4 – Presets menu
Access file destination presets.
5 – Add subfolder item
Choose from a list of subfolder organization tools, including capture time, and photo metadata like camera model or serial number.
6 – Delete item
Remove selected subfolder item.
7 – Edit item
Select from configuration options for selected subfolder item.
File Naming
Apply your favorite naming convention. Include the original file name, add custom text, or number files in sequence.
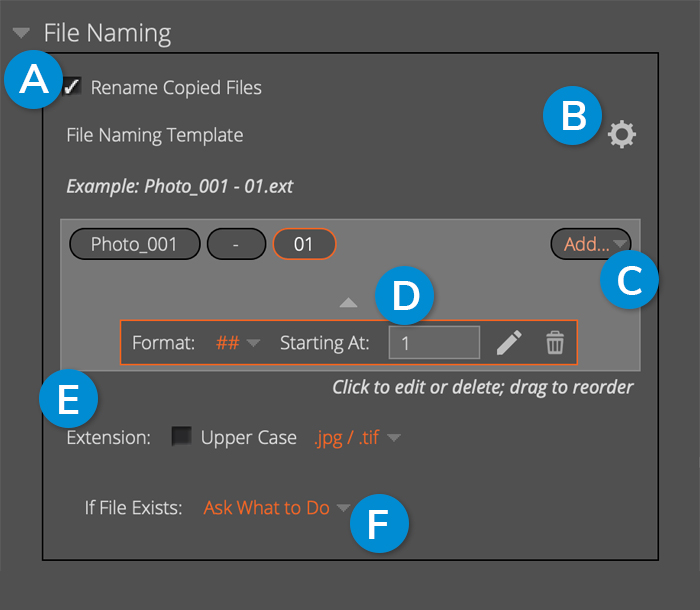
1 – Rename Copied Files
Click to apply your preferred naming convention to the images you copy.
2 – Presets Menu
Access file naming presets.
3 – Add
Select from flexible file naming assets such as Original Name, Capture Time, Numbered Sequence, and more.
4 – Edit Item
Set options for selected file naming item.
5 – Extension
Set the file extension to upper or lower case.
6 – If File Exists
When faced with overwrite dialogs, set Exposure to ask or ignore prompts.
Metadata
Apply metadata to embed information into your image files as they are copied.
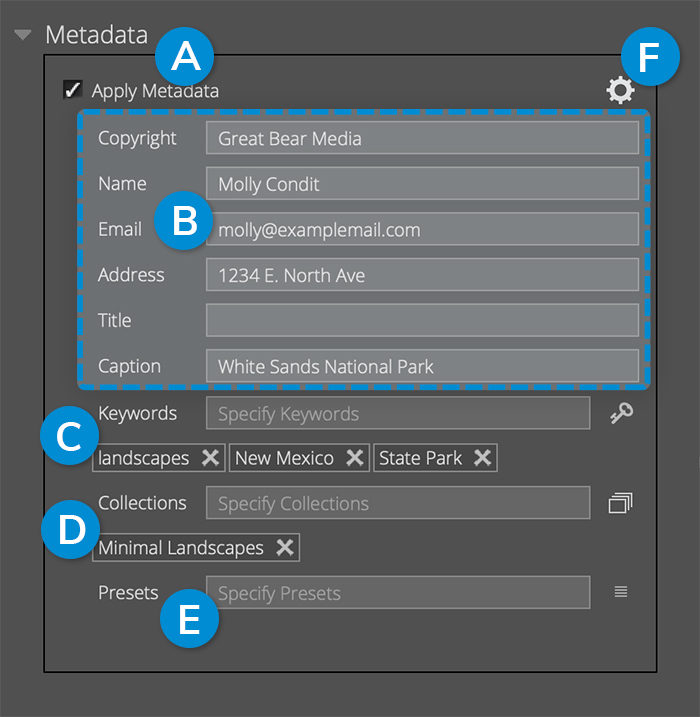
A – Apply Metadata
Control what information is embedded in your image files as they are copied.
B – Metadata Fields
Assign shared information for all images being copied, here.
C – Keywords
Assign organizational keywords to copied images. See our Organizing with Keywords video for more detailed information.
D – Collections
Organize images into collections. Collections are groupings of photos for a specific purpose, like a blog post or an album. See our Managing Photos with Collections video to learn more.
E – Presets
Select from creative presets, including custom presets you have defined. Effects applied during the transfer create virtual copies for each look selected. Tour the presets in Exposure in our Applying Film Looks video.
F – Presets Menu
Access metadata presets.
Exposure offers simple access to browse and edit images. And when copying images from cards, you can have Exposure organize them for you.
Thanks for reading our guide. We hope you enjoyed it. If you need a reference accessing images on your computer, save a link to this article.


