
One of the biggest advantages digital photography has over shooting with analog film is the ability to see results immediately. However, the screen on the back of your camera, the screen on your computer, and the screen on your TV will all display the image differently. You need an effective way to evaluate the tonal range of the photo properly, so it looks great wherever it’s viewed. For that, you need a histogram.
What is a Histogram?
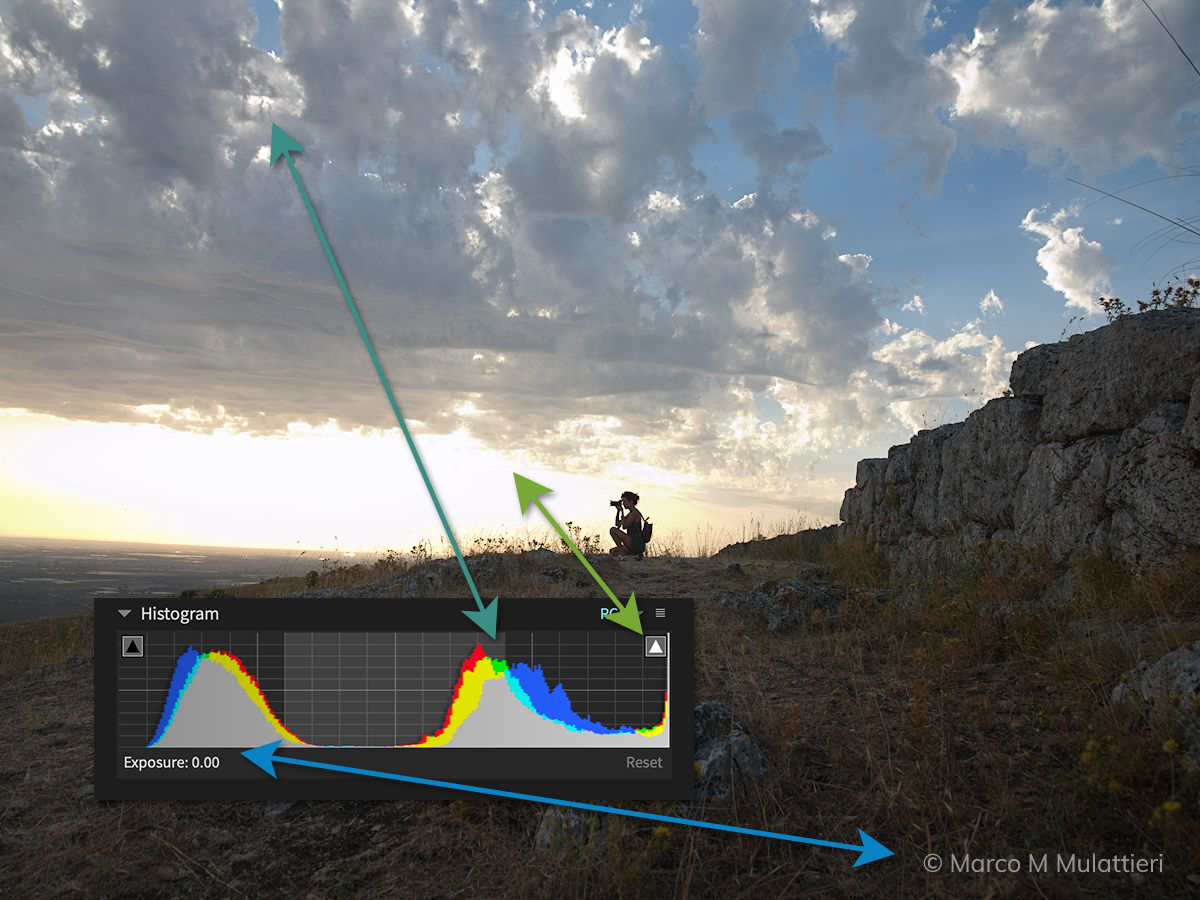
The histogram graphs the photo’s tones making it simple to locate regions with the strongest color. All photos © Marco M Mulattieri.
In digital photo editing, a histogram is a graphical representation of the light distribution in an image. The histogram graph shows you the amount of tones at each brightness level. Histograms are helpful for analyzing overall exposure, color saturation, or directly editing tonal ranges with real-time feedback. And it has more advanced uses such as checking for blown out or blocked up pixels at a glance. There are several benefits to using the histogram when editing images, which we discuss in this article.
Adjusting Histogram Tones
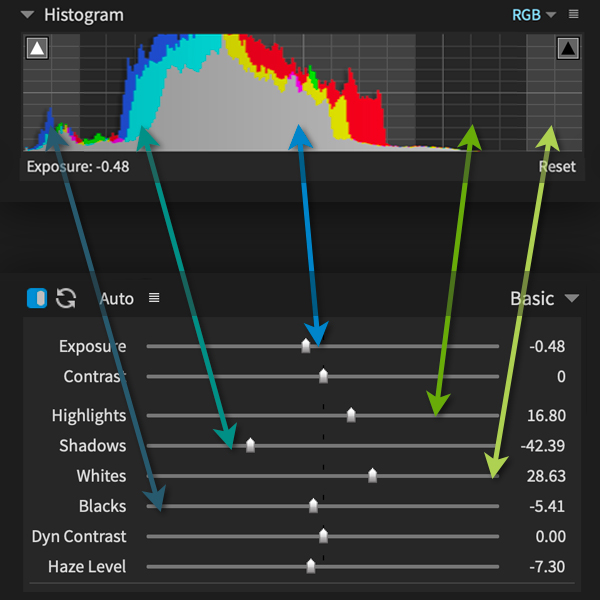
In Exposure, regions in the Histogram graph correlate to the sliders in the Basic panel.
Applying adjustments directly on the Histogram is a great way to edit images because it makes the process simple. You can hover over the different regions in the graph to display the amount of adjustment made to each zone in the bottom left corner. Simply click and drag regions and watch the graph change. Edits applied on the histogram correlate to the sliders in the Basic panel. If you’d like to learn more about all the tools available in this panel, check out our Histogram User Guide.
Order of Application
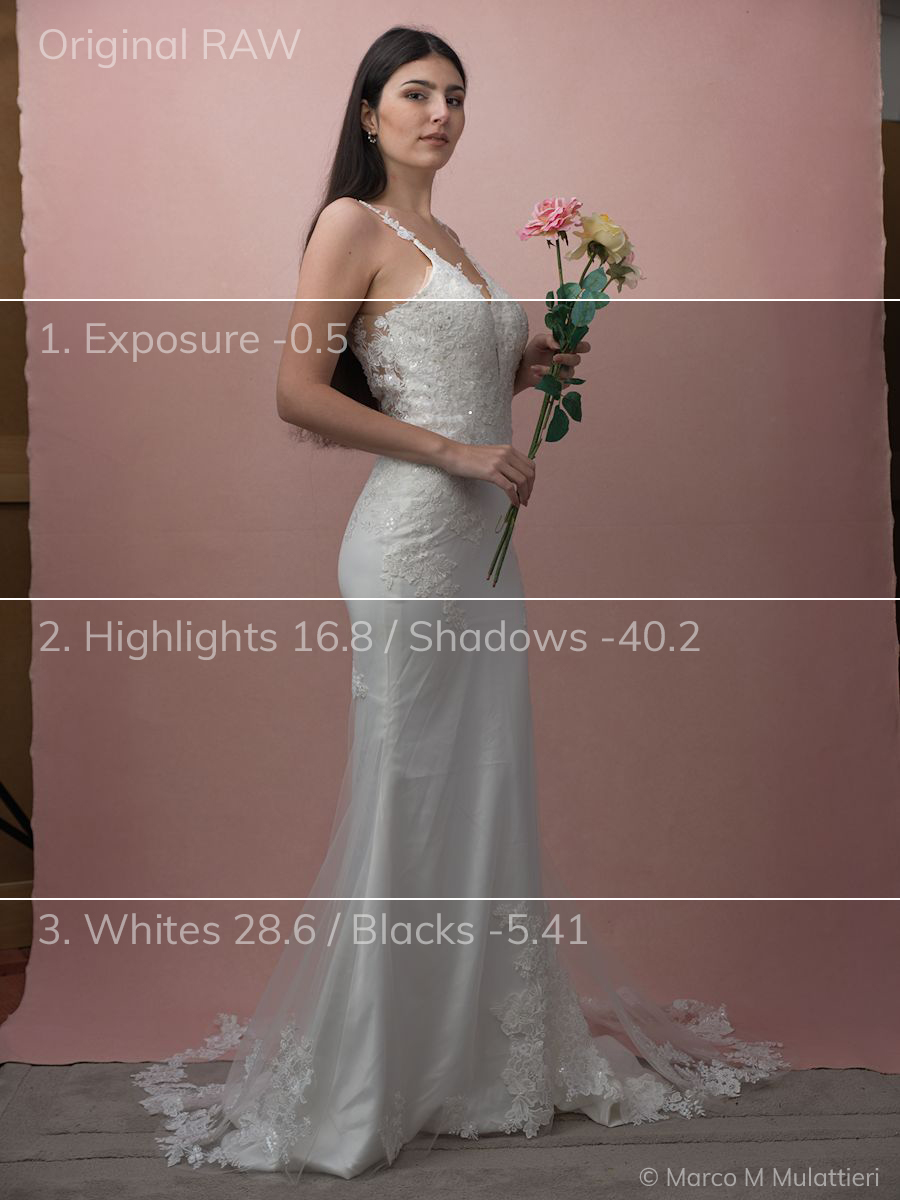
From top to bottom, the editing adjustments applied to this photo reclaim details lost in blown out pixels in the dress and dark shadows in the model’s hair.
When making adjustments in Exposure, the order of application is important. Whenever possible, apply edits in sequential order by size, just like dialing in a microscope. First, twist the big dial to bring objects into focus, then adjust to the smaller dials to fine-tune the sharpening. Exposure is the big dial, it affects the entire spectrum of tonal distribution in the image. Highlights and Shadows control an equal zone of tones on either side of the center values as displayed in the histogram. These sliders affect a smaller amount of tones as the Exposure slider. Last, the Whites and Blacks adjust the smallest portion of tones in the image; both ends. Roughly half the amount of tones as Highlights and Shadows. It’s just for fine-tuning.
Keyboard for Polish
Use the modifier keyboard shortcuts in Exposure to make adjustments without using the mouse. Access the map of Exposure’s keyboard shortcuts from the Help menu.
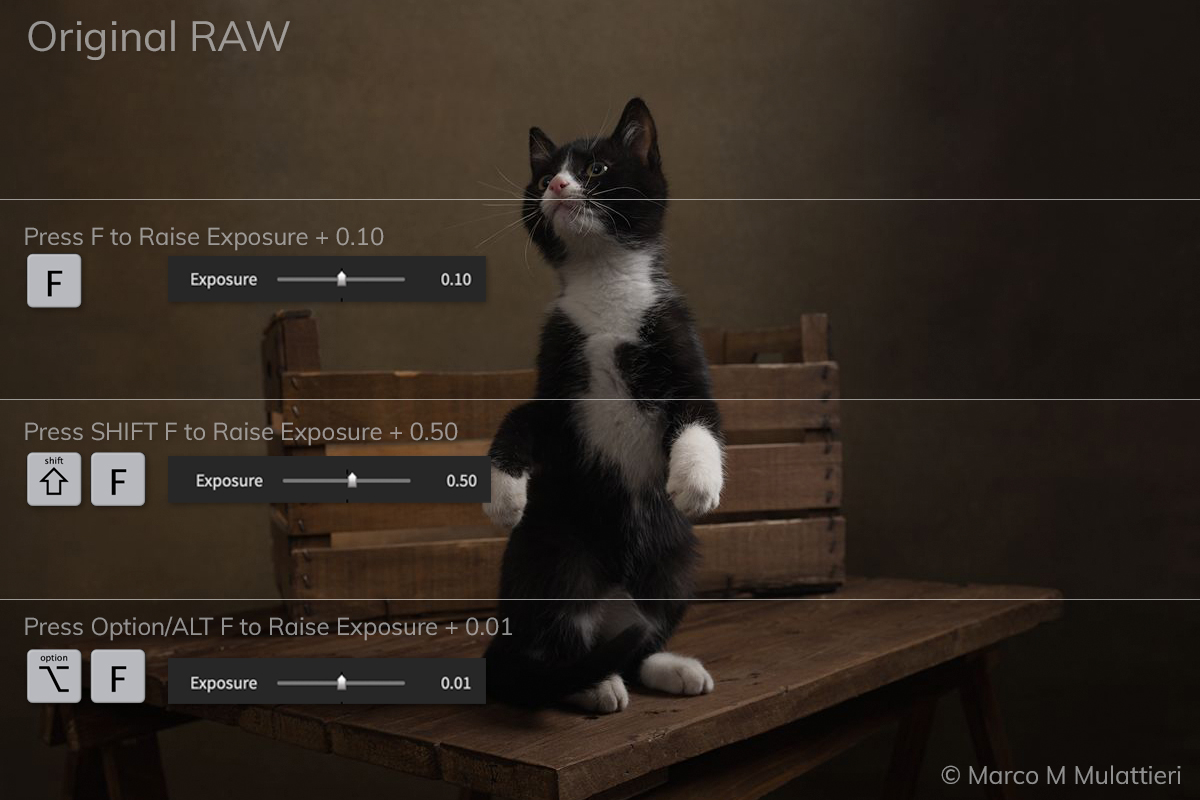
Keyboard shortcuts enable you to make adjustments with surgical precision. Exposure has a set of keyboard shortcuts that tweak each of the Histogram controls. This enables you to apply editing adjustments, including detailed refinements, without using the mouse. Tone adjustments are immediately reflected in the Histogram.
For example, you can raise or lower the exposure control with F and D, or you can adjust Highlights with G and H. You can see a complete list of the keyboard shortcuts in Exposure from the Help menu. Hold the modifier key Shift to make the rate of change more pronounced with each click. For example, Shift+F will raise the Exposure slider by 0.5. Hold the modifier Alt to make the change more subtle with each click. For example, Alt+F will raise Exposure by only 0.01.
Basic Sliders vs Tone Curve
Note the Shadows and Highlights sliders on the Tone Curve panel. They have the same name, but these controls are not the same as the sliders in the Basic panel. The controls on the Tone Curve panel perform straightforward adjustments; the algorithm scales the tone values for each zone. The sliders on the Basic panel in Exposure use an intelligent approach that analyzes the tones before making adjustments. This calculates changes more accurately, which gives the control more consistent behavior on images of varying brightness levels. It helps prevent colors from being blocked up or washed out when there are changes to image contrast.
In summary, there are tons of powerful features in Exposure’s histogram for editing images. The histogram is a great way to make tonal adjustments and visualize the distribution of tones. It’s another one of the ways Exposure simplifies advanced photo editing.
Try Exposure Today


