
Applying adjustments to colors is a powerful way photographers control the mood and feel of their photos. Exposure provides a broad spectrum of tools for manipulating image colors. Many of these features are found within the Color panel. The article below is a guide for working with the Color panel tools in Exposure.
The Color Panel
The Color panel is located in the lower quadrant on the right side of the screen. The default interface configuration of Exposure has it placed between the Detail and Tone Curve panels. Learn more about configuring the arrangement of the workspace in this user guide.
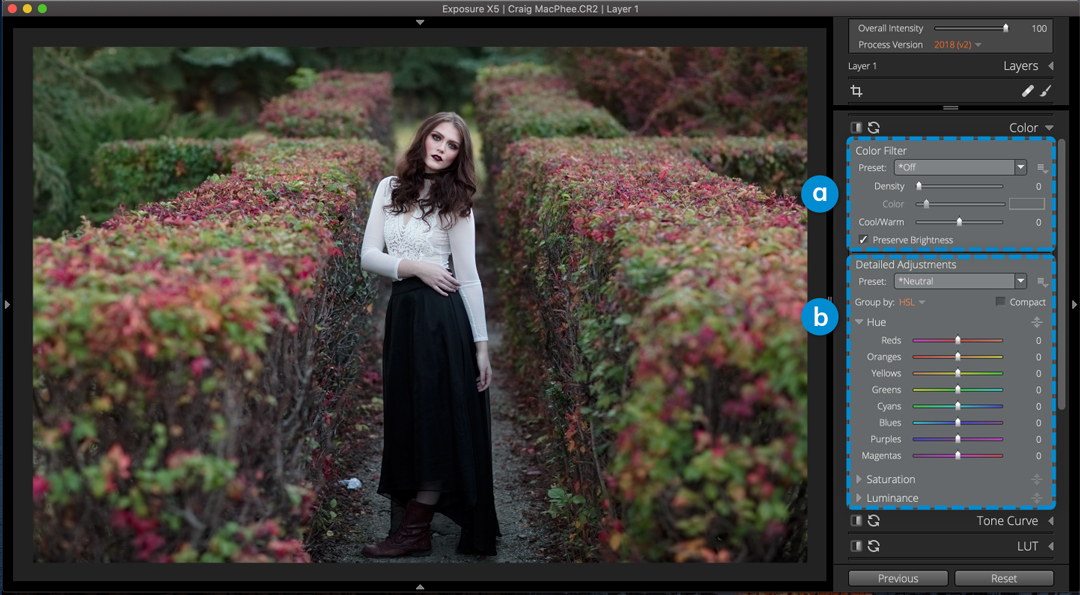
A – Color Filter
The tools in the top section apply color adjustments to the entire image.
B – Detailed Adjustments
In the lower section are controls are for making targeted adjustments to areas with a selected color hue, saturation, and luminance.
Color Filter
This group of tools simulate the effects of shooting through a colored filter mounted on the end of the lens. Color filters like these are frequently used in black and white photography, where they enhance brightness or contrast in a selection of tones.
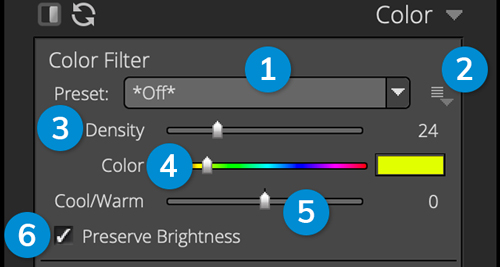
1 – Preset Dropdown
Click to browse and apply customizable color filter presets that only use the Color Filter controls.
2 – Menu Button
Save, Delete, and Rename presets.
3 – Density
Control the intensity of the color filter settings applied to the image. The density amount must be set greater than zero to enable the Color slider.
4 – Color
Control the hue of the applied filter. Click the color chip on the right to access advanced controls for selecting the filter color.
5 – Cool/Warm
Add a creative warming or cooling effect to the entire image.
6 – Preserve Brightness
Prevent the applied color filter settings from lowering the overall image brightness as an analog filter would.
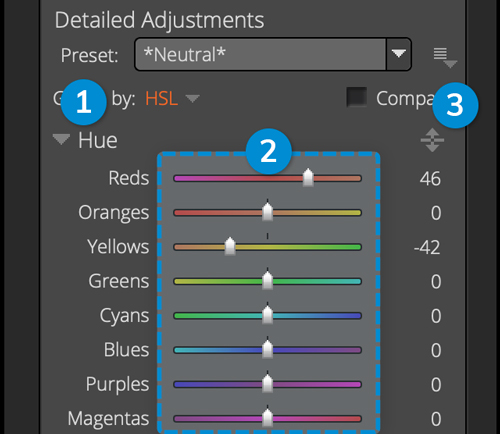
Detailed Adjustments
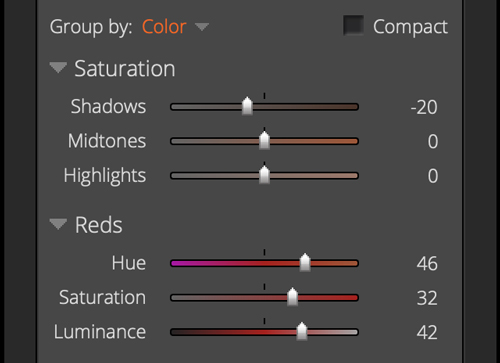
The Detailed Adjustments tools provide fine control over eight different color ranges in the image. They enable you to manipulate aspects such as the hue, saturation amount, and brightness of each color.

1 – Preset Dropdown
Click to browse and apply customizable color filter presets that only use the Detailed Adjustment controls.
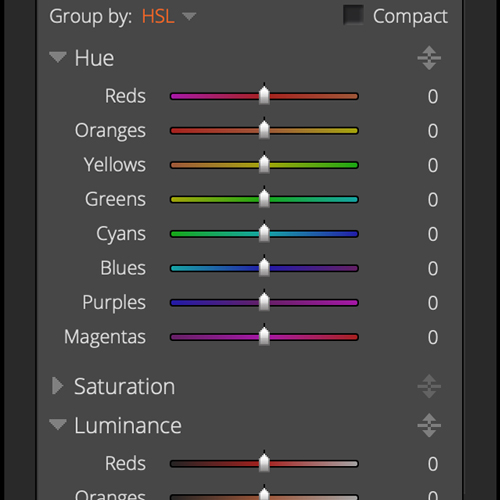
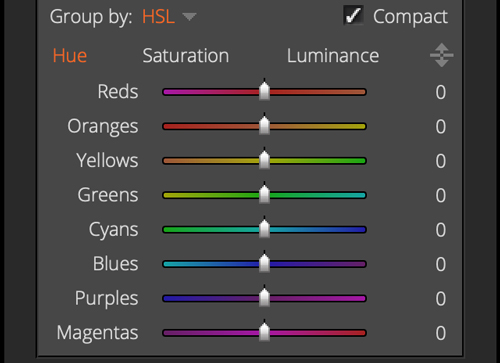
2 – Group By
Arrange the color controls in groups by type or by color. HSL option selected in the image above.
3 – Hue
Adjust the color balance of each hue. For example reds can be made to appear more orange or more magenta.
4 – Saturation
Control the strength of each color tone.
5 – Luminance
Set brightness of each color.
6 – Menu Button
Save, Delete, and Rename presets.
7 – Compact
Enables a more compact layout for the detailed adjustments. Controls may be grouped by either HSL or Color.
8 – Targeted Adjustment
Select, then click a color sample in the image to apply adjustments. Exposure adjusts matching colors over the entire image as the mouse moves up or down.
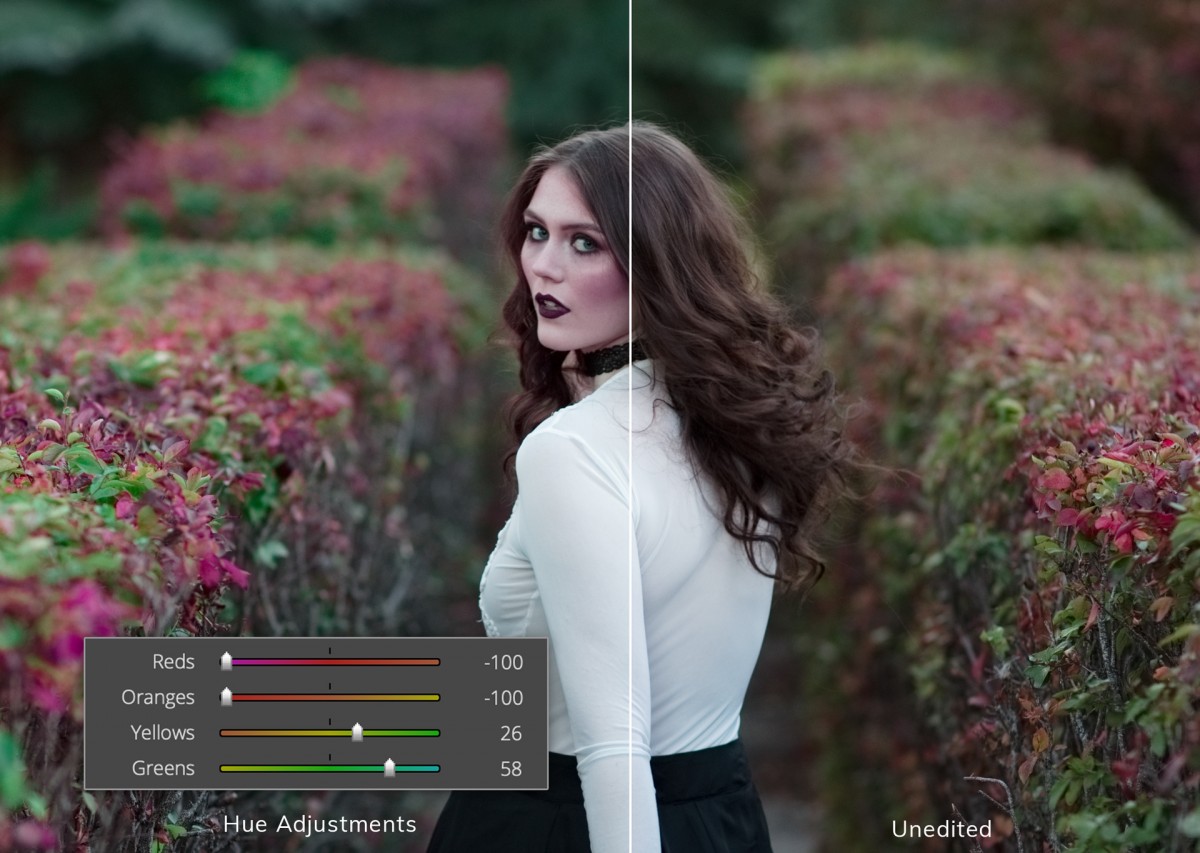
Hue
The Hue sliders shift the tones in your photo. This provides detailed control over each of the eight tones available individually. For in-between color hues, use the Targeted Adjustment tool to tweak several sliders simultaneously.
1 – Hue disclosure
Close or open this set of controls.
2 – Hue Color sliders
Adjust balance of each color hue to the adjacent one on the color wheel.
3 – Targeted Hue Adjustment
Click this and select a color sample in the image to apply adjustments. Drag the mouse up and down to adjust the tones selected in the sample. This may adjust numerous sliders at once.
Saturation
The Saturation controls apply in increase or decrease to boost or subdue specific colors.
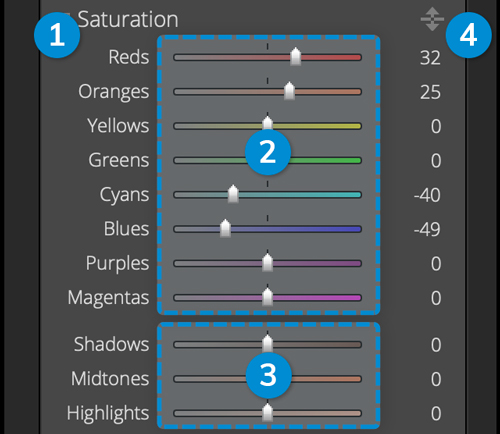
1 – Saturation disclosure
Close or open this set of controls.
2 – Saturation Color sliders
Adjust saturation value of individual colors. Note the color of each slider displays a visual hint for the saturation value at that range.
3 – Saturation Tone sliders
Edit the saturation of the shadows, midtones, or highlight values of the image regardless of color.
4 – Targeted Saturation Adjustment
Use this to select a color sample in the image to apply saturation adjustments. Drag the mouse up and down to adjust all the color tone sliders selected in the sample.
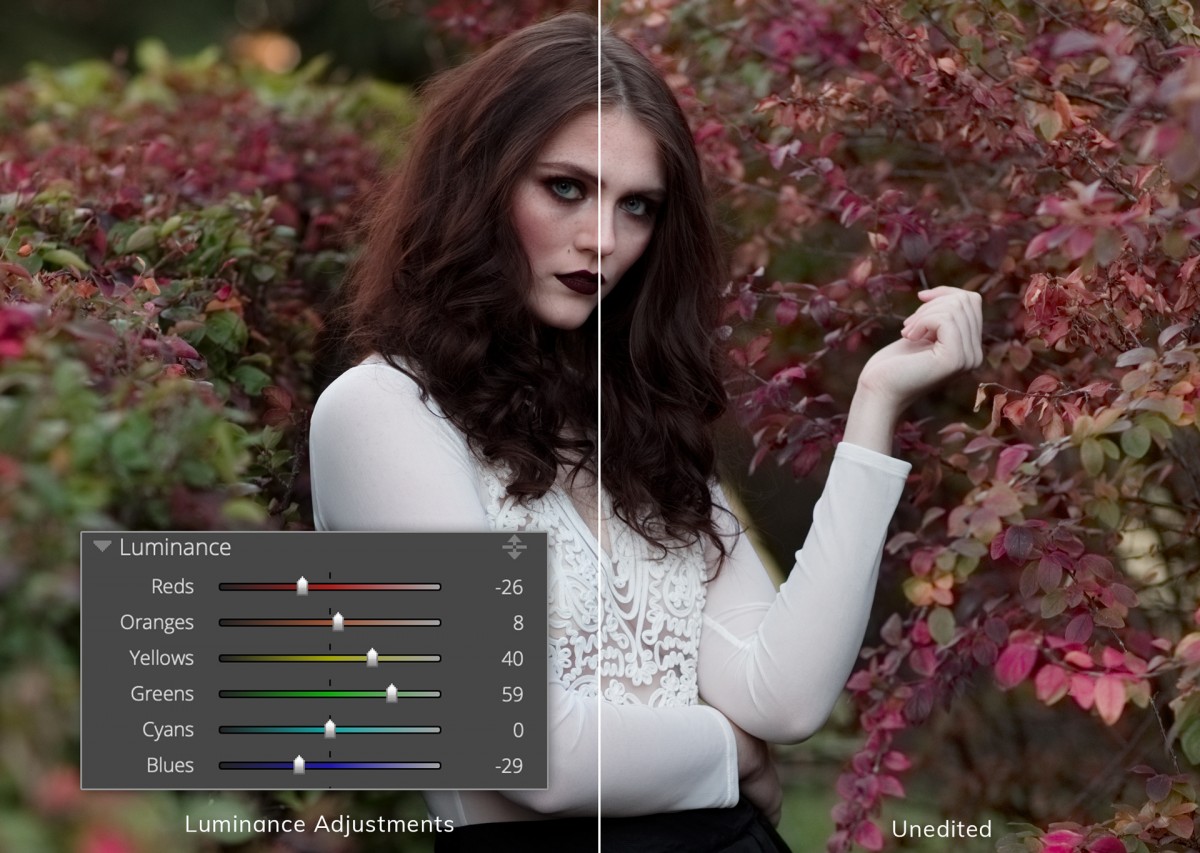
Luminance
Luminance determines the bright or dark quality of each color.
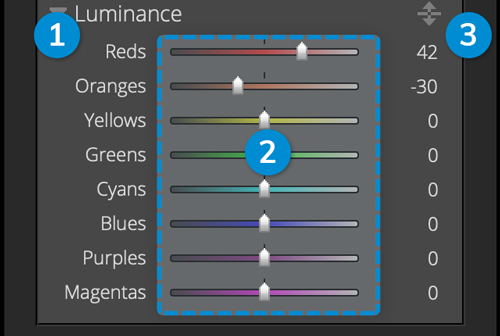
1 – Luminance disclosure
Close or open this set of controls.
2 – Color Luminance sliders
Adjust brightness of individual colors. Note the color of each slider displays a visual of the luminance value at that range.
3 – Targeted Luminance Adjustment
Use this to select a color sample in the image to apply saturation adjustments. Drag the mouse up and down to adjust all the color tone sliders selected in the sample.
Group By configurations
Group by: HSL
This arranges controls in a condensed format. This is a great option for smaller monitors or to streamline your workspace. It takes up less vertical space to minimize scrolling.
Group by: Color
Compact View
Enabling compact view is a great option for smaller monitors or to streamline your workspace. This arranges controls in a condensed format. It takes up less vertical space to minimize scrolling.
Compact Group by: HSL
Compact Group by: Color

The tools on the Color panel, and the other color manipulation tools in Exposure, offer fine control over all aspects of the colors in your photos. Thanks for reading our guide. We hope you enjoyed it. Save a link to this page if you need a reference for using the Color panel.
Try Exposure Today


