
Melanie Myhre is a fine art photographer who got her first taste of photography in the dark ages of film. She affectionately remembers fumbling with chemicals in near blackness. Today, she maintains her film nostalgia while reaping the benefits of digital. Her ethereal imagery has been featured in multiple publications. She teaches workshops on fine art photography and the creative process, always striving to inspire others. The remainder of this article is from her. Thanks, Melanie!
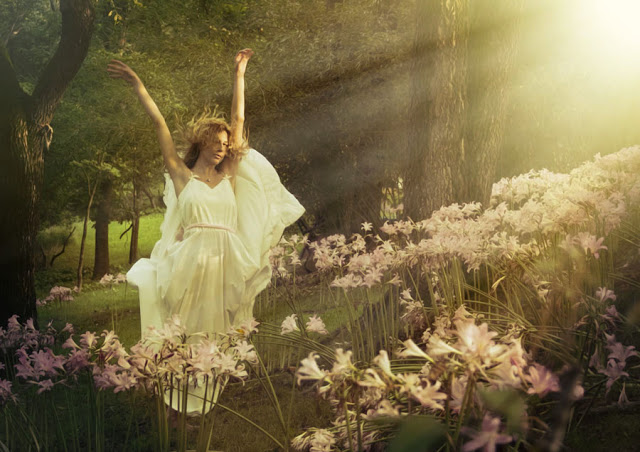
For this shot, I used the ‘Summer Blockbuster – Glow’ preset in the Cinema folder. I reduced the opacity to 65% and increased the density by 3%. I set the tone curve to the ‘Boost all leaving faded skin’ preset which gave a creaminess to her skin. The look was finished with a corner sun flare.
In the days of film, photographers set up their shots with careful patience. They used film types, creative processing techniques, and solid camera skills to create the perfect ambiance in their images. For me, it was frequently a trial and error process that sometimes yielded pleasant surprises, and sometimes complete failures.
Digital cameras and Photoshop gave me greater flexibility than I ever imagined. Equipped with this duo, I can instantly preview shots on the back of the camera and make adjustments on the fly. This allowed me to shoot elements separately and blend them together later. Before the digital age, this was a significant change for my process. This new workflow didn’t come without a cost. The images created in this way aren’t always believable. For me, digital lost some of the emotive organic aspects that films provided. I just wanted the results to be more believable.
Alien Skin saved the day with Exposure. With it, I can produce the same believable tones and textures in an easy-to-use format. This software is my cornerstone for replicating film effects. It’s extraordinarily user friendly, and the creative options are endless.
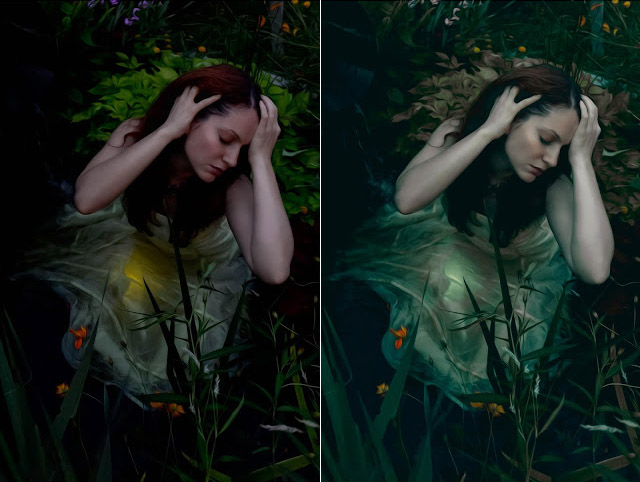
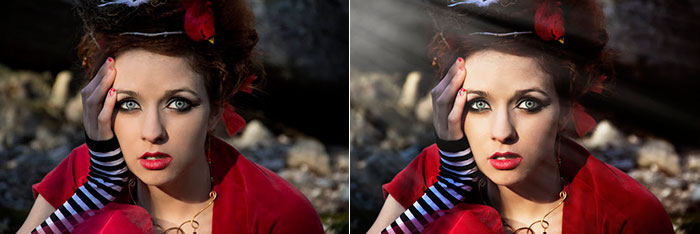
I typically use Exposure 5 in tandem with Photoshop. This gives me more flexibility to adjust layer opacity, use blend modes, add masking, and more. This shot was taken near dusk on an overcast day. It wasn’t the most ideal lighting conditions for what I wanted, but I had an idea of the mood the photo before I clicked the shutter. I wanted a darker, moodier image, and I planned on using a blue tone to enhance the look of moonlight. Sunnier conditions would have given an entirely different feel. Once the photo is in the computer, I prefer to make adjustments with Exposure 5 rather than tweaking the exposure beforehand.
I ran the original photo back through Exposure 5 using a customized neutral setting. Adding a sun flare increased the color contrast on the right side. I used the harsh landscape tone preset and then faded leaving strong sky color saturation preset. This set Kendra apart from the background by making her skin and dress glow.
In this scene, she had to sit on a light in the pond. You can see it through her dress. She really doesn’t like fish. Especially when they nibble at her toes. She had complete dedication and didn’t let them distract her.
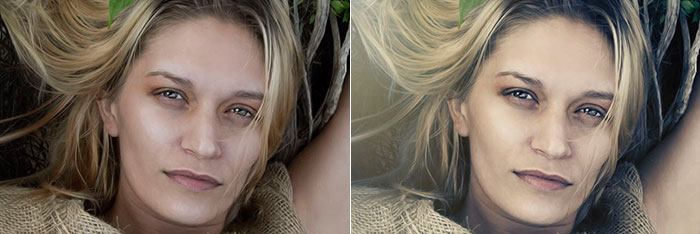
To get this golden sun-kissed look, I started in neutral with the FSA Red Bleach preset in the Split Toning panel.
I used multiple layers to achieve this look. It took a bit of experimentation. Give it a try!
This shot was from my Chasing Wonderland series. I chose the Polachrome-Cool Faded preset in the Polaroid folder.
I shut the grain off and reduced the opacity. I increased the contrast and set the tone curve to crush the blacks.
Increasing the saturation of the reds, greens, cyans, and blues gave the shot some extra pop.
I finished by adding one of the sun flare textures to suggest moon rays.
Try Exposure Today


