
Andrew Gibson is an all-around authoring aristocrat. He’s written dozens of e-books on the topic of photography, some of his titles were written for the posh e-book publisher Craft & Vision. In the world of e-books, they’re heavy-hitters. Andrew was blown away by the amount of awesome coming out of his screen when Exposure 6 started up the first time. He’s a big-time proponent for editing and retouching in Lightroom, so there’s no better way to hear about an Exposure & Lightroom workflow than from the pen of a guru like Andrew. Below is an article about batch image processing. Thanks, Andrew!
—
Perhaps one of the biggest weaknesses of using plug-ins, as opposed to Develop Presets, in Lightroom is the inability to do batch image processing. That’s why it’s so refreshing to use a program like Exposure 6 where batch processing is not only included as a feature, but extremely easy to use.
By the way, batch image processing isn’t new to Exposure 6, although the layout is different. You can catch up on the mechanics of the process by watching the helpful tutorial videos Alien Skin have on their website.

There are two ways to use batch image processing to speed up your workflow. The first I’ll demo works best with photos that are similar in terms of subject matter and exposure.
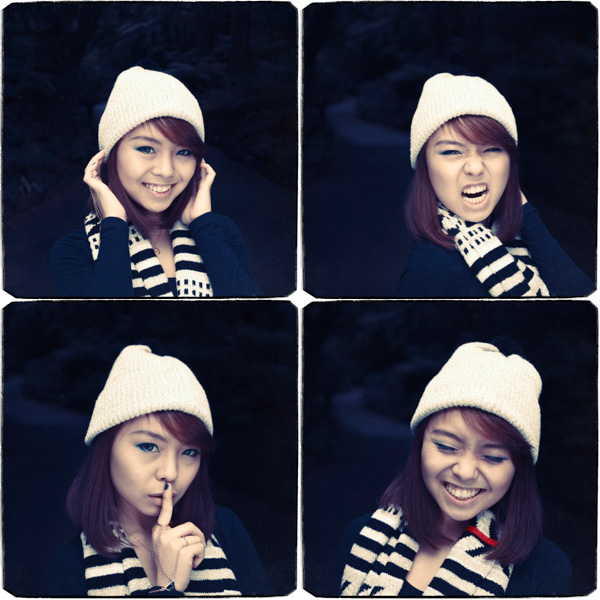
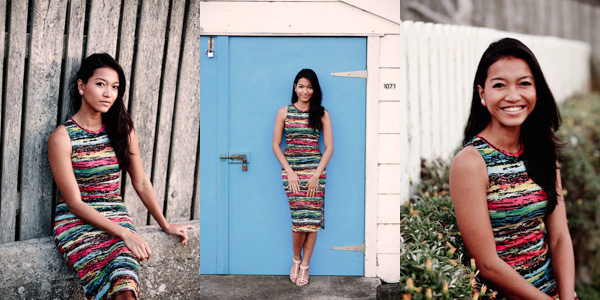
As an example I’m going to show you how I processed a set of photos taken with Ashley, one of my favourite models. She’s a very outgoing girl with a full repertoire of facial expressions. I wanted to take advantage of that so I asked her to stand in one position, pull faces and have fun. Every time she gave me a new expression I took a photo.
There are two things that make these portraits ideal for batch image processing. First, the exposure is the same for each one. I set the camera to manual so there were no variations between frames. The light was steady so that worked perfectly. If light levels are changing, as they can do when you are working outside, you may have to use an automatic exposure mode instead.
The second factor is the dark background. Believe it or not the light in this photo is entirely natural. We were walking around looking for backdrops when I noticed the special quality of the light in this location. It came through a gap in the trees, illuminating the foreground and leaving the path in deep shadow. I asked Ashley to stand in the light, and her boyfriend assisted by holding a silver reflector to bounce more light onto her face. There was a lot more light on Ashley than any other part of the scene, so the background went quite dark.
Before I exported the portraits to Exposure 6 I prepped them in Lightroom. For me that means setting Camera Calibration, enabling Lens Corrections and adjusting White Balance and Exposure in the Basic panel. In this case I also cropped the portraits to the square format.
Then I exported the images to a temporary folder as 16 bit TIFFs. That gave me high quality files to work with in Exposure 6 and avoided creating huge TIFF files sitting in the same folder as my Raw files.
Export completed, it’s a simple matter of selecting those images and opening them in Exposure 6. If you’re coming from Exposure 5 you’ll notice that batch processing has been simplified. There are now no buttons above the film strip to help you navigate. Instead, click on an image to edit it, or use the ⌘-A (PC: Ctrl-A) keyboard shortcut to select them all.
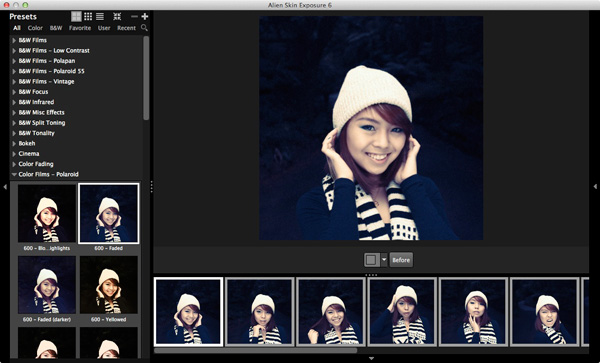
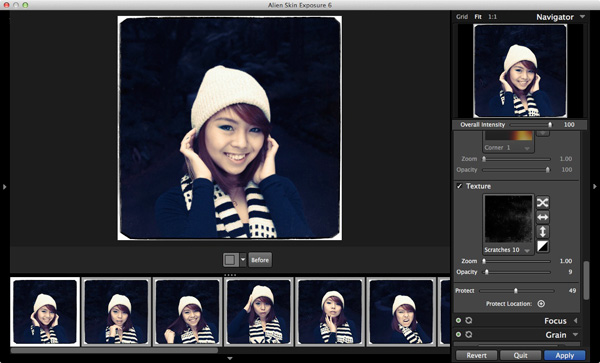
I love the Color Film – Polaroid presets and for this set of images I selected ‘600 – Faded’ as my starting point. When you open your photos in Exposure 6 you’ll see a single image displayed in the centre pane, but the changes you make will be applied to all the selected images. You can then go to the right-hand panes to make more adjustments, which are also applied to all selected photos. The only alteration I made to my photos was decrease the amount of grain in the shadows, as it was too strong for my liking, and add a Grunge border. Oh, and I couldn’t resist adding some subtle scratches.
Batch processing done, you can select images individually if you need to make any further changes. Make sure you Deselect the photos with the ⌘-D (PC: Ctrl-D) keyboard shortcut first otherwise Exposure 6 will continue to apply changes to the entire batch. When you’re done, click the Apply button. Exposure 6 closes, saving your adjustments to the files and updating the Lightroom Catalog.
What impresses me most about batch image processing that I’ve tried it with as many as 70 images and Exposure 6 didn’t slow down at all. Great news for photographers in a hurry!
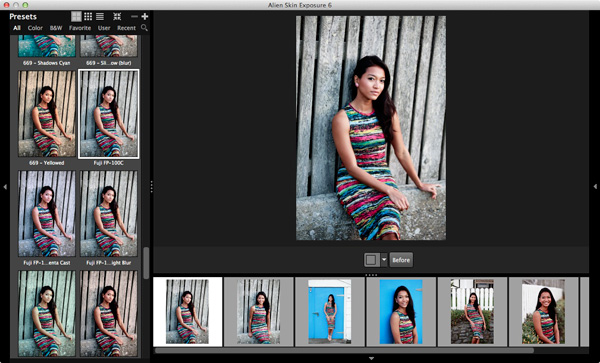
The second way to batch image process (I first saw this tip in an earlier post on the Alien Skin blog) is to open your photos in Exposure 6 and process them in batches, depending on the content.
A situation where you might use this method is when batch image processing from a portrait, wedding or fashion shoot. It is likely that the lighting and background will vary, and you will need to treat photos at least somewhat differently, even if you aim to create the same overall feel.
In this example I selected the first two images in the batch and applied the Polachrome preset from the Color Films – Polaroid set. I reduced the strength of grain in the midtones, made a couple of tweaks in the Basic panel, and added some very subtle, nearly invisible scratches.
Once finished (this is where the magic happens) I created a new preset using the settings of the first photo. Then I selected the next two images in the series, applied the new preset I had just created, then made some adjustment tweaks.
Finally I selected the last three images and repeated the process. If it helps, you can create more presets as you work your way through the batch.
I hope these tips help you get the most out of Exposure 6’s batch image processing feature. If you have found another way to use it then please let us know in your comments. I’m curious to see how other people utilize this very useful tool.
—-
Mastering Lightroom: Book Three – Black & White
Andrew’s written an in-depth ebook about converting color photos to black and white. Mastering Lightroom: Book Three – Black & White explains everything you need to know to make dramatic and beautiful monochrome conversions in Lightroom, including how to use the popular black and white plug-ins like Exposure 6. Check it out! To learn more about Andrew, visit his blog.
Try Exposure Today


