Today, we’d like to welcome guest blogger, Andrew Funderburg (aka Fundy), to the bridge of the mothership. For those who may not be familiar with the name, Fundy Software is a really great company putting out fantastic product for the photography and design industry. If you haven’t checked out the Fundy Designer suite of products, you really should head over to their website to get a look at what you’re missing. Over to you, Fundy!
In this blog post I’d like to share with you the steps I took to get the look I needed. This shoot was planned for a series of print ads for Fundy Software. I am the founder of Fundy Software, but having been a working photographer, I miss the craft and use our own ads for my artistic outlook. I don’t claim to be the best photographer in the world, but to quote Susan Stripling, “not bad for a software guy.”
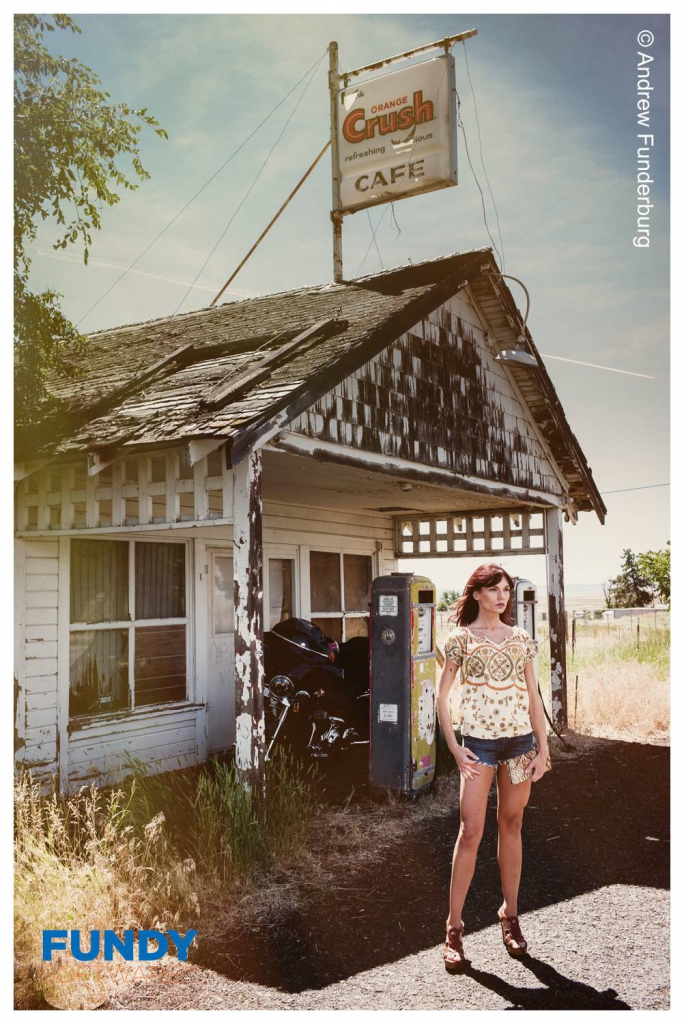
I found the location while looking through some Flickr photos of rural Oregon. In Kent, Oregon (population 80 people) there is an old, run-down gas station store, right on highway 97 going south of The Dalles towards Bend. I had never been to the location before, so decided to take a smaller crew than usual. It is a 3.5 hour drive from our office, so I really didn’t have an entire day to scout the location.
We hired a model and a hair/makeup artist for the day (side note: please hire and pay your models and hair/makeup people going rates, they deserve it). My friend, Greg Schroeder has a Harley, loves to ride it and is a keen amateur photographer, so I brought him along for the fun. Additionally, my good friend Alan Weiner came along for the ride. It was a lot of fun getting out there and we had even more fun shooting.
The one hiccup, was the proximity of the gas station to the highway. I had assumed it would be set back off of the highway, but as bad luck would have it, it was directly on the highway. There was only about 15 feet between the pumps and the lane of traffic cruising by at 65 MPH. So for much of the shoot, I would set up the model, set up the speed light position, then wait for an opening in the highway. I would jump out into the closer lane of traffic and shoot until a car or truck came. My good friends were watching out for me, and would get me off of the highway before I was in any danger.
During the shoot, I used just one camera and one lens – a Leica M 240 digital rangefinder and the 50mm f/2 Summicron. The 50mm is a lens that I’ve been coming back to more and more. It’s a chameleon of a lens. Depending on how you use it, it can look like a wide angle or a telephoto. Bruce Lee was quoted as saying, “I don’t fear the man who practices 10,000 kicks, I fear the man who practices one kick 10,000 times.” I feel the same way about the 50mm lens. If you master it, you are a photographer to reckon with.
In two hours, I took 77 frames, including the set up shots – the shots without the model, setting up the frames. For lighting, I was using two brand new Strobie 230’s. These are simple, manual radio strobes. They’re just $130 each, pack a punch and can be used with any camera that has a hot shoes. The simple trigger is tiny and sits well on the Leica M. The strobes have their radio receiver built into the flash, so no awkward receiver attached. And they just fire and just work. I had two of these on a double T mount and a simple umbrella. My friends helped me hold the light stand in place and away I shot.
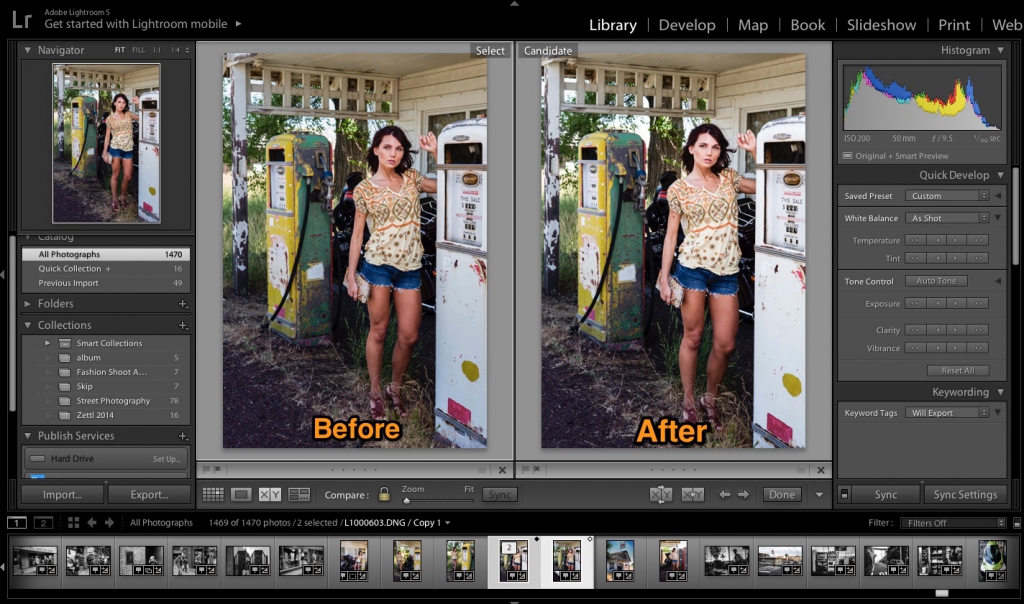
From these 77 frames, I narrowed down my keepers to 7-8 frames using Photo Mechanic. Photo Mechanic allows me to move through my 36MB DNG’s as quickly as if they were web sized JPEGs. Then I loaded these into Lightroom and applied my basic Leica color preset that I’ve created. The preset is nothing special. Most items are set to zero. I have the contrast and the clarity bumped up a little.
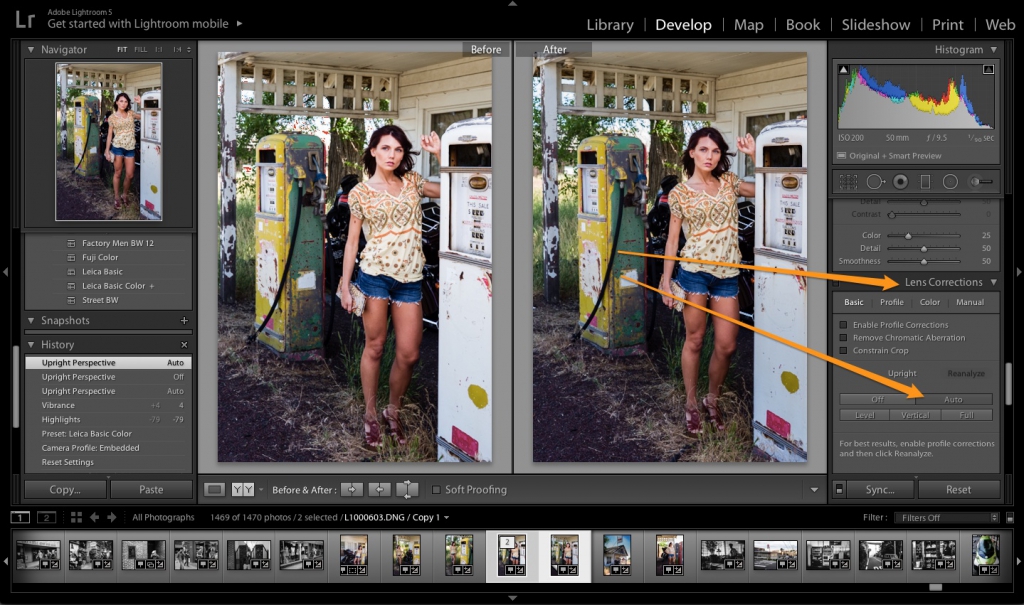
I went through my keepers and adjusted the basics of exposure and white balance. The only special I did in Lightroom was use the Auto Upright function under the Lens Correction tab to make the lines a little straighter.
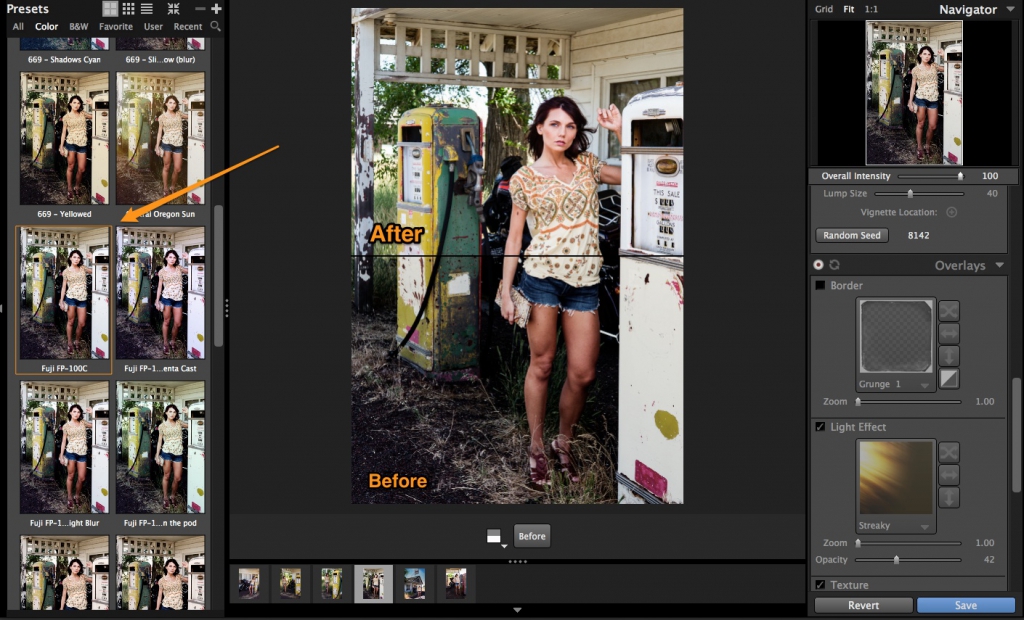
After this step, it was off to Exposure 6. I’m a huge fan of Exposure 6 and it is quickly replacing everything I used to do in Photoshop. The best part is that I can create my own custom looks (which are extremely complex) and apply them instantly with one click to one image or 100 images.
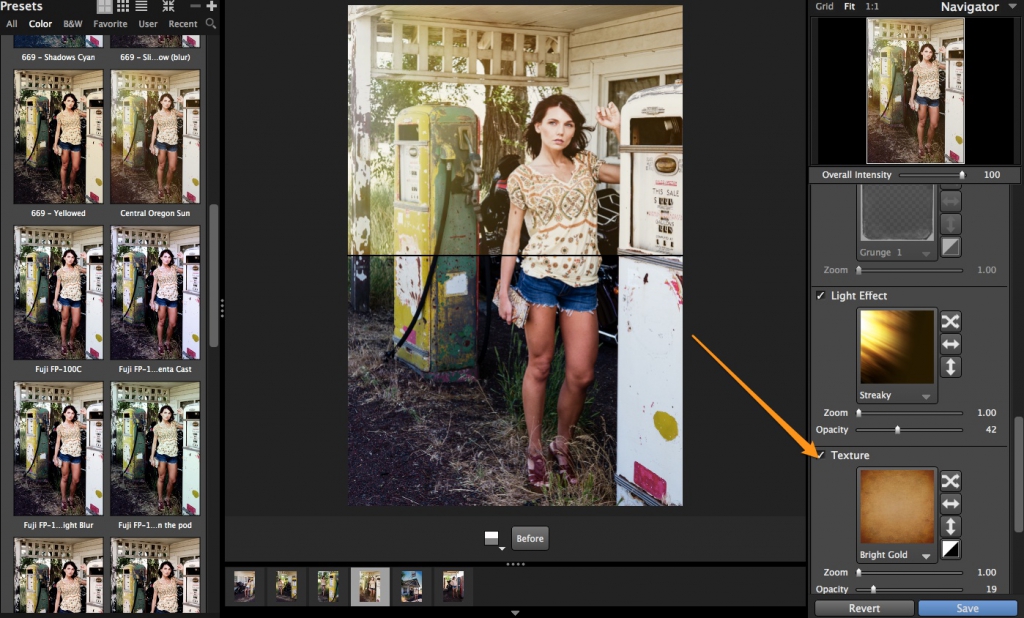
Step one was to choose a base starting point for the look I was going for. I chose the Fuji FP-100C setting under the Color Polaroid films in Exposure 6.
Step 2
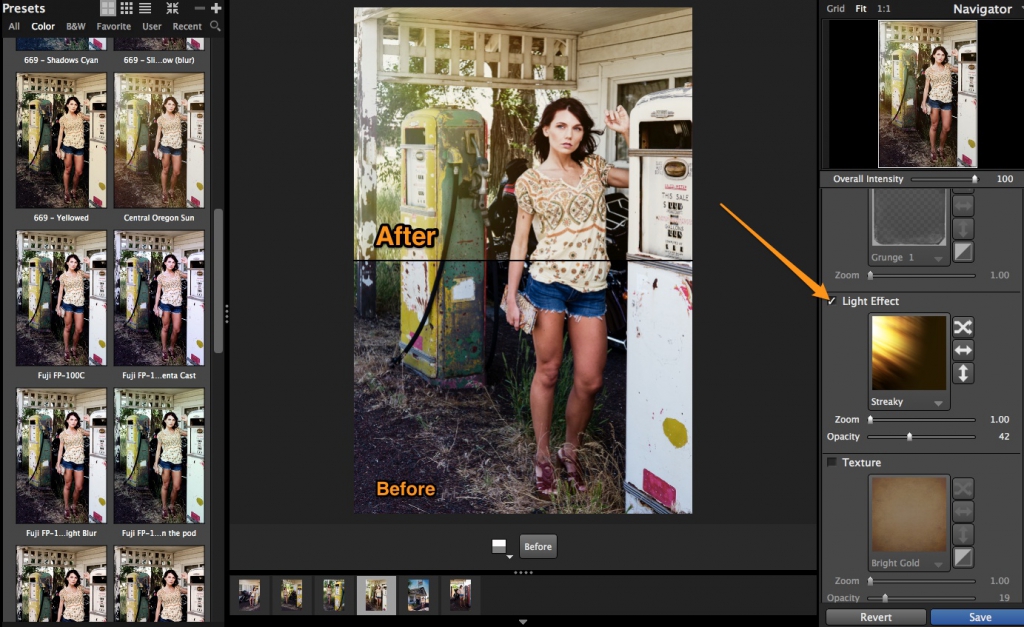
I added in the Light Effect called Streaky and choose to have it shine in from the top left, resembling how the sun might have actually shown in. I turned down the opacity to level 42.
Step 3
I added in my own custom texture, called bright gold. It’s a simple old paper texture that one of my employees created a couple of years ago by merging a few different papers, colors, etc.
And that’s it. I simply saved this mixture out as my own custom preset and applied it to all of the images. It took me about 10 minutes to create the custom preset, but now that I have it, it just takes me a few seconds to apply it to as many images as I want. Whether it’s a portrait shoot, a wedding or a fashion shoot, I’m a big fan of working this way. I’ll take 10-15 minutes to dial in 1-3 custom looks that fits the shoot, then batch apply them in just a few seconds. Exposure 6 is quickly becoming my go-to editing tool.
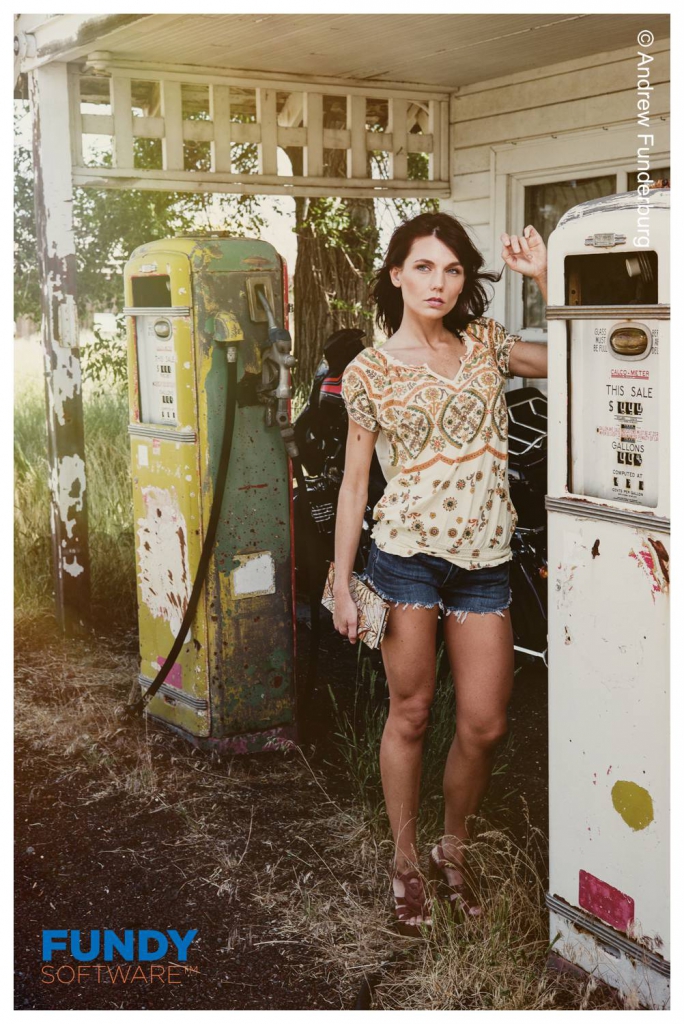
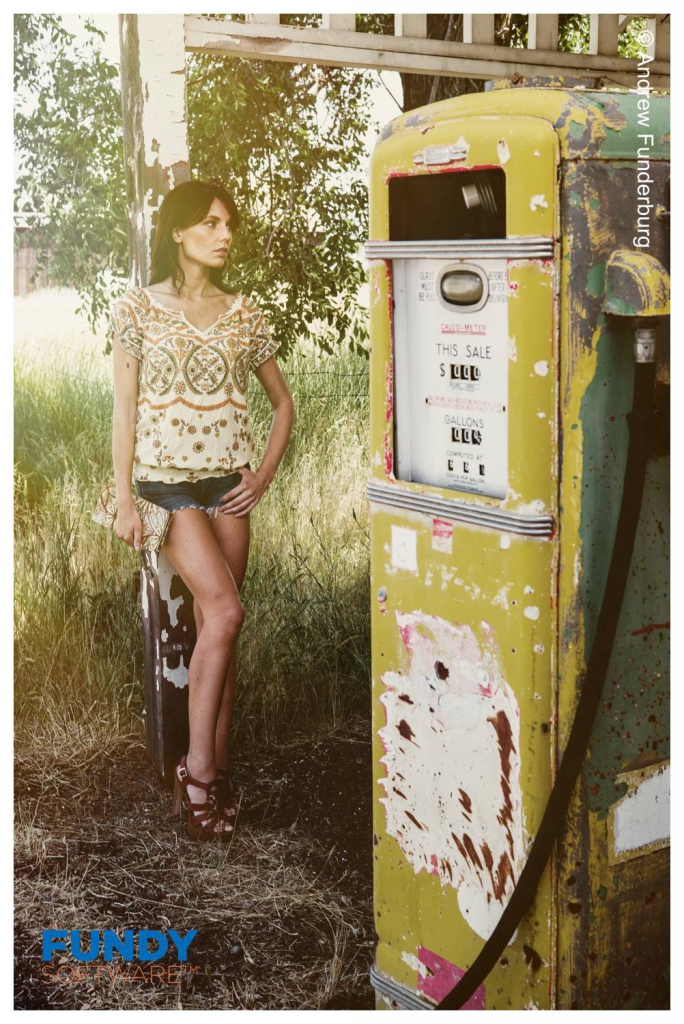
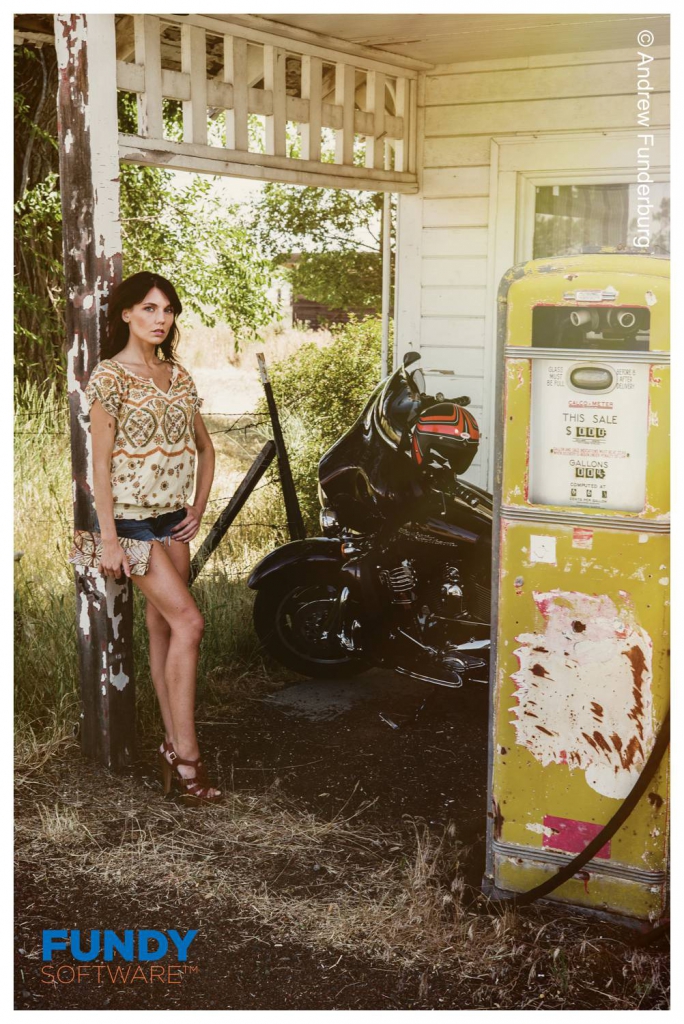
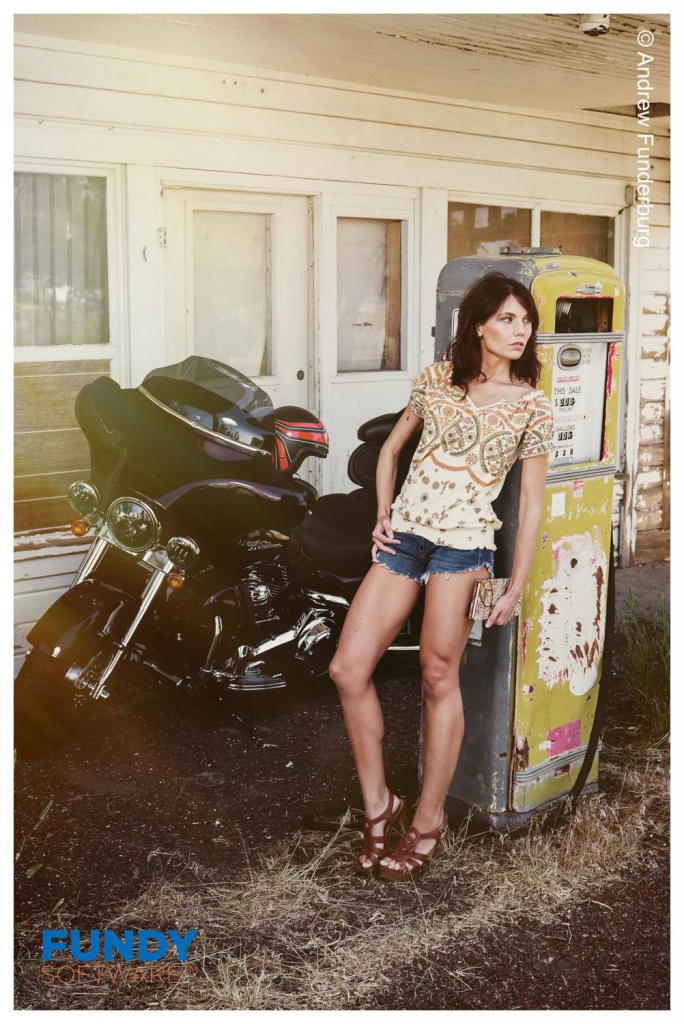
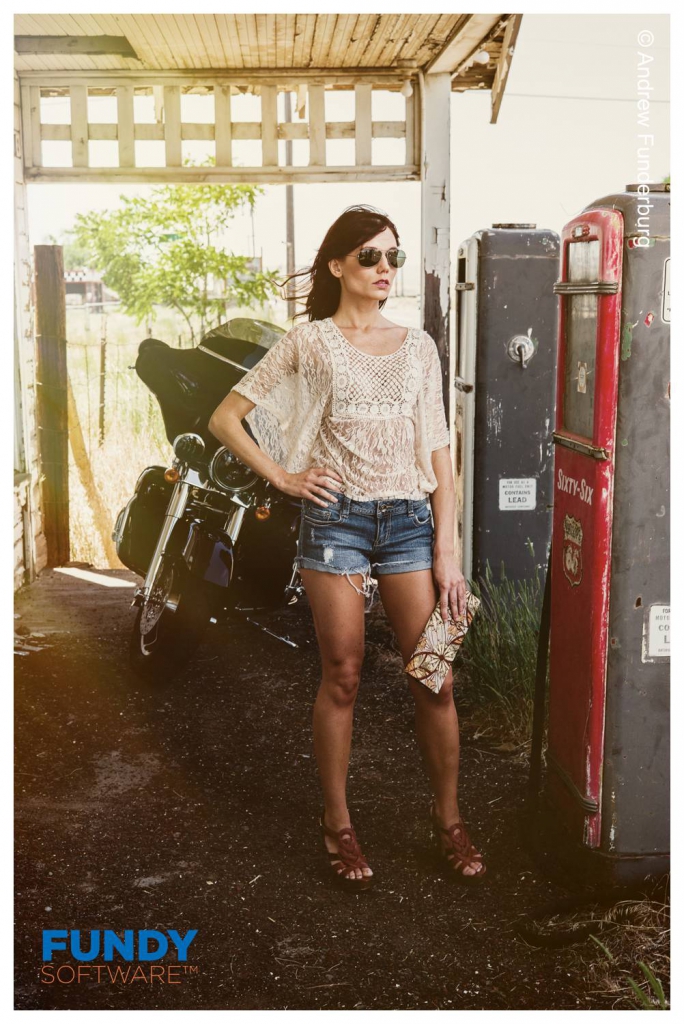
Here are all the final images from the shoot:”
Big-ups to Fundy for putting together such a great tutorial for us. If you want to see more like this on how to get the best out of Exposure, then head over to our tutorial page. Also, be sure to check out Fundy’s fab tutorials on such great products as Album Builder, Blog Collage, and Image Brander over on the Fundy Software site.
—
Interested in Andrew’s gold texture overlay? He was kind enough to provide it for your use, here.
Try Exposure Today






Fundy software seems really nice but there are a lot of possibilities in Photoshop and Lightroom (templates+mcp actions templates+blurb,…)
i buy all my alienskin, ononesoftware, nik software, topazlab,… plugins at less than 100 euros
so when fundry will decrease price from 400usd to 100usd i will consider their soft
i am amateur and can’t afford such price for a album/watermark tool
br
marc
very nice tuto !
what are the main features of fuji-fp100 film ?
do you sell your gold texture ?
there are very few textures in exposure 6 so can’t try the tuto to the end
marc
Hi Marc,
Fuji FP100 film is a daylight film, so it can add slight coloration to your image. It has a bit of grain, but nothing harsh. It’s an exceptionally sharp film, shoots very consistent, and is very accurate, too.
I’ve reached out to Fundy for the gold texture image.
Fundy supplied us with the gold texture he used in the tutorial. Download it from the link in the last line of the article. Thanks, Andrew!