Fast Photo Finishing for Tethered Shooters
Help your work stand out in today’s overcrowded photography market by learning and implementing new photo finishing techniques. Doing so can be as easy as applying photo effects from creative software like Exposure X during post processing. For the most part, you’re not making money if you’re not shooting, so anything that speeds up your editing workflow essentially puts cash in your pocket.
I am part of the tech-savvy commercial photographer crowd, so I use Capture One in my workflow. For me, Capture One’s tethered shooting and Exposure’s processing are both necessities. I use them together everyday. Luckily, export presets in Capture One automatically connect my tethered shooting with Exposure. This allows me to take full advantage of Exposure’s superior color toning for my photo finishing work.
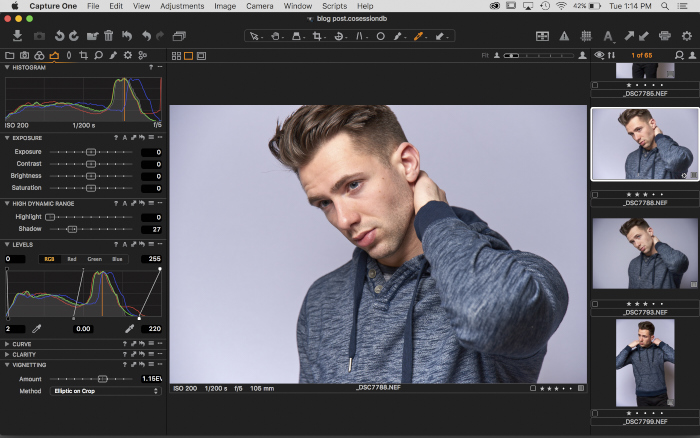
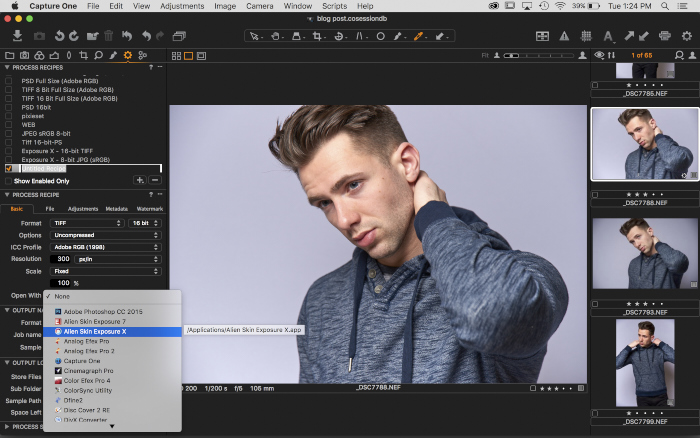
Below is a simple screenshot of what Capture One looks like on my computer during post production. I just finished a recent model shoot with David McLaughlin from Aqua Model Management in NYC. Tethered shooting allows me to quickly set a few specifics such as white balance, highlight/shadow recovery, and exposure adjustments on the fly. Another big plus is the ability to see your images on a much larger screen than the one on the back of the camera. And what’s better is that Capture One is non-destructive, so you can always revert back to your original photo.
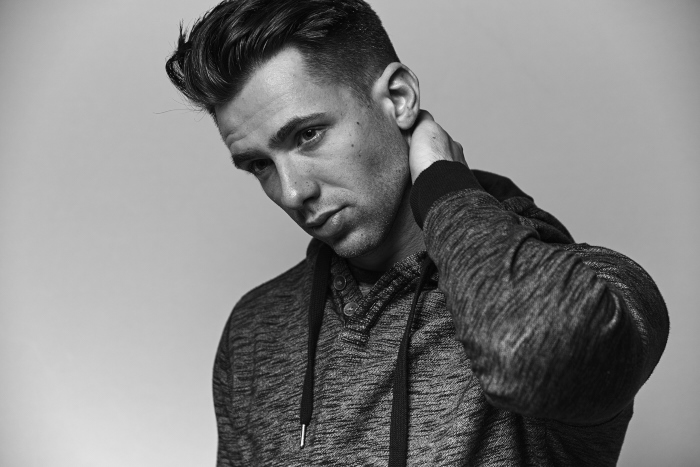
Polaroid Instant Film Look in Exposure
Let’s get right to the good stuff and take the shot into Exposure for some photo finishing magic. I want the final look of this photo to be a high-contrast black and white image reminiscent of Polaroid instant film. Black and white shots let the viewer see the subject’s face and read their eyes without distraction. I think a look like that will work great with this image.
Within Capture One, I’ll click the Process button in the Process Recipes panel. Capture One runs through the action’s steps and opens the photo in Exposure X. The first thing I do in Exposure is press the Reset button in the lower right (or Command+R) to zero out any previously used effects. I do this because I don’t want to make any adjustments to the look of the image by accident before I start making tweaks.
Let’s start the transformation of the image with one of my favorite presets for a punchy, high contrast B&W look: Polaroid 55. The film was known to shoot tack-sharp and had such low grain that it’s hardly noticeable, which are a couple of attributes that I love about it. Sometimes presets work perfectly right out of the box, but I always plan to make some tweaks. This preset produces a look that enhances skin details. I think it works great for this shoot because it adds a bit of distinction to the face of the model. The preset also intensified some of the textural qualities in the clothing, which I like.
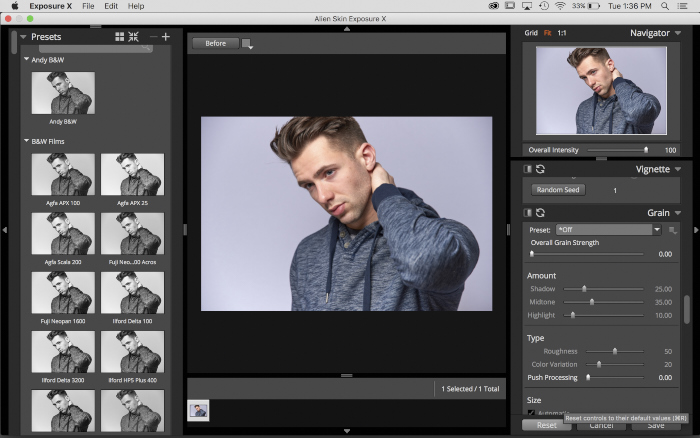
Again, I’m one of those people who wants absolute control over my photos, so I always make customizations to dial the look in. The border doesn’t work for the shot, so I’ll remove that by shutting off the overlays panel. I’ll increase contrast in the Tone Curve panel. If you prefer to use curves, you can add or adjust points on the line, but I’m a lazy, so I use the sliders just below. They make tweaking quick and easy.
Happy with the look, I’ll press Save and Exposure will render the effects out to the TIFF file. The new photo will automatically populate inside of Capture One. This is handy because I can export several different sizes of the same shot simultaneously using process recipes. Speaking of, I should probably show you how to make that happen.
Automatically Export to Exposure
RAW conversion is basically complete when I’m done shooting. The next step in my post-processing workflow is to export copies and use Exposure to finish the look. I built custom export presets in Capture One that size the image appropriately, assign a specific color space, and open them in Exposure automatically.
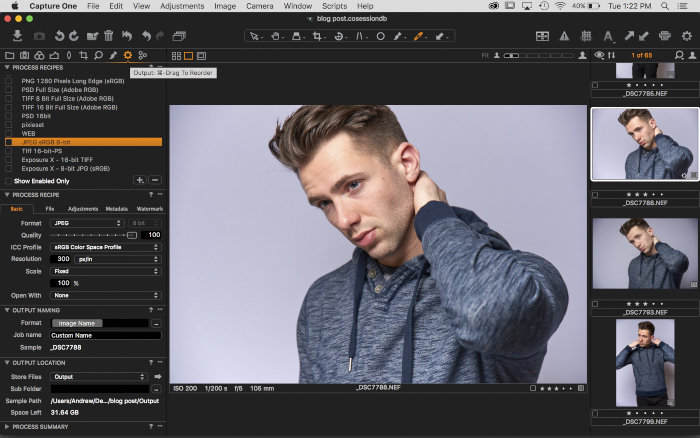
Export presets are easy to make, just click on the sprocket in the tool bar above the histogram to open the Process Recipes panel. Click the + icon to create a new one. For this photo, I’ll set it to save out an uncompressed 16-bit TIFF, using Adobe RGB color space, at a resolution of 300dpi. The real magic is assigning Alien Skin Exposure X from the dropdown.
To run the action, I click the arrow next to Process Summary and click the Process button. Capture One will run through the action’s processing steps including opening the rendered photos in Exposure X. Take note that you can process multiple process recipes at a time, which is something I use to save time. I’ve built recipes to export images for print use and others for web.
So there you have it. Using Exposure to add photo effects to your images when working with Capture One is easy, and it’s a great way of developing new looks during the photo finishing process. These two programs work together beautifully. You can perform basic RAW development while shooting tethered, then you can apply film emulations in just a few moments. It hardly takes any time to have a set of final shots ready for your clients.
If you’re interested in shooting tethered, consider picking up quality gear like the SuperSpeed USB 3.0 cable from Tether Tools. I still remember the headaches of tethered shooting when I started. Quality cables and quality software fixed all of the issues I faced. Behind the photo finishing magic is Exposure X, which you can easily add to your Capture One editing workflow. Exposure works with a bunch of other workflow options outside of just Lightroom and Photoshop. Download the free trial of the Exposure X Bundle and give it a go.
Try Exposure Today


