By paying attention to shadow, you can understand a great deal about the quality of light. Deep shadows with strong lines inform you that you are working with hard direct sunlight. Soft, diffused shadows reveal that the light is soft and even. That information helps you make a series of choices to make your composition in every kind of photography, including street photography and portraiture.

In this portrait image, the softer lighting of open shade is flattering to the subject. On the other hand, direct sunlight can create a stronger graphic interpretation of a scene. By paying attention to the light, you can better understand where to place a subject and how to expose for the location. That same understanding plays a role when post-processing, where the exposure is just a starting point from which to work from.
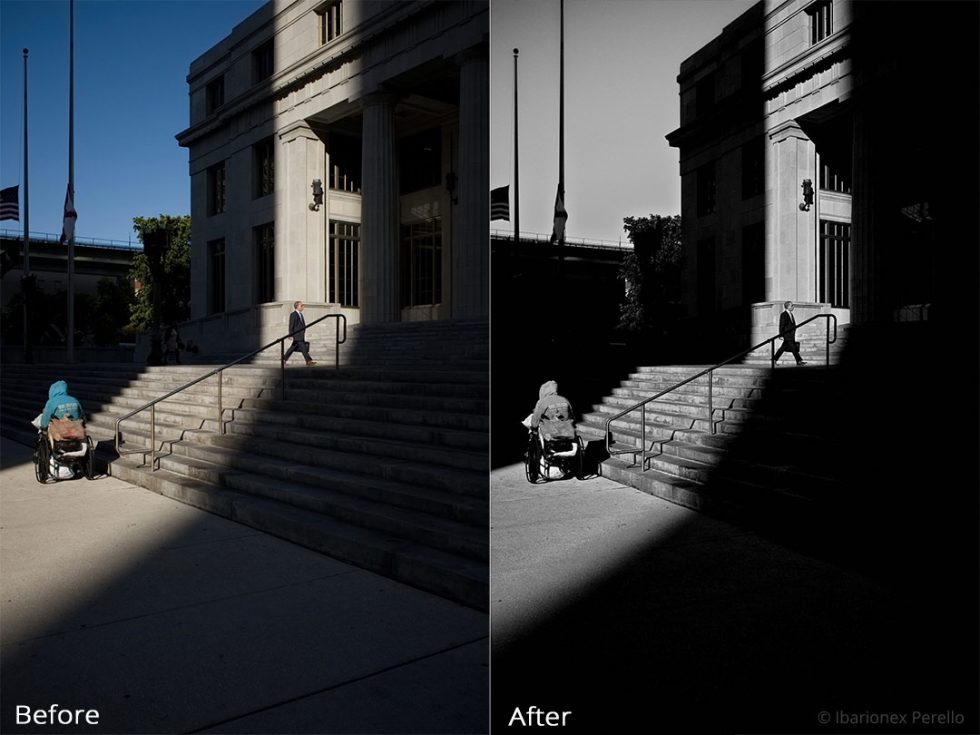 By working with RAW files and layers in Exposure, you can enjoy great flexibility without having to launch another application like Photoshop to enjoy that level of control.
Though Exposure X4 provides a wealth of presets to work with, they don’t always need to be used as a starting point. Instead, you can begin the process of interpreting the RAW file to suit your personal vision, and then apply a preset in a separate layer.
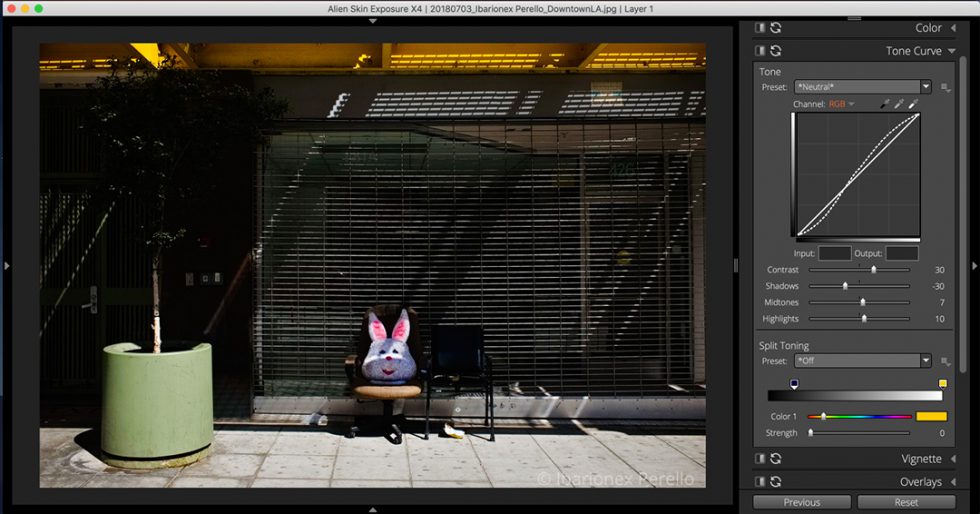 Using the Tone Curve panel, you have fine control over the contrast inherent to the image. It is in the development stage when your awareness of light becomes essential. Creative choices can be made for how the highlights, shadows, mid-tones are rendered. In this example, contrast was increased in the darker tones, which push the shadows into deep, rich tones. Or the decision could be made to flatten the contrast for an airier look.
These changes, however, have an impact on color. Increasing the contrast can result in certain colors becoming more saturated. The color adjustment tools in Exposure make it easy to change the luminance, hue or saturation of individual colors. This also provides an opportunity to shape where the viewer’s attention will be drawn in the photo. For example, you can increase the saturation on a subject’s face while desaturating and darkening color values in the background.
Using the various adjustment tools in Exposure, you can easily move from global adjustments to localized changes. These effect particular areas of the image, where you can use them to further enhance light and dark tones.
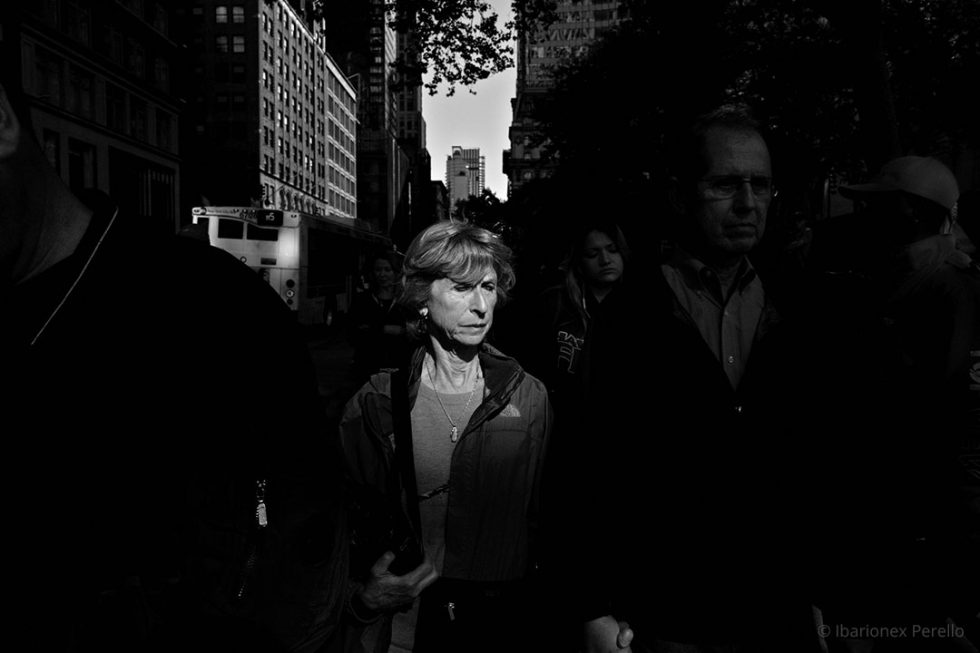
Take the photo above, for example. Burning (darkening) and dodging (lightening) areas of the composition provide the means by which to adjust brightness and contrast to selective areas of the frame. This enables you to control how the viewer’s eye navigates the image by emphasizing the most important elements in the composition. Darkening areas, such as extra people in the frame, can soften visual distractions, while brightening areas can pique the viewer’s attention.
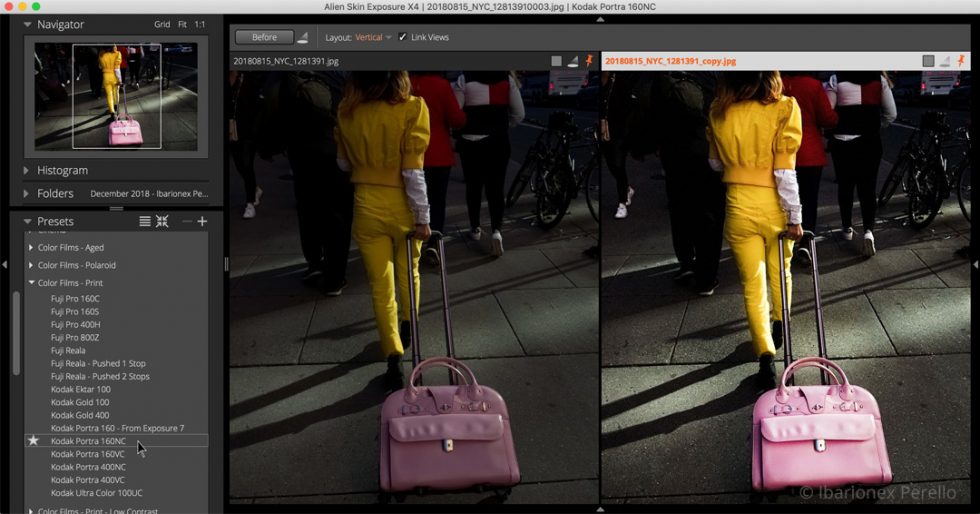
Exposure’s helpful display options enable you to easily select and compare different looks. And by massaging the RAW image before applying presets, you can make more accurate decisions about the final look of your image. The comparative views in Exposure help you make preset selections that are in line with your personal vision for the photograph.
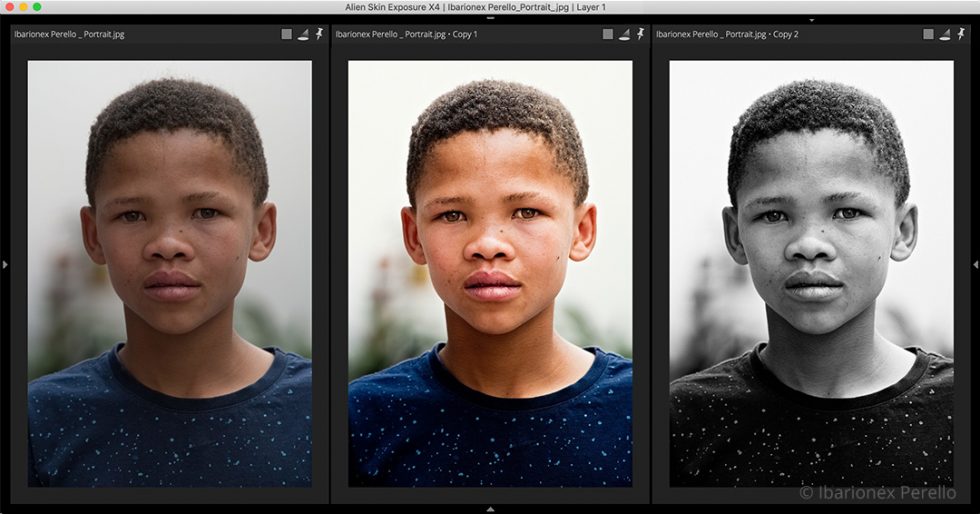
The virtual copies functionality in Exposure also makes it possible for you to create different edits of the same file, including color and black and white versions. Not only does Exposure provide a variety of black and white presets to choose from, it also gives you the ability to refine the look to their personal taste. This is all done while still editing the original RAW file.
The power of Exposure X4 is that its many tools and controls allow you to approach an image in any variety of ways. It ensures that you create a final image that is a personal expression of your own creativity.
—
His latest book: Making Photographs: Develop a Personal Visual Workflow is being released this year. The eBook version is currently available and the soft-cover will be in stores in December. You can place an order now and receive a 40% discount off the list price directly from the publisher’s website at RockyNook.com.
Try Exposure Today


