
Since the early days of film photography, photographers have used dodging and burning to enhance their photos. Simply stated, dodging lightens and burning darkens the areas where you apply the effect. The terms themselves are based on the darkroom technique for controlling the exposure of an analog print by exposing some areas more, and some areas less. Dodging and burning can be used to rescue areas with under or overexposure, or to manipulate photos creatively and give them more punch. This article shows you how to perform non-destructive dodging and burning in Exposure.
Dodge and Burn Effects in Exposure
Exposure’s layers and local adjustment tools enable you to apply dodge and burn effects to your images with precise control. You will need at least two layers since dodging and burning are separate effects. One layer is needed for the dodge effect, which increases the exposure values of the area it’s applied to. And one layer is needed for the burn effect, which decreases the exposure values of the area it’s applied to. Each layer has its own opacity slider, which enables you to seamlessly blend the effect with your image. If you have any questions about using Exposure’s layers, check out our Non-destructive Layers video.
Exposure’s brush tool enables you to quickly create precise selections for your dodge and burn adjustments. To speed up the brushing process, you can set different brush parameters for two brushes to make brushing faster. For example, you can set up a large brush for applying adjustments quickly, and define a smaller brush for fine-tuning details. For dodging and burning specifically, we recommend you use a brush with a low Flow amount. This enables you to slowly and accurately build up effects with numerous brush strokes.
Another option to apply an effect to part of an image is with Exposure’s gradient tools, which enable you to make seamless, natural fades between effects. You can combine several gradients on a single layer, and you can use them in conjunction with brush strokes. Using brushing and gradients together enables you to selectively apply effects with a natural fade and with detailed placement. To learn more about using Exposure’s brush and gradient tools, watch our Local Adjustments video.
Common Dodge and Burn Scenarios
Because dodge and burn are creative techniques, the results you achieve are only governed by your creativity and imagination. One rule of thumb when creating these effects is that subtle dodge and burn effects are more forgiving, and will appear more believable. Below are three real-world dodge and burn examples to learn from.
Use Case 1: Emphasis and Balance
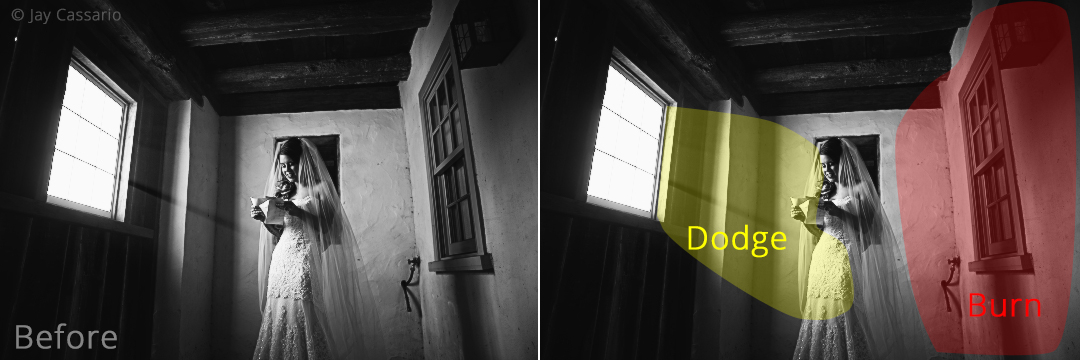
In this photo from Jay Cassario, dodging enhanced the bright light pouring into the scene from the window, while burning on the right brought balance to the composition.
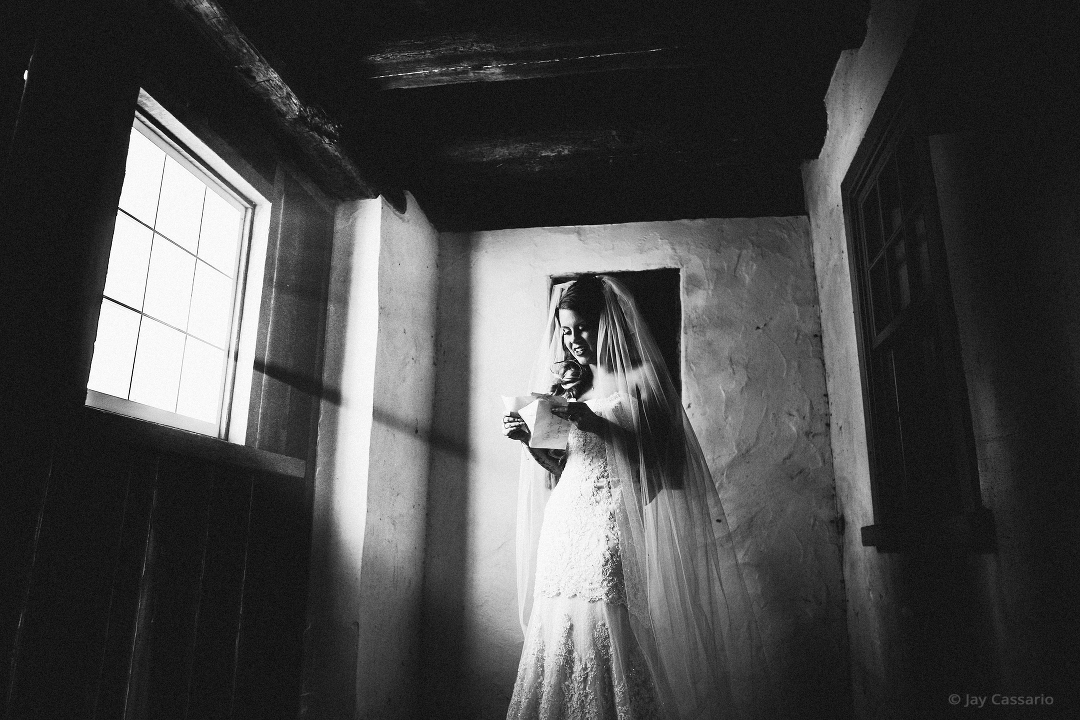 Exposure’s efficient workflow enables you to process large volumes of images at a remarkable pace. This is especially useful for wedding and event photographers who can have thousands of images to edit from a single event.
Use Case 2: Subtle Sculpting

This example from Andrew Foord demonstrates how a subtle application of dodging and burning the model’s contours give her more of a pop.
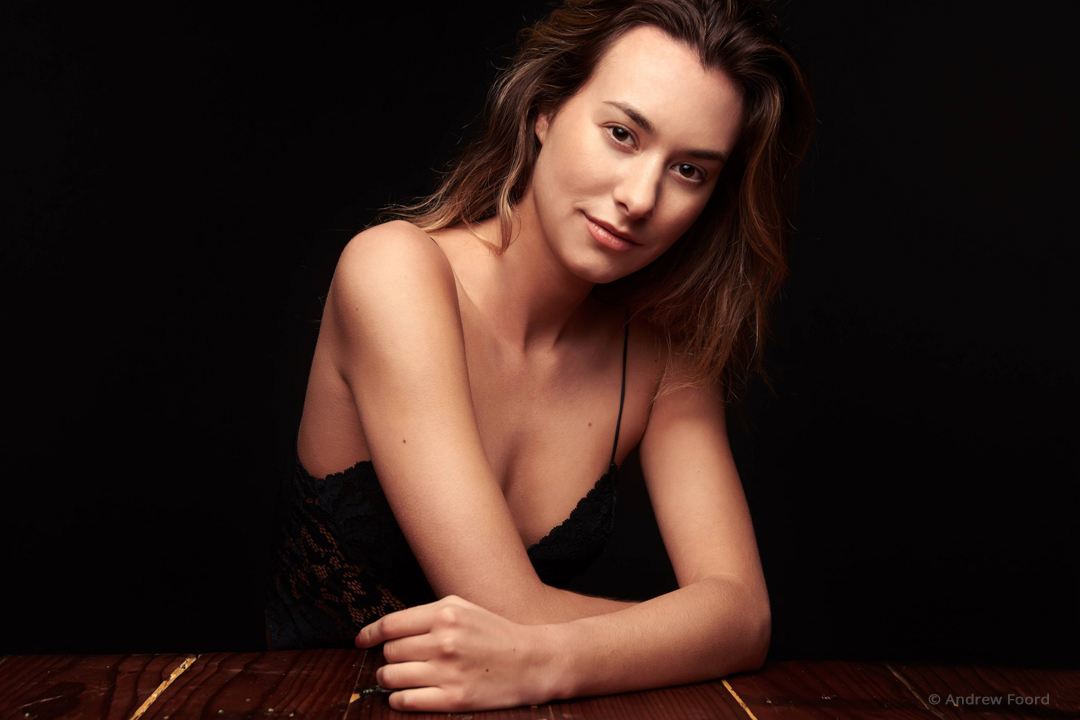
Dodging and burning are useful tools for enhancing portraits. Consider the contrast of the main features, such as the hair, eyes, and skin. Each feature will require a different treatment in order to look its best. Dodging and burning gives you that fine control over the tonality in small concentrated areas.
Use Case 3: Creative Contrast
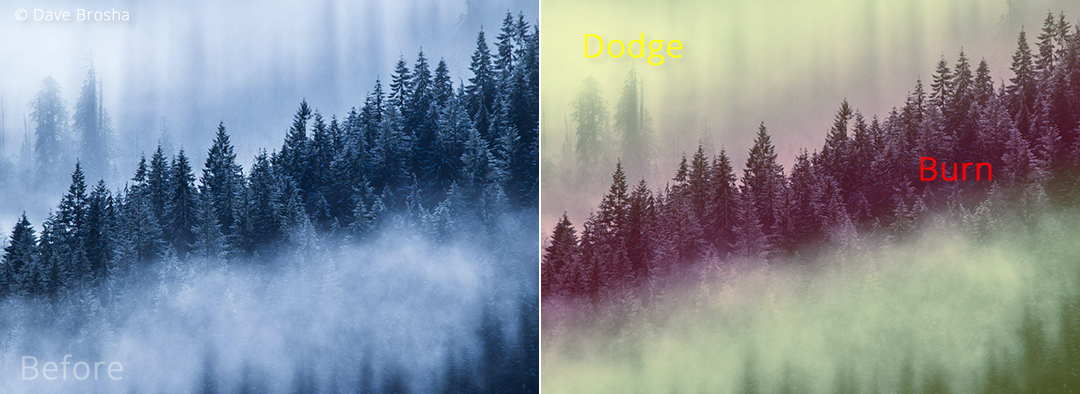
In this image by Dave Brosha, dodge and burn effects give the finished photo more dimensionality. Dodging increased the brightness in the layers of fog, and burning deepened the shadows in the lines of trees. The added contrast between the dark and light elements in the photo enhance the illusion of depth.
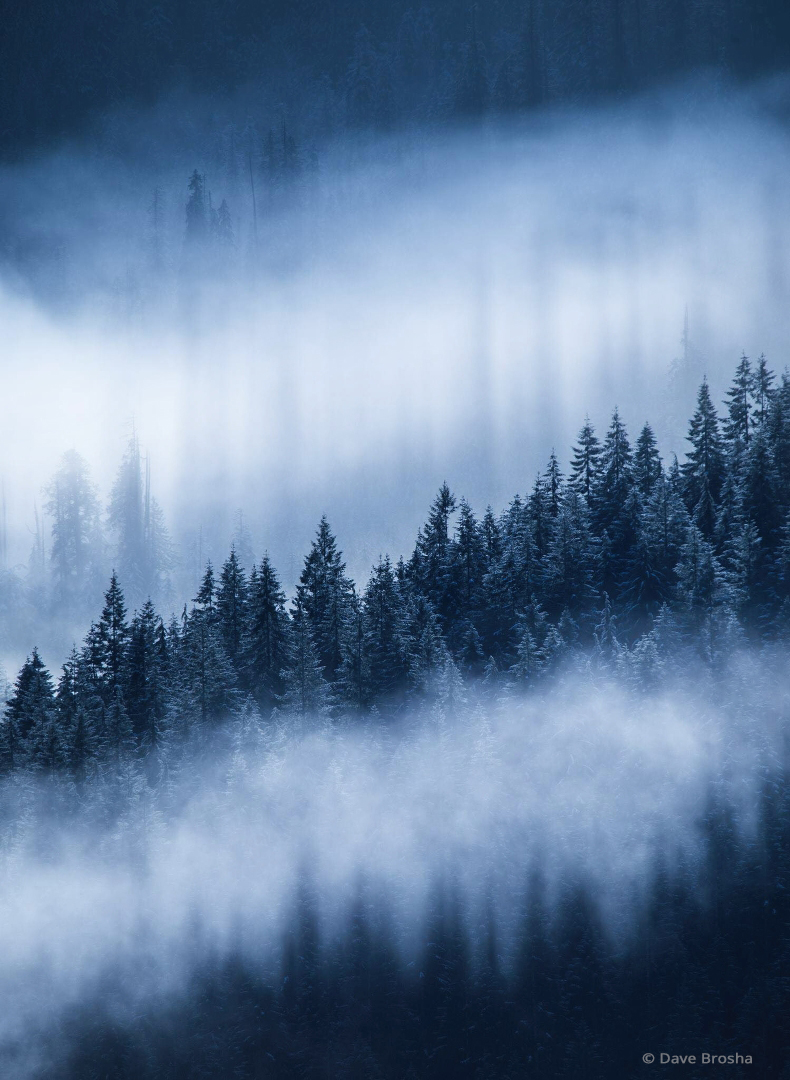 The linear aspect of this image’s composition made it a good candidate for using Exposure’s gradient tools. Several gradients were applied to the dodge and the burn layers to create the effect. Each gradient has an individual opacity slider in Exposure, in addition to the layer opacity control. These combined controls enable you to make very fine adjustments to the effect strength.
Dodging and burning originated many years ago in the darkroom with analog film. In today’s digital photography, the principles remain remarkably useful. Whether you are a seasoned pro, or brand new to photography, dodging and burning are techniques you should consider using in your workflow for putting the finishing touches on your photos. Exposure’s tools help you efficiently complete your dodging and burning.
Try Exposure Today


