
Vignetting is a decrease in brightness at the edge of an image. It is a dynamic artistic element that can strengthen energy and mood in a photo, or subtly draw attention to the subject. The appearance of vignette effects can be widely varied, from a sharp mechanical edge, to a free-flowing organic look that blends seamlessly with the image. We made this guide to show you how to apply vignette effects in Exposure.
Vignettes can be produced by camera lenses in certain situations. If lens vignetting isn’t desired, it can be removed with the tools on Exposure’s Lens Correction panel. Check out our Lens Distortion and Vignetting video for details on removing unwanted vignettes.
The Vignette Panel
The Vignette panel is located in the bottom section of the right dock. By default, it’s placed between the LUT and the Overlays panels in Exposure. You can hide and relocate panels in Exposure to streamline the workspace for your particular needs. Learn more about configuring the UI in this user guide.

Vignette Controls
Create, and modify vignette effects with the tools in the panel. The presets are great starting points when creating a vignette. Browse the presets in the dropdown to display their effects on the selected image. Click to apply, and then customize the vignette with the sliders.
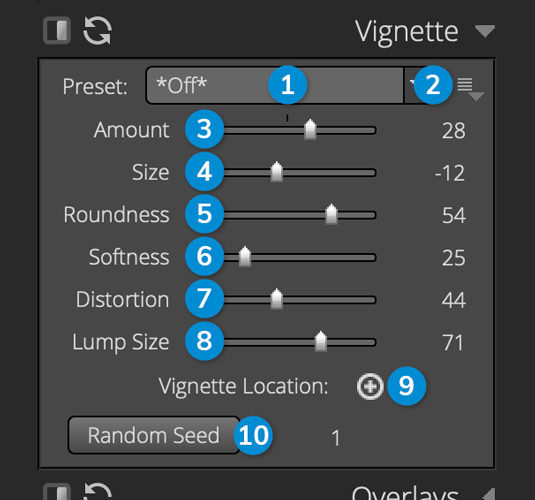
1 – Vignette Preset
Select from several preset vignettes, including any custom presets you have saved. An asterisk will appear when adjustments have been made to the selected preset.
2 – Menu Button
Save, delete, and rename vignette presets.
3 – Amount
Control the strength of the applied vignette effect. This slider ranges from -100 to 100. Positive values darken the edges. Negative values lighten edges. At zero, the vignette isn’t visible and all the other controls are disabled.
4 – Size
Control the radius of the vignette. At low values most of the image is covered by the vignette. As it is set higher, more of the photo is shown.
5 – Roundness
Changes the shape of the vignette. Set the slider to the right for a vignette that is a perfect circle, set it left for a rectangle vignette with rounded corners.
6 – Softness
Control how the image fades into the vignette effect. Low values give a hard edge, and high values make it increasingly subtle.
7 – Distortion
Integrates random ripples in the vignette shape for an irregular look. Turn distortion up to make the shape of the vignette more lumpy.
8 – Lump Size
Sizes the lumps introduced by the distortion slider. Turn it low and that the ripples at the edges of the vignette are smaller. Higher values make larger ripples.
9 – Vignette Location
By default the vignette is positioned at the center of the photo. Click to move the center of the vignette to another location.
10 – Random Seed
Clicking the Random Seed button will vary the look of the vignette by changing the placement of the lumps. Click it a few times to experiment with different looks. The number next to the button allows you to reproduce a particular distorted look later.
Applying Vignettes
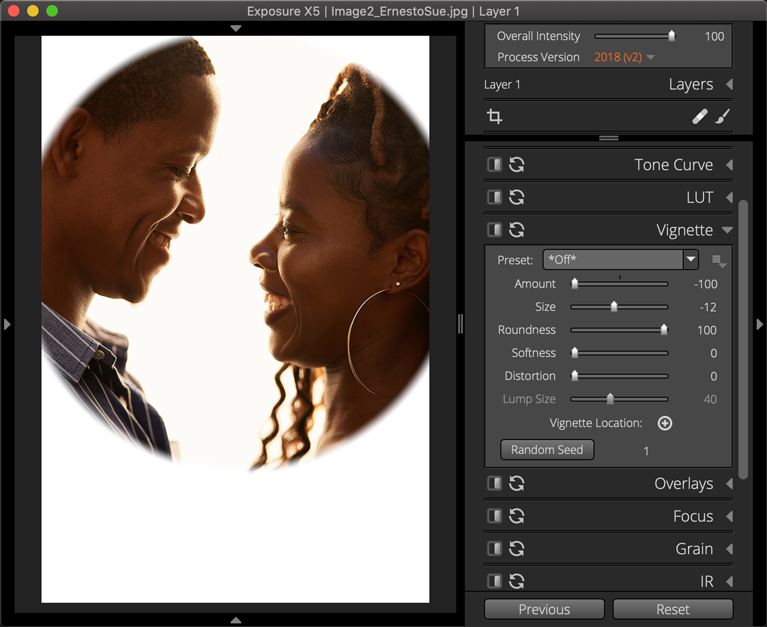
It can be helpful to turn the Amount slider all the way up or down when creating a vignette. A low softness value is another way to emphasize the effects. Both of these techniques make the effects of the vignette easy to see. After the vignette characteristics are set, lower the Amount slider and raise the Softness slider to make the effect more subtle.
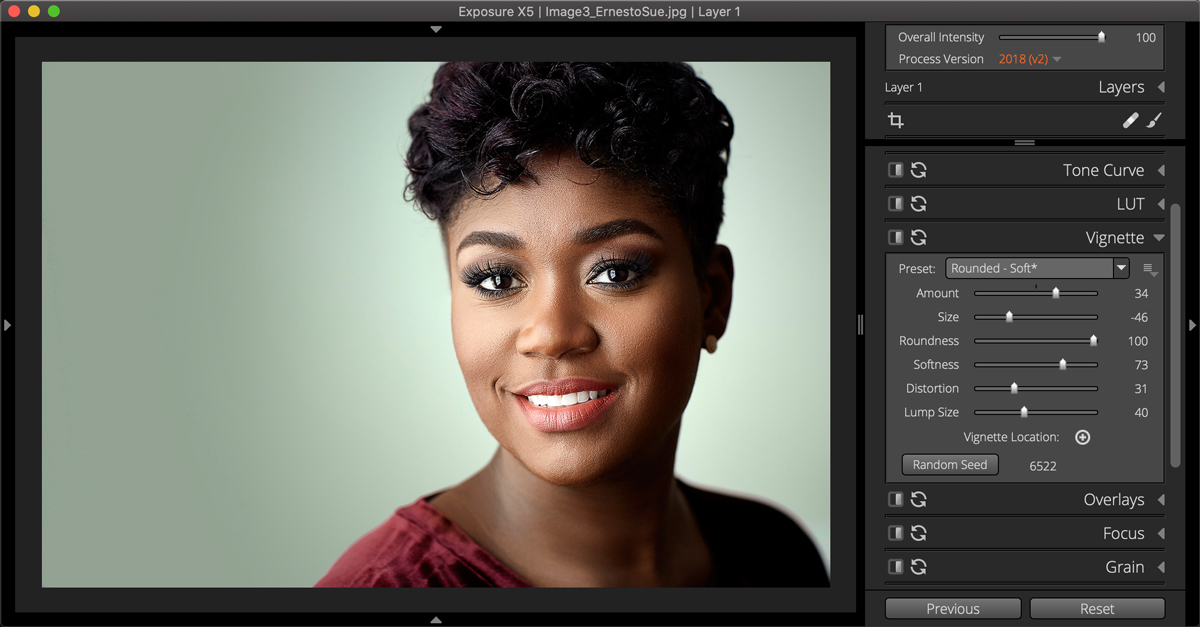
Edge irregularities in the look can give the photo an organic, hand-made feel. Introduce ripples in the vignette edge with Distortion. Control their appearance with the Lump Size slider. The effect these controls make can be randomized to fit better with each photo or to avoid repetition. The placement of the vignette center can be crucial for visual impact of the image. Note the vignette in the above example, which is centered on the subject’s face.
As you can see, Exposure offers robust tools for creating beautiful vignettes for your images. Thanks for reading our guide. We hope you learned something new. If you ever need help adding watermarks to your images in Exposure, save a link to this article.


