
This video demonstrates how to apply split toning effects to your images in Exposure.
Photo: Terrence Jones Photography
Color Toning
Exposure's tools enable adjust colors with precision and ease. This tutorial demonstrates how to take command of image color with creative color toning effects.
Photo: Paola Paz
Adding Film Grain
If you love the look and feel of grain, or if you’re drawn to the nostalgia of analog film, check out this tutorial. Learn to the fundamentals of applying and controlling grain effects to enhance your photos in Exposure.
Photos: Tony Sweet
Virtual Copies
Exposure’s virtual copies feature encourages you to experiment with different looks for your photos. See how to use the feature in this video.
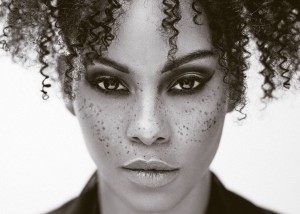
Photo: Art Face Portrait
Local Adjustments
In this video tutorial, learn how to apply adjustments locally in Exposure. This enables you to apply editing changes only to the areas you designate, and seamlessly blend any of the edits you make.
Photos: Angie Lambert

Complementary Color Grading
This tutorial video demonstrates techniques for building a custom Exposure preset with a beautiful orange and teal look.
Photo: Jason Bone, Robert Coppa, Alexander Heinrichs, Jenna Barrett
Preparing Photos for Social Media
Increase your exporting productivity by integrating Exposure's quick export presets into your workflow. This video shows you how.
Photo: Bruce Cotton
Organizing with Keywords
Keywords enable you to structure robust classifications, and flexibly search through your digital image library. Learn how keywords can assist you in organizing your photos in this video.
Photo: Frank Salas
Watermarks
This video demonstrates how to when and how to apply watermarks, how to customize them, and how to create your own using Exposure.
Photo: Jan Siebert
Comparing Photo Treatments
Learn how to use Exposure’s side-by-side view to experiment with photo treatments.
Photo: Kyle Ford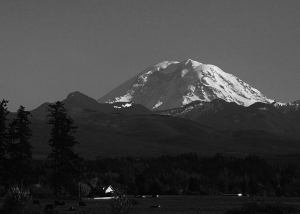
Removing Sensor Dust
Photographer Kyle Ford demos his workflow method to clear dust spots from his photos in Exposure.
Photo: Kyle Ford
Sharpening Techniques
This video introduces you to several different types of image sharpening, and it explains when to use each kind. Learn how to get great-looking sharpening results by adding the effects during various periods in your workflow.
Photo: April Milani, Anne Helene Gjelstad
Using External Editors
Learn how to launch images in other programs as external editors from Exposure. Integrating all your tools into one central post-processing tool is one of the great benefits to using Exposure as the centerpiece of your workflow.
Photo: Matthew Bliss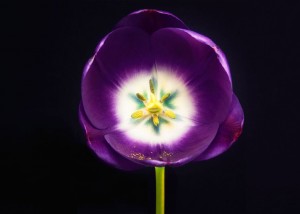
Working with Layers
Layers take photo editing to a whole new level. Separate layers provide more precise control over adjustments. Learn how to use layers in this video.
Photo: Lynda Mills
Working with Photoshop Files
Learn how to integrate Exposure with Photoshop. This video shows you how to edit PSD images created in Photoshop, how to export PSD images, and more.
Photo: McClanahan Studio
Tim Grey Webinar
Learn ways to improve your understanding of Exposure’s many creative tools. Watch expert instructor Tim Grey’s webinar 'Effects for Creative Vision' and gain new insights into creative editing.

Batch Editing
Batch editing is a post-processing technique that allows for adjusting a bunch of images fast. If you have images shot under similar lighting conditions, you can apply the same tweaks to them all at once. Exposure gives you a few different ways to batch edit photos.
Photo: Jeni Ann
Vignette
This video shows you how to create well balanced vignette effects. Vignettes are great creative tools to subtly focus attention on the subject.
Photo: Oleg Kim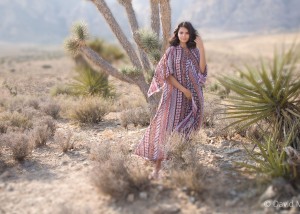
Creative Focus Effects
Image focus is a powerful way to direct the viewer’s eye. Controlling areas that are in and out of focus gives you loads of creative options in post-production. This video was made to show you how you can add realistic blurring effects to your images in Exposure.
Photo: David Mecey
Working with Presets
Learn how to work with presets in Exposure. See how to browse and search, use filtering, how to save custom presets, and how to import and export.
Photo: Tony Asgari
Exporting
Learn methods for exporting finished images out of Exposure. Exporting is the last major step in your post processing workflow..
Photo: Hiram Trillo
Managing Image Files
Learn how to browse files, add favorite folders, and perform file management in Exposure.
Photo: Oded Wagenstein, Jay Marroquin, Jimmy Beech, Chad Bromley
Tagging, Filtering, Sorting, and Searching
Learn how to organize files in Exposure using the tag, filter, sort, and search tools.
Photo: Hiram Trillo
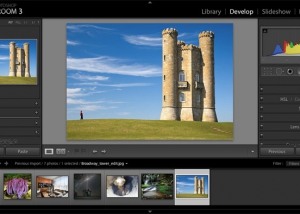
Understanding Exposure’s Nondestructive Workflow
This video demonstrates some of the main benefits to Exposure's non-destructive photo editing workflow.
Photo: Tony Sweet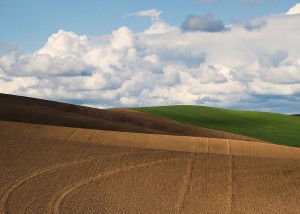
Lightroom
This video tells the first things to know when you’re starting to use Exposure with Adobe Lightroom. It gives a brief tour of the UI, and suggestions for how to work.
Photo: John Barclay
Photoshop
Exposure is a complete photo editor that can handle your entire photography workflow. But, it can also integrate into other photo editors. This video demonstrates how to access the unique creative capabilities in Exposure from within Adobe Photoshop.
Photo: John Barclay
Exposure Bundle: Getting Started Photoshop
This video guides you through how to launch and use the Exposure Bundle as a series of Photoshop plug-ins.
Photo: John Barclay
Exposure Bundle: Getting Started Lightroom
This is a getting started video guide that demonstrates how to launch and use the Exposure Bundle as a series of Lightroom plugins.
Photo: John Barclay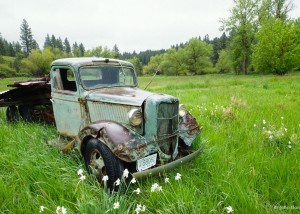
Exposure Bundle: Getting Started
This getting started video shows how to use all of the award-winning photography tools in the Exposure Bundle.
Photo: John Barclay
Eye Candy: Furry Text
Learn to use the Animal Fur effect on text, selections, & objects in Photoshop.
Topics Covered: Animal Fur
Eye Candy: Reflections
Here's a quick tutorial about using the Shadow effect to create mirror-like reflections.
Topics Covered: Shadow

Eye Candy: Winter Holiday
Learn how to make icy winter graphics with a combination of the Snow and Icicles effects.
Topics Covered: Icicles, Snow

Eye Candy: Gold
This video shows numerous ways to achieve gold looks with different effects in Eye Candy 7.
Topics Covered: Chrome, Diamond Plate, Brushed Metal, Rust

Eye Candy: Chrome
This video explains how to get great-looking Chrome in Eye Candy, every time.
Topics Covered: Chrome

Eye Candy: Lightning
Control applying settings to images of various sizes with the Scaling Modes.
Topics Covered: Scaling Modes
Eye Candy: Scaling Modes
Control applying settings to images of various sizes with the Scaling Modes.
Topics Covered: Scaling Modes

Eye Candy: Textures
Use the texture effects to fill an object or an entire layer and see how to manipulate their behavior.
Topics Covered: Brick Wall, Reptile Skin, Animal Fur

Eye Candy: Shapes
Learn how to dress up objects, text, & selections using the shape effects.
Topics Covered: Extrude, Shadow, Fire

Eye Candy: Getting Started
After Eye Candy 7 is installed, watch this video to start learning how to use it.
Topics Covered: Basic Workflow, Navigation, Presets, In-Preview Controls

Eye Candy: Introduction
Here is a quick introduction to Eye Candy 7. This shows some examples of the program's capabilities.

Blow Up: More about Modes
Here is a further explanation about the three different modes in Blow Up 3.

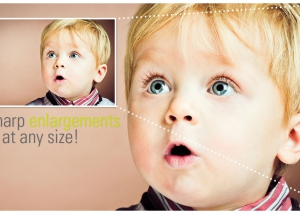
Blow Up: Getting Started
Blow Up enables you to enlarge images to huge sizes without sacrificing image quality. It makes it easy to make photos big enough to print on a semi truck or a billboard. This video shows you the basics.
Blow Up: Introduction
This is a brief introduction to Blow Up 3. You'll hear and see what the program does and what it's capable of doing. To learn more about Blow Up 3, watch the Getting Started video.

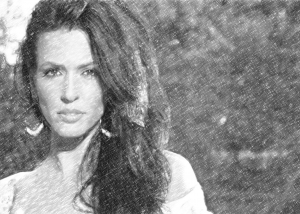
Snap Art: Effects Tour
A tour of Snap Art's range of effects and a quick look at controls for perfecting your image.
Photo: Tyson Robichaud
Snap Art: Detail Masking
This video shows you how to apply selective adjustments to specific areas of your image to enhance details, draw attention to your subject, etc.
Photo: Tony Sweet
Blow Up: Lightroom
Here is a further explanation about the three different modes in Blow Up 3.
Snap Art: Introduction
A brief introduction to Snap Art. This video demonstrates its abilities to create natural media effects that look hand made.
Photo: Jimmy Beech.

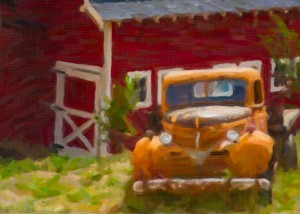
Snap Art: Getting Started
Snap Art enables you to turn your artistic vision into reality. It makes it simple to create a finished work of art that looks handmade. We made this video to show you how to transform your photos with creative effects in Snap Art.
Photo: Tony Sweet
Settings Management
Learn techniques for managing your own custom settings. This video will quickly teach you how to save, share and archive your own settings for Alien Skin products.