
Layers play an essential role in controlling editing adjustments. They introduce an extra level of control over effects. Think of a layer like a level or a group that contains a set of modifications. Each layer provides separate control over all the effects assigned to it and can be stacked and blended with limitless variety. The article below is a helpful guide for working with the Layers panel in Exposure.
The Layers Panel
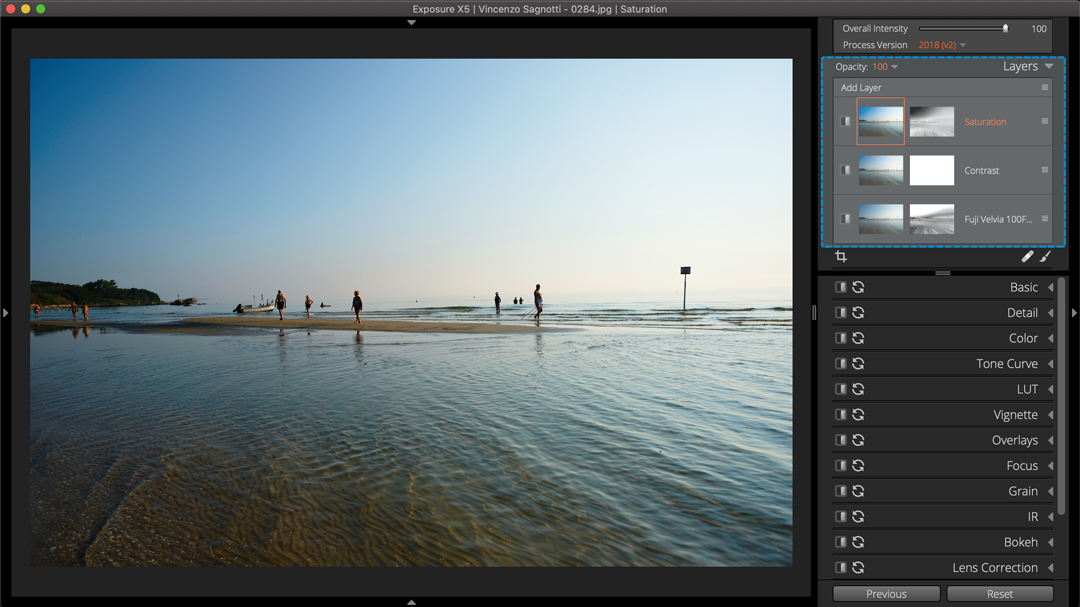
The Layers panel is located in the top quadrant on the right of the screen. The default configuration of Exposure’s user interface has it placed between the Overall Intensity and the toolbar for the Crop, Spot Heal, and Brush tools.

1 – Layer Opacity
Sets the strength of the edits applied on the selected layer. Lowering the opacity will darken the mask and reduce the effect the layer has on the photo. Note the mask thumbnails in Exposure are updated in real-time with this setting.
2 – Add Layer
Creates a new, empty layer and mask.
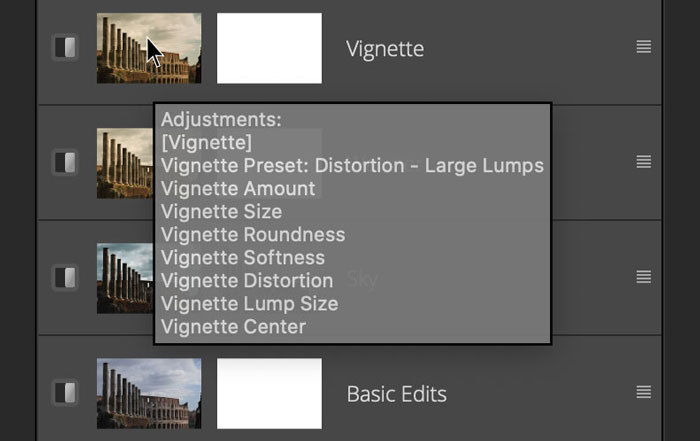
3 – Layer Thumbnail
Layers do not include base adjustments to the Overall Intensity slider, spot healing or cloning, crop and rotate, lens correction, and transform effects. Right-click the layer thumbnail to access commands to copy, paste, or reset layer adjustments.
4 – Mask Thumbnail
Hover the cursor over the mask thumbnail to show the mask overlay on the selected image. Right-click the mask thumbnail to access the copy, paste, invert, and reset mask commands.
5 – Layer Name
Double-click to rename the layer or right-click and select ‘Rename Layer.’
6 – Menu Button
Access layer operations like copy, paste, rename, and delete. There are similar operations that only affect the adjustments made on the layer, and other operations for just the layer masks.
Additionally there are options to adjust the size of the thumbnail images in the Layers panel.
Layer Controls
Layer Order
Edits on each layer are rendered in ascending order. The bottom layer’s adjustments are applied to the photo first, then the effects in the next layer are applied to the result of that. Click and drag to reorder layers. Access the layer operations rename, delete, erase, and copy from the right-click menu.
Layer Masks
Every layer has a mask associated with it, which controls where the effects from that layer are applied to the image. Masks are displayed in greyscale. When the mask is white, the effects from that layer are applied to the image. When the mask is black, the effects from that layer are hidden.
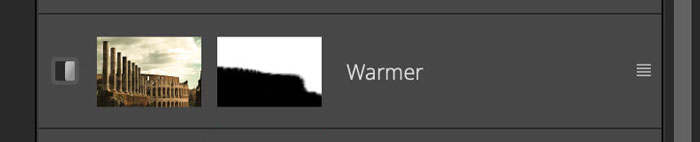
Use the brush tool to paint the mask by hand or use the gradients for seamless, natural fades. Learn more about creating masks with the brush and gradient tools in our Local Adjustments video.
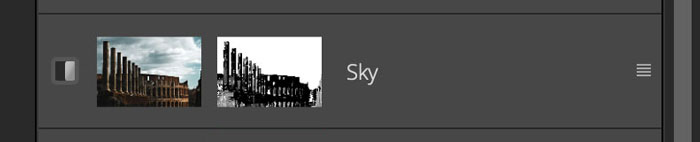
Exposure’s 3D Color Masking features create sophisticated masks, easily. The color constraints controls use values in your image to target specific tonal ranges for the mask. Learn about Exposure’s 3D Color Masking features in our Deep Dive video.
Layer Visibility
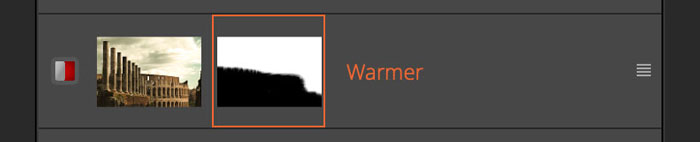
The layer effects can be turned off or on with the toggle on the left of the Layers panel. When off, the layer will have no effect on the image.
Panel Tools
Layer Controls
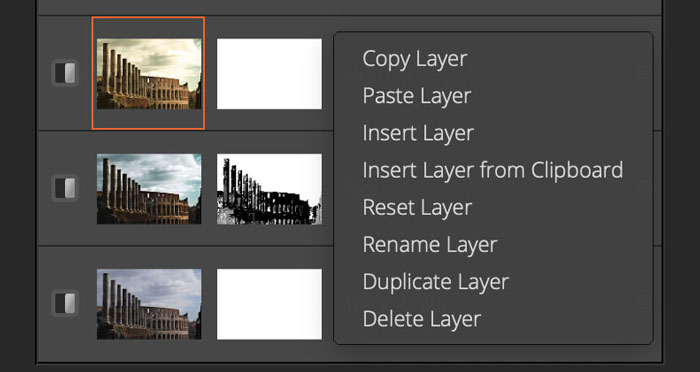
There are several layer commands available from the right-click menu. These operations will affect the layer, editing adjustments, and layer mask. Adjustments to the Overall Intensity slider, spot healing, cloning, crop and rotate, lens correction, and transform effects are not included in layers.
Adjustment Controls
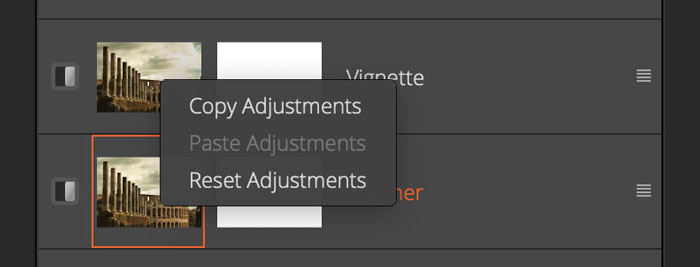
Copying editing adjustments between layers is a fast and useful editing technique. For more precise control over the settings copied from each layer, use the Copy Settings option from the Edit menu. Learn more about the adjustment selection options in our Working with Presets video.
Mask Controls
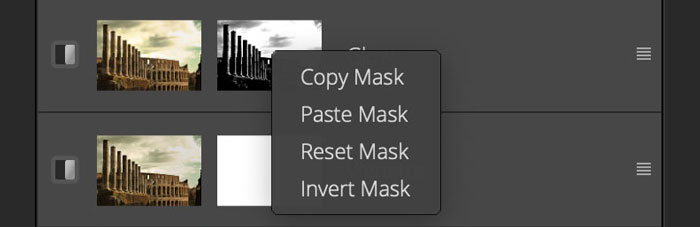
Masks can be copied, pasted, inverted, or reset from the options in the right-click menu. This includes color constraints, which automatically recalculate mask boundaries for the content of the image they are applied to. See a demonstration of this in our 3D Color Masking video.
As you can see, the Layers panel in Exposure is loaded with powerful, easy-to-use tools. Thanks for reading this guide. Bookmark this post for your reference in the future.
Try Exposure Today


