
When applying creative looks to your work, sometimes it’s useful to combine multiple presets on one shot. Exposure enables you to easily explore creative combinations. You can add more presets and control how they blend together with Exposure’s editing tools. We wrote this article to give you a few creative suggestions to get the most out of your time.
Prepare Photos for Creative Looks
If you’re gearing up for some fun creative experimentation, here are a couple things to keep in mind to get ready.
Use RAW images whenever possible. RAW photos contain unprocessed sensor data which gives you more latitude when applying adjustments. This helps you produce cleaner, clearer photos with less noise or banding issues.

Notice the differences between the before and after image in the preview. The Auto adjustments applied intelligent adjustments to develop this photo. All images © C.North
Make essential development tweaks before applying presets. Exposure’s presets work best on properly exposed, color balanced images. Use Automatic adjustments to speed you through this step. Also, if you are editing color images, adding sharpening at the beginning is a good idea. If you plan to convert to black and white, wait until after converting to apply sharpening. Sharpening and contrast affect black and white images more than color photos, so it will need to be readjusted if you apply it earlier in the workflow.
Selecting Each Look
Use Audition mode to compare different looks on the screen all at once. The comparison views enable you to see presets and edits side-by-side. This is useful if you don’t know where to start looking for a preset. It’s also helpful if you already know what type of look you have in mind, but there are several presets from the same family, like Fuji Pro or Kodachrome. Learn more about Preset Audition in this video.
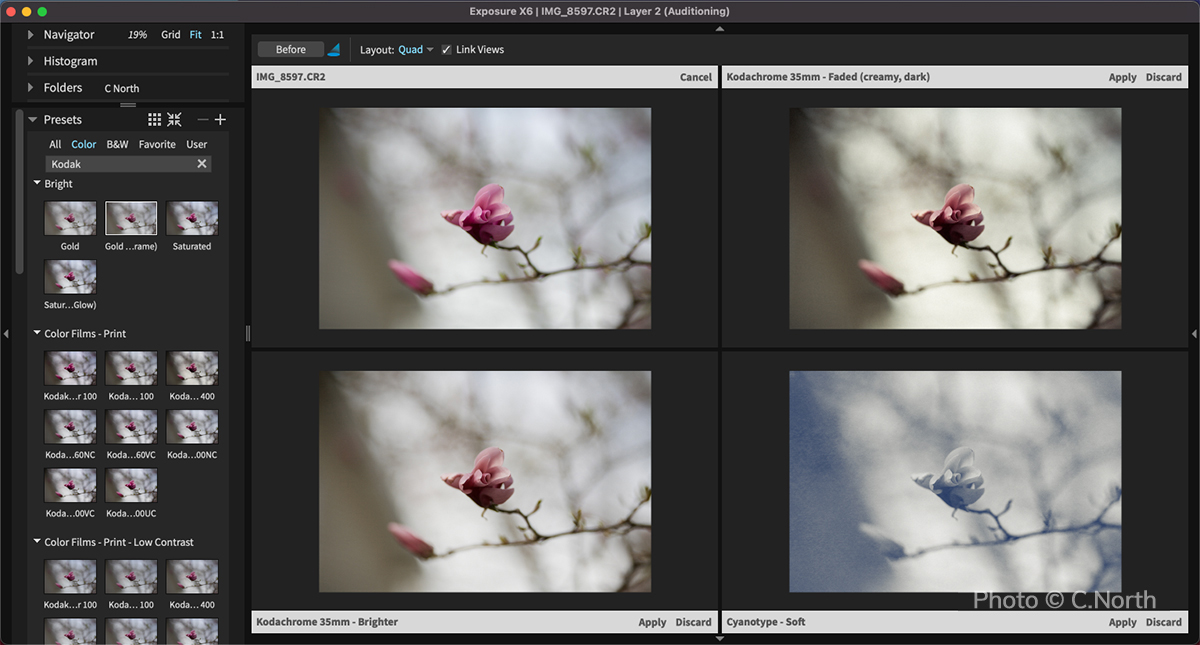
Quickly compare presets in both color and black and white in Exposure.
You can perform search operations in the Presets panel if you know what you’re after. At the top is a box that will search the name and description fields. The filters along the top of the Presets panel display only one category of presets at a time, such as black and white, or color. Exposure has a lot of great-looking presets, so a helpful practice is to designate the presets you use most often as favorites. Check out our Applying Film Looks video to learn more about where to find specific looks in Exposure.
Maintaining Order
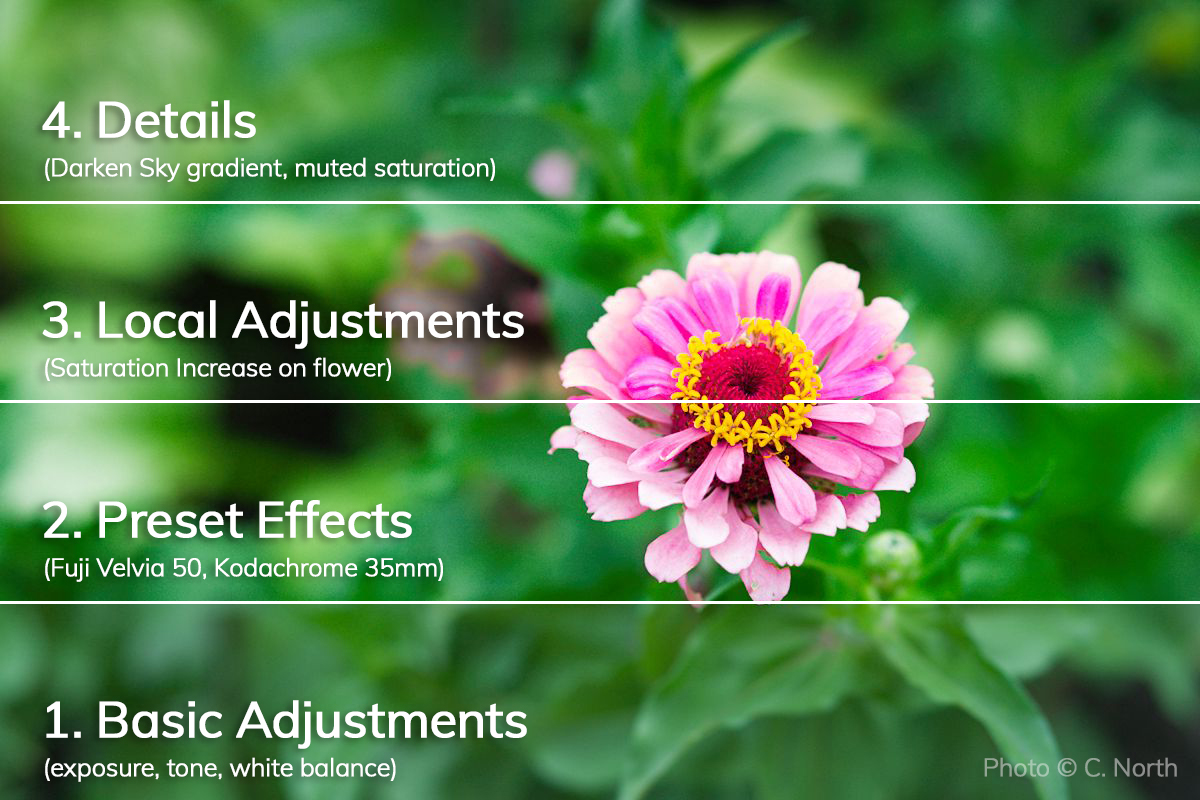
The order of layers will impact the appearance of the look. Rendering begins at the bottom of the stack and progresses up through each layer. The layers can be reordered, which changes how the effects are applied to the image. It’s simple to move layers around in the stack to see how it changes, just drag and drop. You can apply adjustments in any order you want, but the following order usually gives the best results.
- Basic adjustments to exposure, tone, and saturation
- Preset effects
- Local adjustments, sharpening
- Details like grain, borders, or overlays
Check out our video Working with Layers for more information on Exposure’s layer system.
Blending Effects
Exposure’s layer system makes it easy to blend different looks together creatively. Each layer has a mask that controls where the effects on that layer will affect the photo. In addition to the mask, the layer Opacity slider controls how much of each layer’s adjustments you see overall. Opacity changes will reflect in the mask thumbnail. A lower opacity amount for the layer will display a darker mask. When the mask is black, the effects from that layer are not being applied to the image.
Masks can be customized in powerful ways to blend each of the layers on the image. When making masks in Exposure, you have a few different options. The brush tool is the simplest way to control where the adjustments from that layer on your images. You simply set the brush size, feather, and flow levels and paint on where you want to apply the effect. Our Local Adjustments video goes into detail about how to use the brush tool for masking.
Another way to create a mask to control where the effects from a layer are applied is with the gradient tools. They enable you to easily make seamless, natural fades between effects. The gradient tools are simple to adjust as you customize the effect to work with your shot. And, gradients work seamlessly with the brush tool for an additional level of control. Learn more about blending effects in our Gradient Tools video.
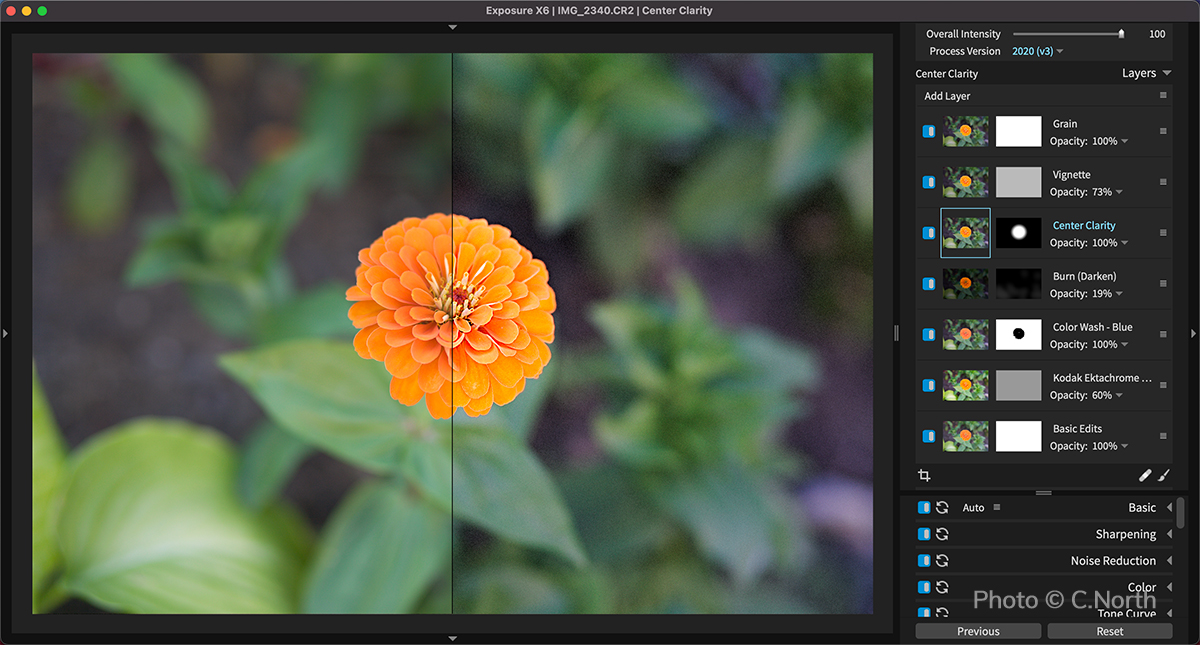
Isolating the flower in this photo was done by mixing several different presets. Grain was added to separate the foreground and background, a strong vignette, some localized burning, and a color wash layer. The bloom only received sharpening and contrast.
Color constraints enable you to create detailed masks easily. They generate a mask based on hue, saturation, and luminance values in the image. This enables you to make very precise selections with little effort. Use the Color Constraints controls to accurately select elements like a bright sky, blue water, or skin tones. Check out our 3D Masking Deep Dive video for more info about creating layer masks with the color constraint controls.
And there you have it. There are tons of great creative presets in Exposure and several easy-to-use tools that give you detailed control over how they are applied to your images. The next time you’re planning some creative experimentation, use the tips we shared in this article to help.


