Tim Grey is a highly-regarded author and educator in the world of digital photography. His work is a combination of technology, teaching, photography, writing, and travel. He has authored over a dozen books, such as the best-selling Photoshop CS4 Workflow, and he has written for numerous publications including Digital Photo Pro and Outdoor Photographer. He publishes the Ask Tim Grey eNewsletter and Pixology e-magazine. When he’s not writing, Tim spends his time teaching workshops, seminars, and he makes appearances at major photography-centric events worldwide.
Below is an article on Snap Art 3 that Tim wrote for Pixology. Thanks for sharing, Tim!
—
Masterful Painting & Drawing Effects with Snap Art 3
I’ve loved photography for as long as I can remember, but along the way I’ve periodically felt envious of those who could create artwork from scratch, drawing directly onto an empty canvas with paint or other media. I’ve never had the talent for drawing or painting, which may explain why I’ve always been interested in creating painterly interpretations of my photographic images using Photoshop and a variety of other tools.
The problem is, most of the available tools for creating such artistic variations on a photographic image have fallen short of my expectations. That all changed when I was introduced to Snap Art from Alien Skin Software.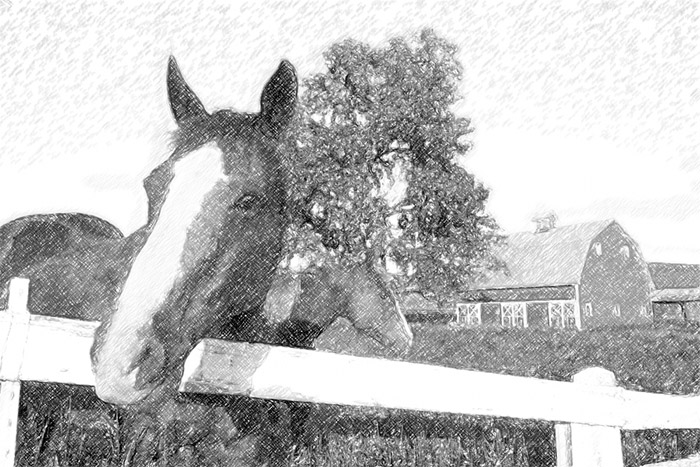
Getting Started
Snap Art provides a wide variety of artistic filter effects you can apply to your photographic images. In short, Snap Art provides you with painting and drawing effects that are natural in appearance, without the obvious pattern duplication I’ve been frustrated by with other filters offering similar effects.
Snap Art runs as a plug-in within a host application, supporting recent versions of Photoshop, Photoshop Elements, and Lightroom on both the Windows and Macintosh platforms. In other words, you must have one of these host applications to put Snap Art to use. Within any of these host applications, putting Snap Art to use to create an artistic interpretation of any photo is simple.
Within Photoshop or Photoshop Elements, after opening an image you’d like to process with Snap Art, you simply choose Filter > Alien Skin > Snap Art 3 from the menu. In Lightroom you access Snap Art as an external editor by choosing Photo > Edit In > Snap Art 3 from the menu. Regardless of which host application you’re using, after choosing the appropriate command your image will be presented within the Snap Art interface.
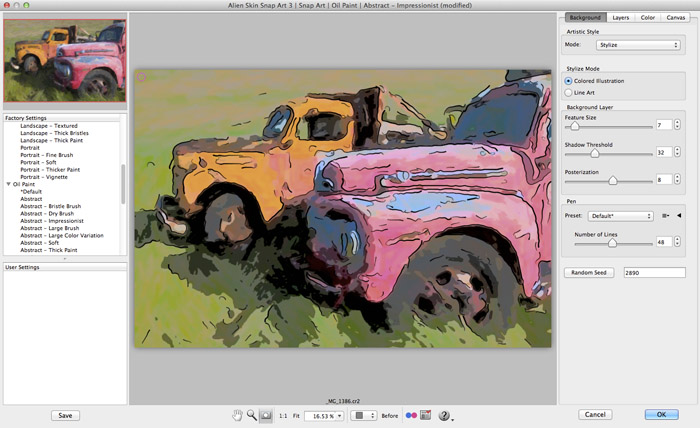
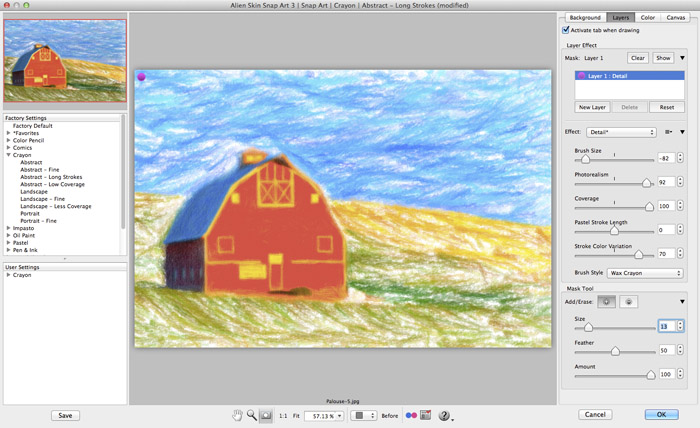
At a fundamental level, working with Snap Art is remarkably easy. On the left side of the interface you’ll find a set of Factory Settings presets, grouped into categories based on the type of effect. These categories include, for example, Color Pencil, Crayon, Oil Paint, Pastel, and others. You can expand or contract any of these sections of presets by clicking the triangle icon to the left of any of the headers. Then simply click on the name of a preset you’d like to apply, and the preview will update to reflect that particular creative effect. When you find an effect you’re happy with, simply click the OK button and the result will be applied to your image.
If you are working in Photoshop or Photoshop Elements, the Snap Art effect is applied as a duplicate image layer, ensuring the adjustments are completely non-destructive to your original image. If you’re working in Lightroom, a new image will be created in a stack with your original, preserving that original version.
Customizing the Effects
While the presets included with Snap Art provide a quick and easy method of applying various artistic effects to a photographic image, you can also customize the effect using a set of controls on the right side of the Snap Art interface. You can also save your custom settings to create your own presets for use with other image later.
What I find is that I like to explore the many presets to get a sense of what type of effect might work best for a given image, and then I’ll use that as a starting point as I fine-tune the settings for the effect.
You actually don’t need to use the presets as a starting point at all if you don’t want to. Instead you can simply choose the desired type of effect from the Mode popup on the Background tab at the right side of the Snap Art interface. The specific controls for refining the effect will vary based on the option you choose. For example, the Oil Paint mode features a control to adjust the amount of color variation between brush strokes, while the Color Pencil mode allows you to specify the degree to which the color pencil strokes should cover the virtual paper behind the image.
The controls for each of the effect modes are very straightforward, so you have a pretty good sense of what each control will do to the image. More importantly though, I don’t think you’ll find the controls to be the least bit intimidating, so you can comfortably experiment with the various options as you decide how you want to interpret the current photographic image.
Randomization
At the bottom of the Background tab at the right side of the Snap Art interface you’ll find a Random Seed button with a number in a text box to the right of the button. This somewhat unassuming button is perhaps one of the more important options for creating a truly unique creative effect.
Each time you click the Random Seed button the image is re-processed with the same settings, but with a variation on the overall look. The result is an image with the same stylistic appearance but with a random variation on how that look is achieved. The concept is very simple, but the result is a degree of variability that ensures each image you process with Snap Art can look completely unique.
Utilizing Layers
You may already be familiar with the use of layers and masks in Photoshop or Photoshop Elements to create composite images or apply adjustments that only affect a specific area of a photo. Similarly, you may be familiar with the Adjustment Brush tool in Lightroom, which enables you to paint specific adjustments into particular areas of a photo. Snap Art includes a Layers feature that provides similar benefits, allowing you to fine-tune the filter effect in specific areas you identify by painting within the image.
After adjusting the settings as desired for the overall image using the controls on the Background tab, you can switch to the Layers tab to begin working on specific areas of the photo. By default a single layer will be available, but it will not actually define any area of the image. To define an area of the photo you’d like to apply different settings to, simply start painting on the image preview.
As you paint you will see a pink overlay indicating the area you are painting. You can show the entire mask you’ve defined for the custom effect by clicking the Show button toward the top-right of the Layers tab. This button acts as a toggle, allowing you to turn off the overlay as well.
You can adjust the settings for the brush using the Mask Tool controls at the bottom of the Layers tab. The first set of controls allows you to choose whether you want to add to the existing mask or subtract from that mask. You can also click a triangle icon to the right of these buttons to expand the list of controls, allowing you to adjust the size of the brush, the degree of feathering for the brush edge, and the Amount, which controls the overall opacity of the Mask Tool brush.
Once you’ve defined the area you want to apply custom settings to, you can use the set of controls in the Effect section to change the appearance of the area you’ve masked. For example, you can create a more photorealistic effect for a key subject in the photo, with a more artistic interpretation applied to the rest of the photo.
Taking things a step further, you can create multiple layers within the image so you can fine-tune multiple areas with a variable effect. To add a mask layer click the New Layer button in the Mask section of the Layers tab.
Additional Adjustment Options
You’ll likely spend most of your time in Snap Art adjusting the controls on the Background tab, and with certain images you may spend some time focusing specific effects in particular areas using the Layers tab. However, you can further refine your results using the controls on the Color and Canvas tabs.
The Color tab provides a set of basic tonal and color adjustments that include Brightness, Contrast, Saturation, and Temperature. These are obviously very basic adjustments you could easily apply through the host application you’re using for Snap Art, but it can be helpful to utilize these controls while you’re establishing the overall filter effect you want to apply to the image within Snap Art.
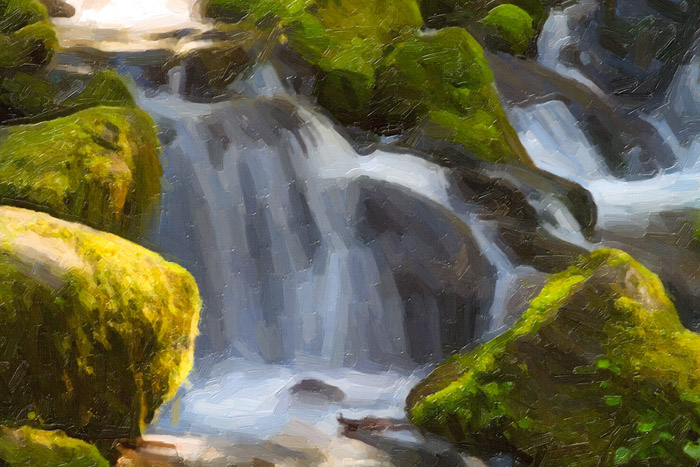 The Canvas tab allows you to adjust the settings for the virtual material your artwork is being created on. In other words, you can adjust the color and texture of the substrate, which can affect not only the texture of the actual creative effect you’ve applied, but also the color and texture of areas where the “paint” does not cover the entire image area. For example, if you set the Coverage setting for the Pastel effect to a very low value, paper white will appear between some of the pastel strokes in the image. The Canvas settings determine how those areas appear.
You can start off by selecting a canvas option from the Preset popup at the top of the Canvas tab. You can then adjust the Thickness setting to adjust the overall strength of the canvas effect. In addition, you can adjust settings for Lighting and Vignette to adjust the overall appearance of the canvas on which your image appears.
Taking a Test Drive
If you have any interest whatsoever in producing creative artistic interpretations of your photographic images, I strongly encourage you to try out Snap Art 3 from Alien Skin Software. You can download a free trial of Snap Art (and other plug-ins) through the Alien Skin Software website at www.alienskin.com.
Snap Art 3 is priced at $99 for new customers, or $69 for those upgrading from prior versions of Snap Art. This is a little on the expensive side for plug-ins, but considering the high quality of the creative effects you can produce with Snap Art, as well as the considerable control you can exercise over the process, I think this is a very worthwhile purchase for those who are interested in a relatively simple method of creating impressive artistic versions that mimic various painting and drawing styles.
—
Tim has a slew of online resources available. In the free Ask Tim Grey eNewsletter he answers a workflow question each weekday. If you want to read more from Tim, check out his website or his blog. Social butterflies can connect with him on Facebook, Twitter, or his Youtube channel. Recently Tim started recording podcasts. Check them out here.
Try Exposure Today





Hi Jimmy,
I heard about your product at Nature Visions this past weekend. Do you know if there might be a discount for the Snap Art product. I may qualify by being in a photo club, former teacher, military, AAA, or AARP?
Sincerely,
Esta Gladstone
f8shoot@gmail.com
Hi Esta,
Reach out to Robert, our friendly support guru. He’ll be able to tell you what discount options we have available. Here’s a link to open a support ticket: https://support.alienskin.com/hc/en-us/requests/new