
In photography, metadata is a set of information about a photo. It can include a variety of information, including camera and capture information, copyright owner, keywords, and more. Using metadata is a great way to identify and protect your photos. Exposure uses metadata to search for images, and for automating organization tasks to speed up post-processing. We made this guide to show you how to use the Metadata panel in Exposure to edit image information.
The Metadata Panel
The Metadata panel is located at the bottom right dock. It contains information about the image that is used for documentation and organization. You can hide and relocate panels in Exposure to streamline the workspace for your particular needs. Learn more about rearranging the UI in this user guide.
Metadata Controls
Related information is grouped together in this panel. These fields display embedded data written from the camera system, in addition to information stored in sidecar files, such as keywords and collections.
Exposure enables you to filter images using metadata for quick navigation. On the bottom dock, use the Filter by Metadata field. Watch our Tagging, Filtering, Sorting, and Searching video for more information about the filtering tools.
To protect your work with copyright, caption and other information, Exposure can include metadata in automatically-generated watermarks. Check out the watermarks user guide to learn more.

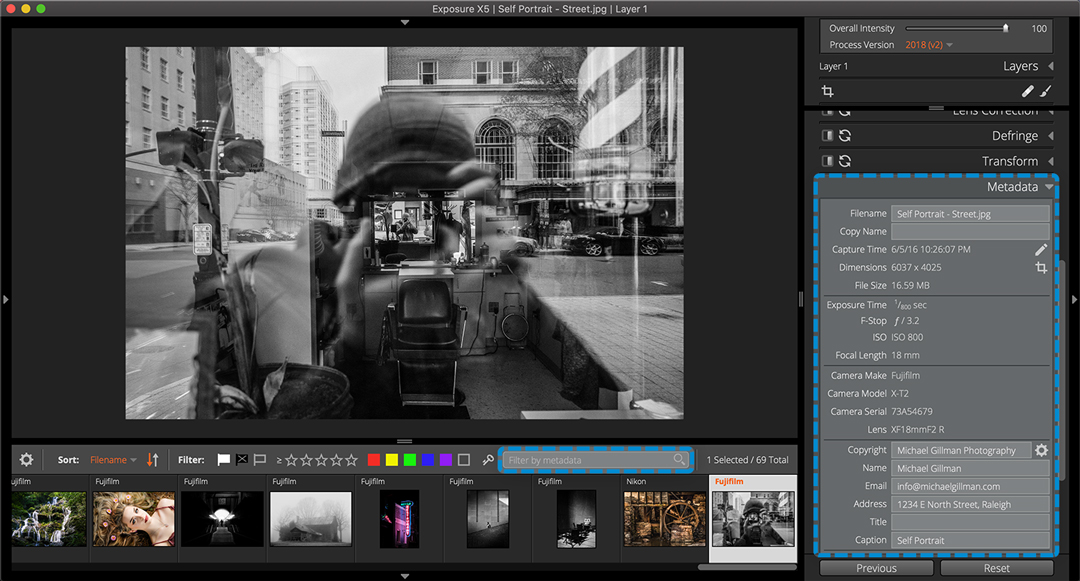
1 – File Data
Image file information is displayed in this group. The name, copy name, image dimensions, and other attributes can be customized, here. The capture time can be adjusted for individual files, and groups of images.
2 – Capture Settings
The information in this group is embedded in the image file when it’s captured. These were the camera settings used to capture the photo.
3 – Camera Data
The camera system information for make, model, and lens can be viewed, but not edited, here.
4 – Copyright Data
Protect your work with the information in these fields. Enter Copyright, Name, Email, Address, Title, and Caption. Saving presets in this section speeds up applying metadata. Click the gear icon to access preset management tools.
5 – Organization Data
Use flags, star ratings, and color labels to sort and filter images in Exposure.
6 – Collections
Create new image collections by typing a name in the text box, or click the icon on the right and select from existing collections.
Collections are a versatile way to organize images for a specific purpose. Use them to automatically gather your best portfolio work, or to quickly assemble selections for a blog post or a client meeting. Learn more about using Collections in this user guide.
7 – Keywords
Apply keywords to images in this section. Type them into the field, or select from existing keywords with the button on the right.
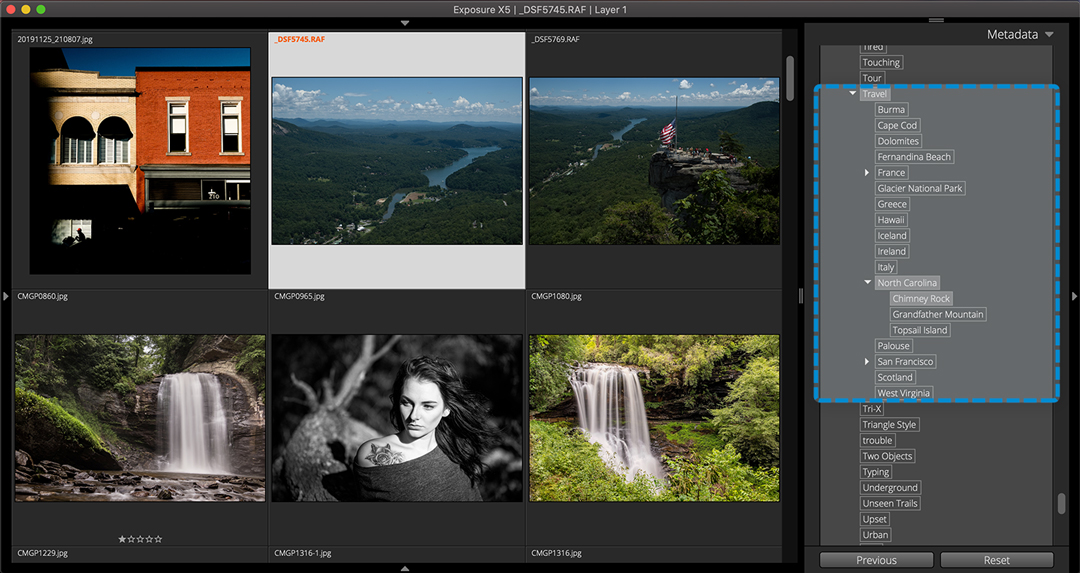
Quickly filter images using keywords on this panel. Right-click on a keyword and select “Filter By.” Then, Exposure will display all the images in your library with that keyword.
Keywords can be added at the beginning of post production, when images are copied from the camera card. This helps organize your library from the first step.
Keyword Library
Keywords are a great way to categorize photos efficiently. Once applied, they can be used to sort and filter images, and are often required for selling stock photography.
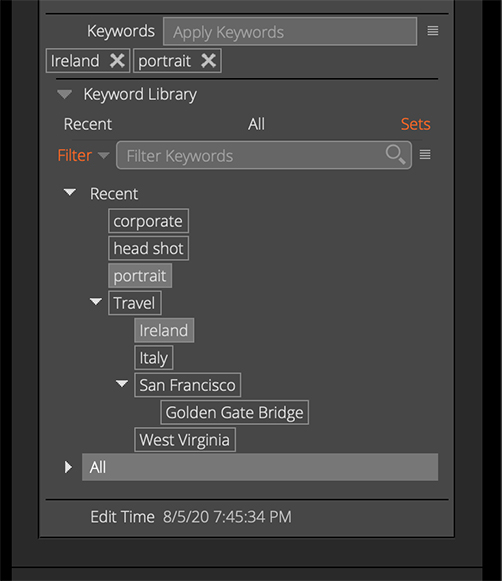
For additional speed when applying keywords, use keyword sets to apply the same group of keywords to multiple images. Keyword sets can be applied all at once, which helps keep them consistent.
When making Keyword sets, the quickest way is to add the all at once. On the Sets tab, change the search filter to “Add,” then type in all the keywords you like. Another way to make a keywords set quickly is to select one representative image from a shoot, and then apply your keywords to it. Once complete, multi-select all the keywords you want in the set, right-click and choose ‘Add to Set,’ and then ‘New Set.’ It’s faster to create keywords directly in the set, rather than moving them around after you make them.
Hierarchical Keywords
Creating a hierarchy makes navigating through keywords simple. Parent/Child keywords add an extra level of sophistication to organizing. They work great for taxonomic needs, like a family and its members, animals, or geographic locations.
A simple example is travel keywords, where images would use keywords for locations visited. Searching using the travel keyword will display all images taken while on the road.
The tools on the Metadata panel are a great way to organize, manage, and protect your photos. Thanks for reading our guide. We hope you enjoyed it! Save a link to this page if you need a reference for using Metadata.


